This blog post is a companion piece to our Advanced Automation in NinjaOne webinar, providing step-by-step instructions for setting up the Auto-Install Applications example explored during that webinar. The full webinar recording provides additional examples, tips, and suggestions for getting more out of NinjaOne’s automation capabilities.
This blog post and webinar recording should ideally be read and watched together. To follow along, click here to jump ahead to an in-depth explanation of the NinjaOne auto-install example, or you can view the entire recording below.
What we’ll accomplish with NinjaOne automation
In this walkthrough, we’ll create a reusable form (via custom fields) to automate the deployment of multiple applications (via scripts) and use policies to automatically fill out that form, detect the form fill, and deploy the scripts making application deployment fully automated.
NinjaOne automation allows for custom software deployment profiles delivered at scale via policy assignment. Learn how to streamline your deployment process and optimize IT efficiency with the Software Deployment User Guide.
Setup custom fields
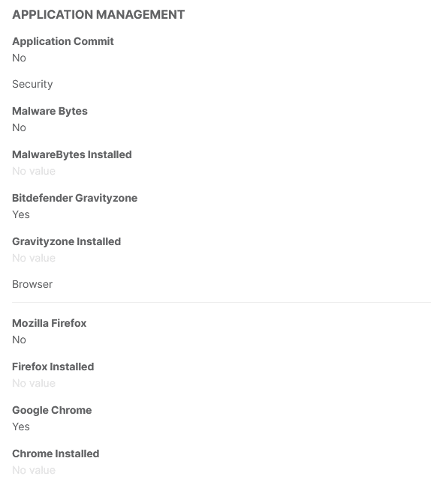
We’ll need several custom fields for this automation — a master deployment switch and a checkbox for each application we want to deploy. In this example, we’re creating switches for Malwarebytes, Bitdefender Gravityzone, Google Chrome and Mozilla Firefox; the portfolio of applications you make available for deployment can easily be changed and expanded.
When the master deployment switch is enabled (set to ‘true’), the policy will deploy each application whose checkbox is checked (set to ‘true’).
Custom Fields
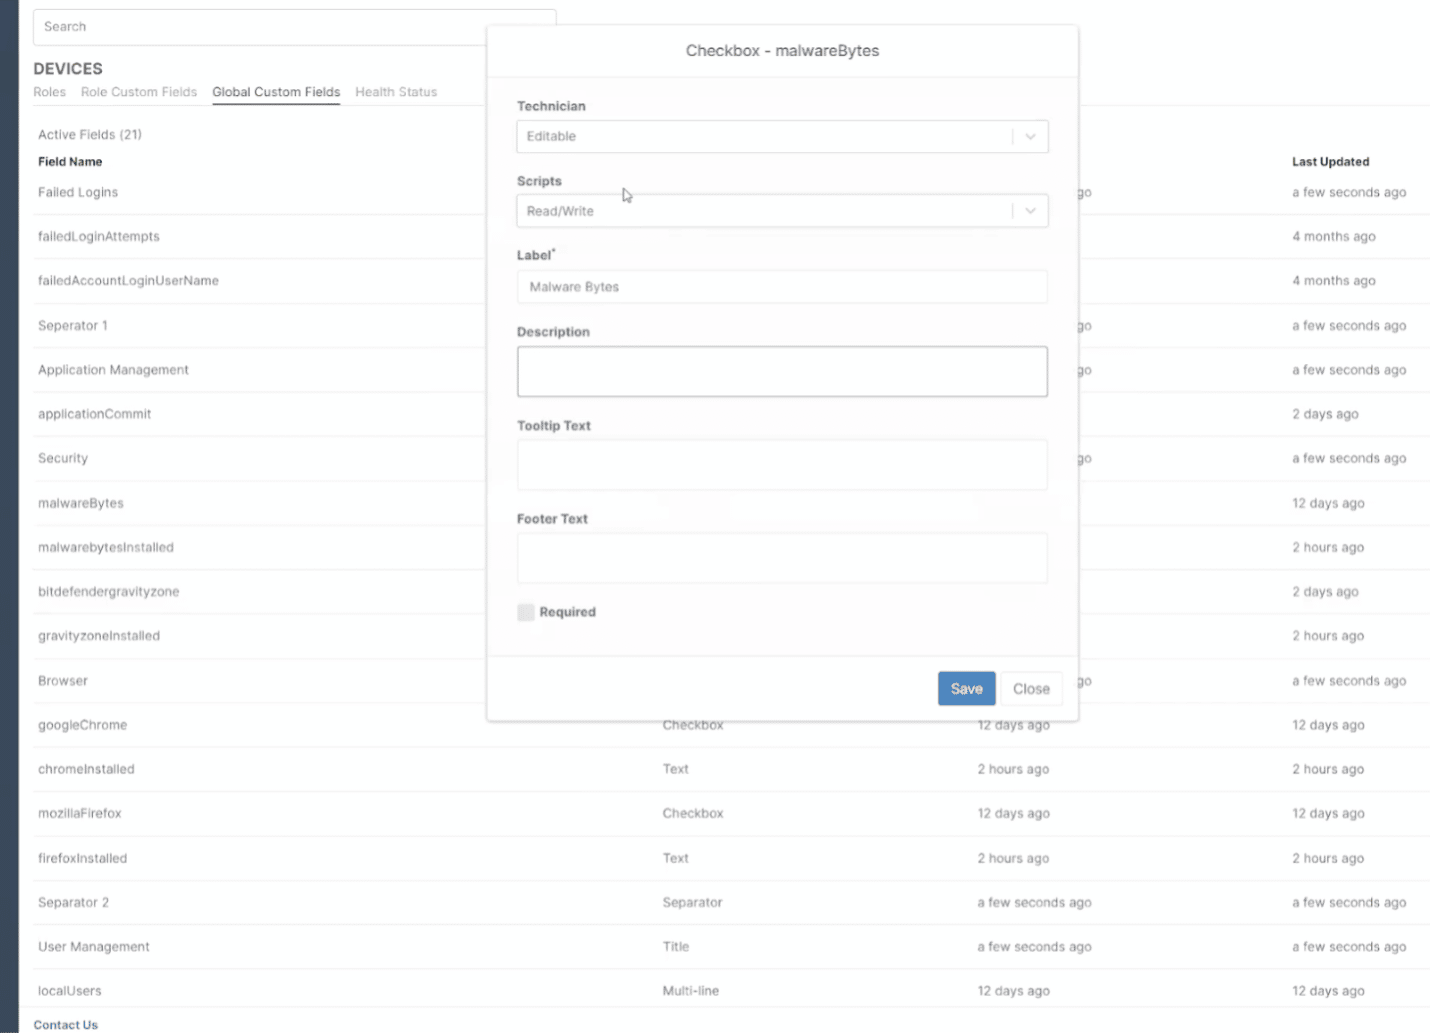
To set up custom fields, navigate to ‘Configuration’ -> ‘Devices’ -> ‘Global Custom Fields.’ These custom fields can also be set up as role custom fields if they only apply to specific device types (Windows laptops only, for example).
All custom fields should be set to ‘Read / Write’ via scripts. All the custom fields in this example are checkboxes.
| Field Name | Type | Purpose |
| Application Commit | Checkbox | Stops automation from running until set to ‘true’ |
| Malwarebytes | Checkbox | Indicates if MalwareBytes should be installed |
| Bitdefender GravityZone | Checkbox | Indicates if Bitdefender should be installed |
| Google Chrome | Checkbox | Indicates if Chrome should be installed |
| Mozilla Firefox | Checkbox | Indicates if Firefox should be installed |
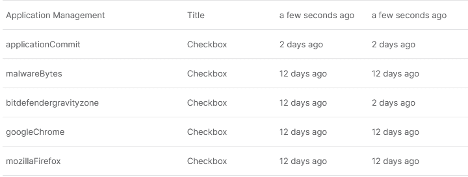
This is what the form will look like on an endpoint:
If you’re following along with the webinar recording, we also use an organization-level custom field called ‘Package ID’ to ensure the successful installation of GravityZone.
Setup scripts
For this automation, we’ll need:
- Checkbox Field Management – a dynamic script that will dynamically uncheck or check a checkbox.
param(
    $fieldname,
    $fieldvalue
)
Ninja-Property-Set $fieldname $fieldvalue
This script allows you to check or uncheck a checkbox by entering the field name and field value when configuring the script to run.
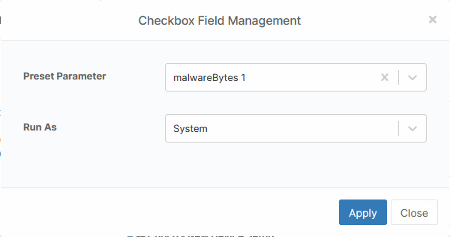
For example, running this with the parameters below would set the Malwarebytes field to true.
$fieldname = Malwarebytes
$fieldvalue = 1
- Application Deployment: a script for each application we want to deploy. You can use the built-in application deployment script or write your custom script for more complex application deployments. Note that applications should be installed silently.
Bringing it all together via policies
In this example, policies will serve two functions:
- To detect when an application deployment checkbox is checked and deploy the appropriate application
- To set specific checkboxes when a device is first onboarded
Detect and deploy
The checkbox state detection and application deployment trigger will be done via conditions.
We’ll need to set one of these up for each application we deploy. We’ll use Google Chrome in this example:
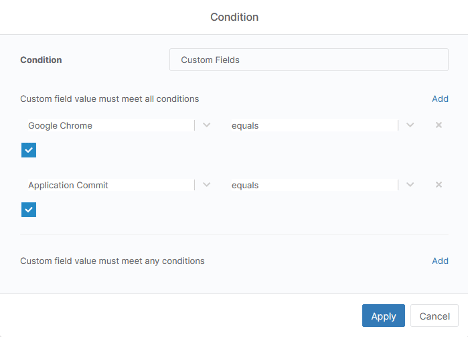
- Add a new condition with a condition type of ‘custom field.’
- Under ‘Custom field value must meet all conditions,’ select the ‘Google Chrome’ custom field, set the operator to ‘equal,’ and check the checkbox
- Add a second field under ‘Custom field value must meet all conditions’ select ‘Application Commit’ custom field, set the operator to ‘equal,’ and check the checkbox.
- Hit ‘Apply’
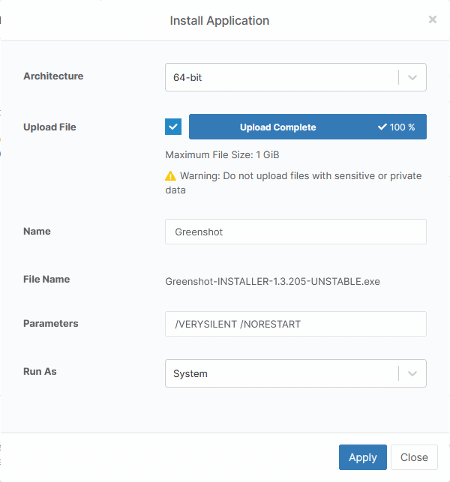
When this monitor is triggered, we’re going to want to deploy Google Chrome so that we can add an install application script.
- Click ‘Add Script’
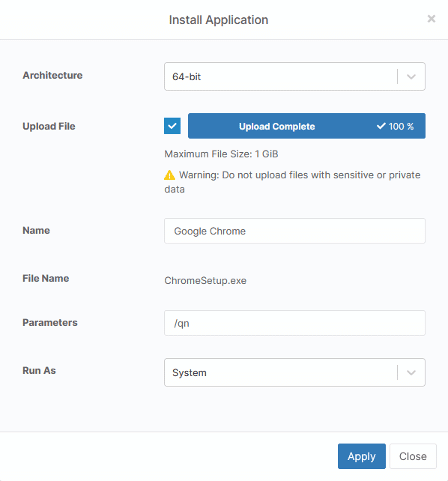
- Click ‘Install Application’
- Follow the install application prompt
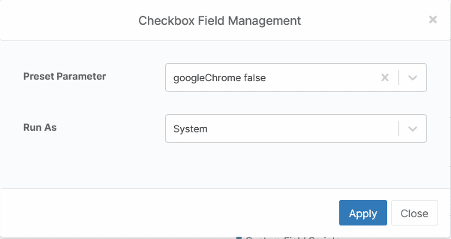
We also don’t want Ninja to try to install Chrome continuously, so we’re going to uncheck the Google Chrome custom field by also deploying the Checkbox Field Management script from earlier.
Automating the application deployment profile
This last step is purely optional but adds a lot of value to this automation. In short, the more applications you setup in this manner and the more application deployment profiles you can automate, the better.
At this point, your technicians can manually check the boxes on a device and deploy software. This step will automatically assign application deployment profiles to devices when added to a policy.
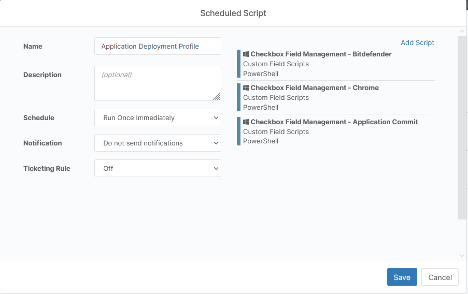
We’ll use scheduled scripts to automatically check the checkboxes for specific applications whenever a new device is added to this policy. For this example, we’ll automatically deploy GravityZone and Chrome when a device is added to the policy.
- Navigate to ‘Scheduled Scripts’ in your policy and click ‘Add a scheduled script.’
- Give the script a name (‘Application Deployment Profile’ for example)
- Set the schedule to ‘Run once immediately’ — this will run the script as soon as the device checks in for the first time
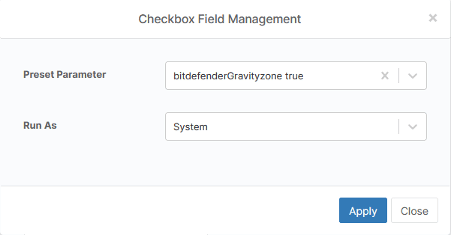
- Add a script and choose ‘Checkbox Field Management.’
- Set the parameters to ‘bitdefenderGravityzone true.’
- Hit ‘Apply’ and ‘Save’
You’ll need to repeat the process for Chrome and the application commit checkbox process, with the only difference being the parameters set to ‘chrome true’ and ‘applicationCommit true.’
Once you hit save, this application deployment profile will run.
See how GSDSolutions was able to streamline their workflow and make their technicians more efficient.
“Ninja does a lot of work for us – from software deployment and patching to basic remediation – giving my technicians time to work on complex tasks for clients,”
Mark Andres, Director of IT Services at GSDSolutions
Deploying in the real world
This example uses a limited number of applications and only a single application deployment profile. In a real-world scenario, the number of applications would likely be much higher. Additionally, if we have only one application deployment profile, the need for conditional deployment is minimal, and there are easier ways to accomplish this.
A better deployment scenario might leverage policy inheritance and multiple sub-policies to assign applications based on employee function and/or client needs.
- Parent Policy – all the application deployment monitors are set up here. No scheduled script is assigned for an application deployment profile.
- Marketing Child Policy – Uses a scheduled script to create an application deployment policy that installs common applications, Photoshop, and video editing software.
- Engineering Child Policy – Uses a scheduled script to create an application deployment policy that installs common applications, Nodepad++, and a VPN to your production environment.
- Finance Child Policy – Uses a scheduled script to create an application deployment policy that installs common applications and accounting software.

