

Kiosks are a part of everyday life, we use them at stores for self-checkout, at doctors’ offices to check in, and so much more. But how do you make one? Certainly, you can’t just take an Android tablet and make it a kiosk, right? Well, it just so happens that you can! This blog walks through that process in NinjaOne, starting with enabling NinjaOne MDM, all the way through locking a tablet into single- or multi-app kiosk mode!
To get started, enable NinjaOne MDM by going to Administration>Apps>NinjaOne Android MDM and from this screen click “Enable” at the top right. From here, you’ll be asked to connect your Android Enterprise account. To do this, log into the Google account associated with your Android Enterprise account. If you don’t have one, you can create an account for free. You can add more Android Enterprise accounts as needed to support different clients or departments.
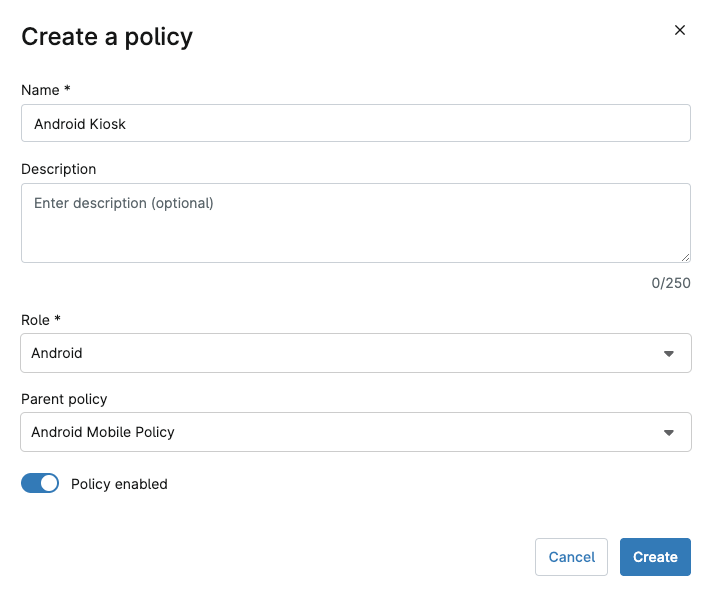
Next , you’ll need to configure your Android policy in NinjaOne. Navigate to Administration>Policy>MDM policies.
- Give the policy a name and optional description
- Select Android in the “Role” drop down box
- Then either
- Select a parent policy to inherit from or
- Create a new policy from scratch
- Finally, click Create.
There are a lot of settings that can be configured here. The most important part of a kiosk is the app you’re using. Navigate to the Applications section of the policy and click ”Add apps” then select Play Store. In the play store window simply search for the app you want to use, click on it, and then click Select in the details page of the app. With the app now added to your Managed Applications, select it and click ”Edit” to change the settings for the app. The one we’re looking for is Assignment type. You want Single app Kiosk, we’ve also set the Default Permission Policy to Grant to prevent any permissions prompts from interrupting the user of the kiosk and make this process more autonomous. Visit the NinjaOne dojo for more ways to implement application management.
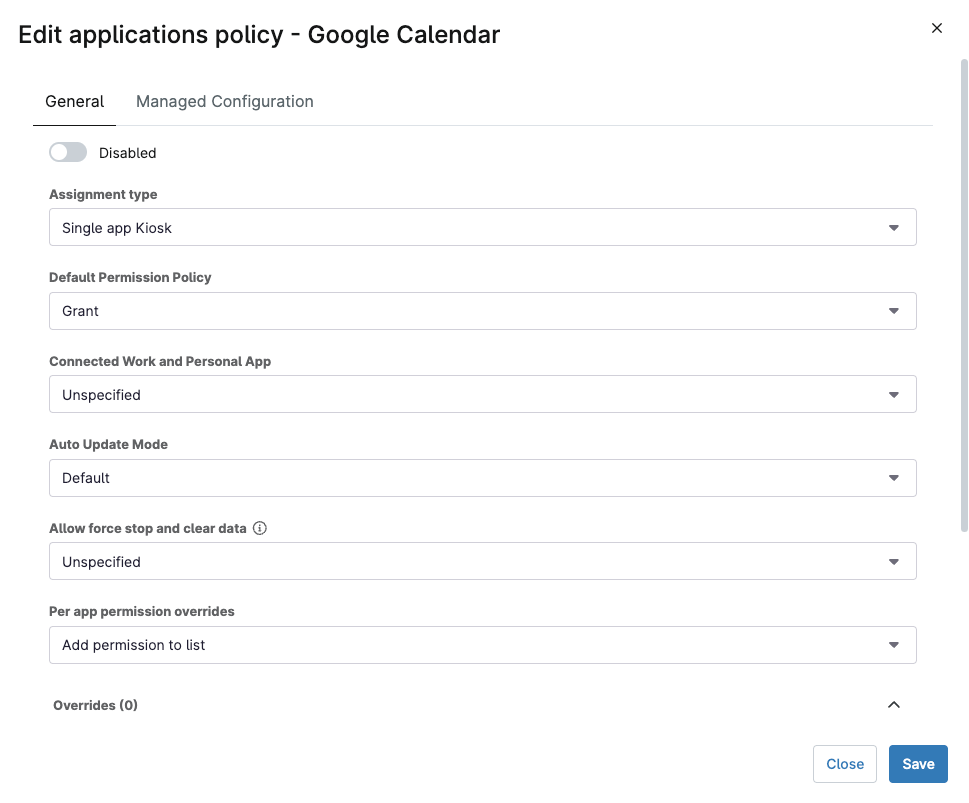
Pro Tip: You can continue to add more apps if you’re building a multi-app kiosk.
The next step to building your policy is in the Kiosk Settings section of the Applications page. Here you can determine how the Power Button functions, enable or disable System error warnings and System navigation, configure the Status bar mode, and manage access to Device settings.
Once you’ve identified the various settings appropriate for your use case, apply that policy to an organization, location or device. In the case of Kiosk devices, you may want to add a location within one of your organizations specifically for kiosks. You can also apply the policy to the device on a per-device basis.
To add the policy to an Organization, open the Organization editor by going to Administration>Organizations and clicking the desired Organization. From there go to the Policies section and then the MDM Policies sub-section and select your new policy in the Android drop down.
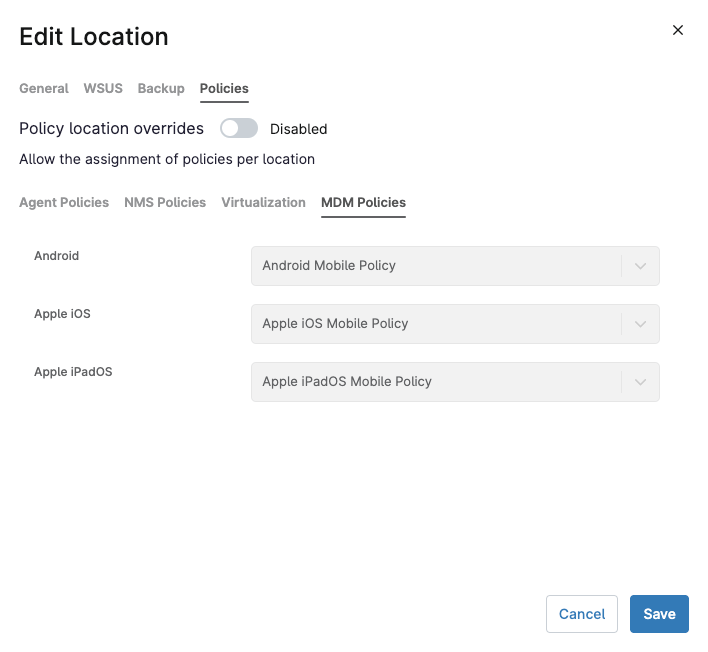
To add the policy to a location the process is similar. Open the Location editor by going to the locations section of the Organization editor and clicking your desired location. Then on the Policies tab configure the polices the same way you configure an Organization.
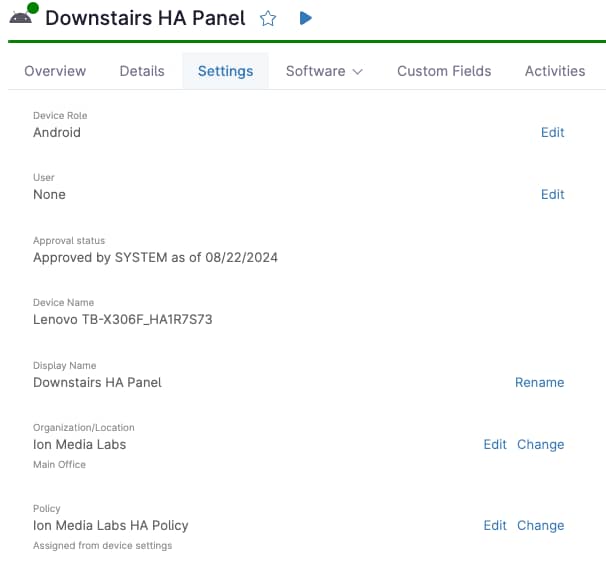
To add the policy to a device individually, navigate to the device in NinjaOne, then select Settings and under Policy, click change to change the policy of the device.
Note: If you’re adding the policy to specific devices you must enroll them before assigning the policy.
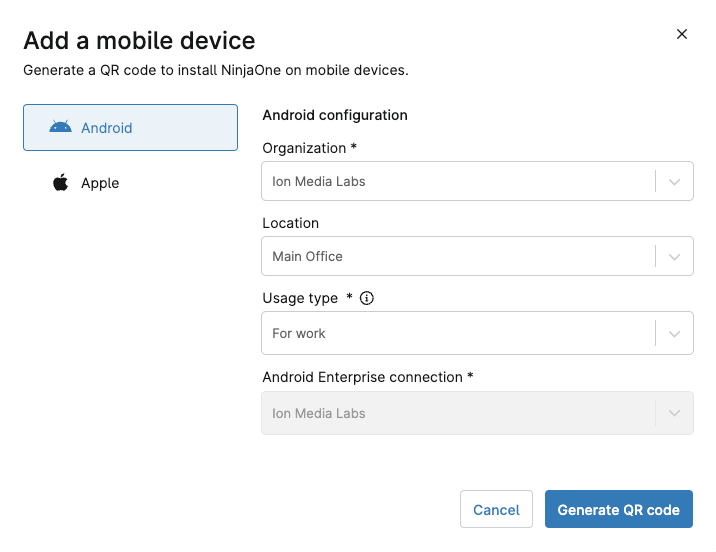
With the Policy built and assigned to an Organization, you just need to enroll a device. It’s important to note that for this example we need an out-of-the-box device or one that has been factory reset . In the top right of any NinjaOne dashboard click the plus button, select Device from the drop-down menu and then select mobile device. Here you will be presented with the option to choose Android or Apple. Select the Organization or Locationto which you added your new Android policy, then in the Usage type box select “For Work.” The last box will be auto-filled if you only have one Android Enterprise account connected to NinjaOne. If you have multiple accounts, be sure to select the appropriate account. Next, click generate QR code.
Note: as of this writing, NinjaOne currently only supports kiosk mode on Android.
With the QR code on screen, you can enroll your Android device. On the first screen when powering on a new device or factory resetting a device, tap the screen six times quickly. This will open Android Enterprise enrollment. From here simply scan the QR code, and the device will begin the enrollment process. It will walk you through connecting to Wi-Fi and updating. How easy is that?! One note, the Wi-Fi you connect to here will be overwritten by any Wi-Fi set in your android policy.
Once you have the device connected and updated it will prompt you to install the NinjaOne Assist app, which is needed to deploy MDM policies. Click “Accept/Install” and the device will finish its configuration. It can take a few minutes to pull Policies and Apps. But once that’s done, you merely complete any required setup in the app itself and you’re done!
You now have a functioning kiosk!
Visit the NinjaOne Dojo for more information on configuring kiosk settings.


