

HDR is a display technology that allows for a greater range of brightness and colors. Monitors must be designed for HDR, and both internal and external monitors can support it. Monitors that do not support HDR are called SDR (Standard Dynamic Range). Windows 10 and 11 both support HDR displays and the playback of HDR video, but calibration is often necessary for the best results, as different displays may behave differently. Ambient lighting can also greatly affect how much detail is visible in bright and dark sections of video.
This guide provides detailed instructions for calibrating a built-in laptop display or external for HDR video in Windows 10 and Windows 11. It will help you get the best possible HDR picture quality for gaming, movies, and TV shows.
Step-by-Step guide to calibrating a HDR display on Windows 10 and Windows 11
Each display model has different specifications and each individual display can also have variations. This, combined with the ambient lighting in the room where your Windows PC is located, makes display calibration necessary for the best viewing experience. Calibrating your monitor is especially important when HDR is enabled, ensuring that the optimal brightness and color settings are set, so that you can watch HDR video as it was intended to be seen — not washed out because the default settings on your laptop aren’t correct for your environment.
Both Windows 10 and Windows 11 allow you to configure and calibrate HDR for built-in laptop and external HDR displays using the Settings app:
- Right-click on the Start button and open the Settings app
- Navigate to System > Display
- Select the monitor you want to calibrate HDR video for by clicking on it so that it is highlighted
- On Windows 11 devices, click HDR (if instead a toggle for Use HDR is shown, turn it on then click on it to open HDR settings)
- On Windows 10 devices, click Windows HD color settings
- To change which monitor you are calibrating HDR for, use the Choose display dropdown
- Toggle HDR video streaming to on if it isn’t already
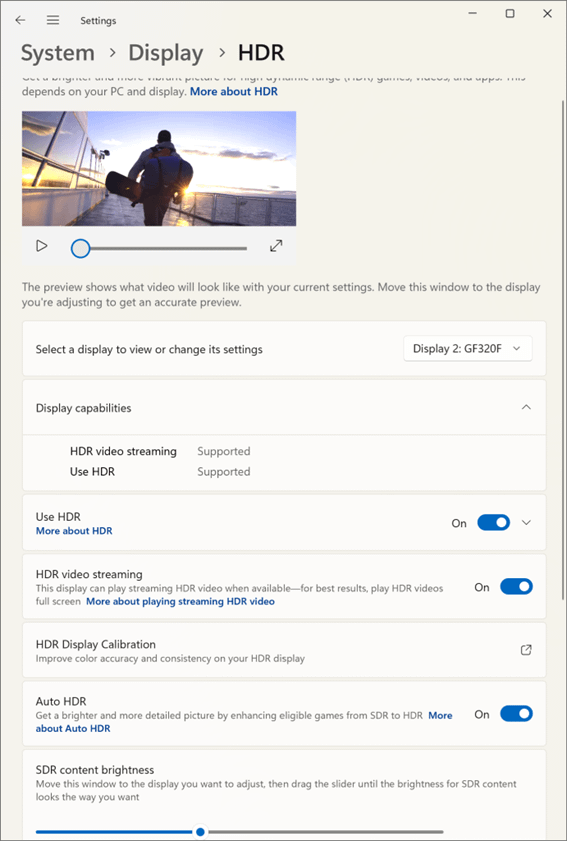
Note that if HDR is not available for your hardware or the correct, up-to-date drivers aren’t installed, Not supported will be shown next to the HDR supported and HDR video streaming display capabilities.
From here, the steps differ for Windows 10 and Windows 11.
HDR video calibration in Windows 11
Windows 11 uses a separate HDR Display Calibration tool to help you find the best settings for your built-in or external HDR display:
- In the HDR settings, click HDR Display Calibration
- The Microsoft Store page will open for the Windows HDR Calibration app
- Click Install to install the app, or Open if it is already installed
- Read the on-screen instructions that explain how to use the HDR calibration tool and press Get started to begin
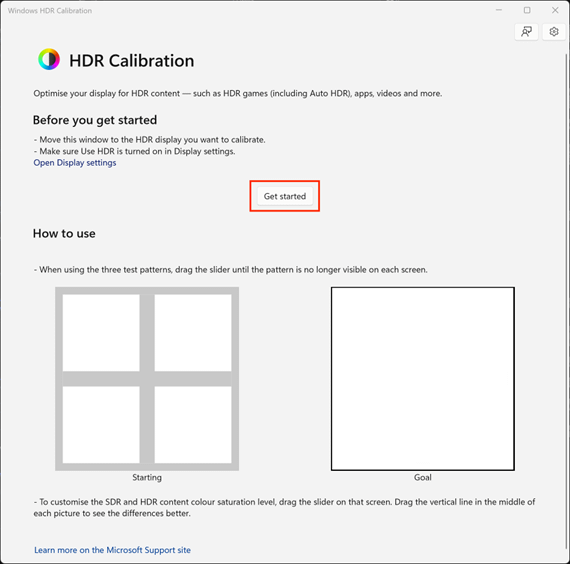
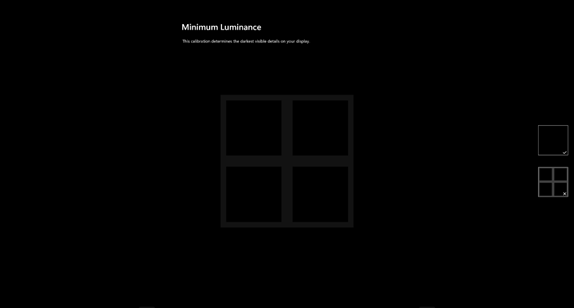
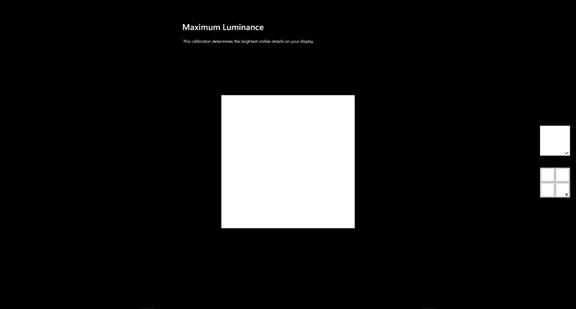
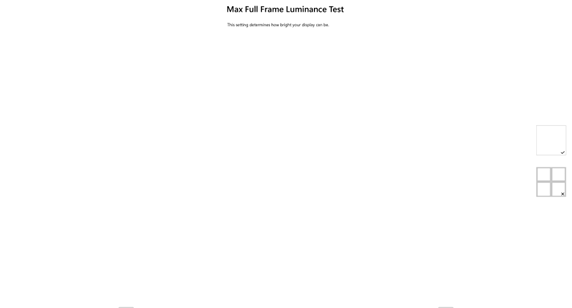
- On each screen, move the slider until the intended result (shown to the right) is achieved

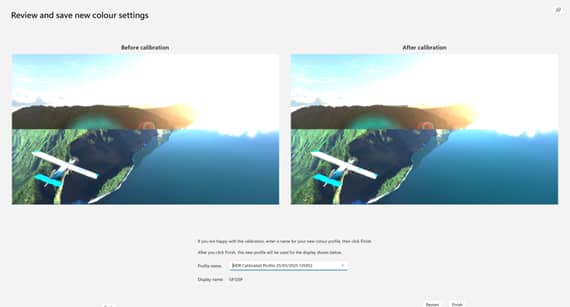
- The final step will preview how the newly calibrated profile looks compared to your previous profile
- Name the new profile and click Finish to assign it and complete the HDR color process
- Close the Windows HDR Calibration app
Note that the screenshots above may not fully depict the difference in calibration due to it not being for your own monitor.
HDR video calibration in Windows 10
Windows 10 does not use a separate app for HDR calibration, with only limited calibration functionality that does not provide as much guidance:
- In the Windows HD color settings, click Change calibration settings
- Set the calibration video to full screen (the option will appear when you place your mouse cursor over the video)
- As the video plays, adjust the calibration slider to get the best balance between visible detail in the brightest (moving the calibration slider to the right) and darkest (moving the calibration slider to the left) parts of the images
- Pay attention to the details on the buildings and the mountain — particularly the windows and rocks — to find a good balance of detail between the two
- When you are satisfied with the balance as shown on the calibration video, you can test with a real HDR video, and make tweaks as required
- Verifying HDR calibration in Windows 10 and Windows 11
You can test the new calibration settings for your built-in or external monitor by playing an HDR-supported video from a streaming platform such as Netflix or YouTube, or a local HDR video file.
To see if a video has HDR support:
- For video files, the MediaInfo program can check whether a video supports HDR: Open the video using the tool, and check that the Color primaries value is BT.2020 and the Transfer characteristics value is PQ for HDR
- On Netflix, look for movies that support Dolby Vision
- YouTube videos that support HDR will show HDR in the video quality settings menu
Troubleshooting common HDR calibration issues
If your hardware supports HDR, but it is not shown as available in Windows, check that you have up-to-date drivers installed. If you’re experiencing other display issues or are having difficulty finding a good balance of HDR settings, you can recalibrate your monitor before recalibrating the display settings for HDR video. You may also need to recalibrate if you move your device (even within the same room), to prevent HDR video from being washed out by differences in lighting. For example, the details in dark scenes can be hard to see in a sunlit room.
Some programs and games will not work well with HDR (either because it makes them unpleasant to use, or for technical reasons), and it may be necessary to temporarily disable it when using productivity software or playing games that were not designed for it.
Optimizing Windows 10 and Windows 11 PCs in enterprise and education environments
In enterprise and education environments, it is critical that devices are configured consistently. Display color profile (including HDR calibration) consistency is especially important for industries that create digital media, and in video production. Remote monitoring and management (RMM) by NinjaOne provides an online interface for your entire fleet of Windows PCs (as well as Apple and Android devices), allowing you to deploy and enforce policies, track hardware inventory, and remotely diagnose and resolve configuration issues.


