

Your Activity History tracks the websites you visit, the apps you work on, and the services you use so you can pick up where you left off faster. Microsoft stores this data (with your permission) to adapt to your needs across multiple devices.
Your data security is a top priority, and learning how to manage and delete activity history on the cloud lets you take control of your digital footprint. This comprehensive article fully explains how to clear your activity history from the cloud.
Understanding Windows 10 activity history
Microsoft activity history tracks various parts of your computer’s routine, including:
- The programs you use
- When you use your applications
- How often you use specific programs
- The files you access
- Visited websites
- Connected USB devices
- Which files are used to launch programs
- Where pre-launch files are stored
Windows then stores your activity history on your computer if you allow it to be accessed. Alternatively, you can connect your device to a Microsoft account and copy your Windows 10 activity history to the cloud. Doing so ‘syncs’ your computer with your other devices, letting you access your most-used apps and more from, say, your work phone.
How to view your activity history
Here’s how you can easily find your activity history via Windows 10 Settings:
- Press the Windows Key.
- Click Settings.

- Go to Privacy.
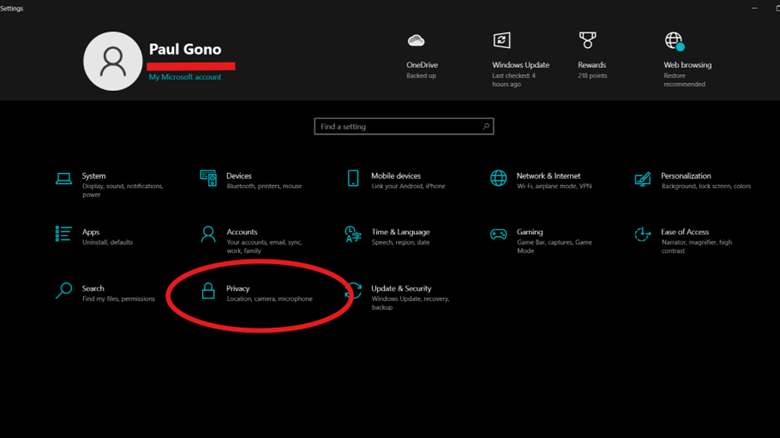
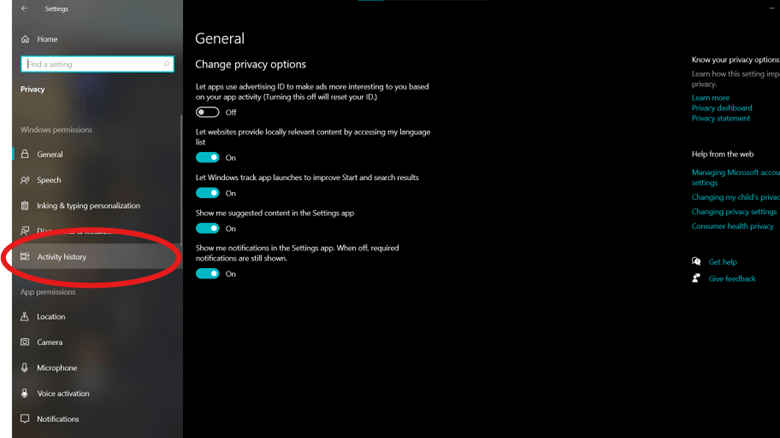
- Select Activity History from the side panel.
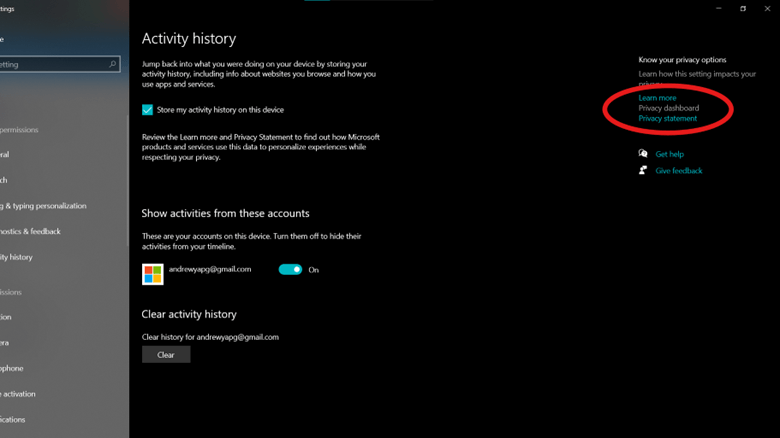
- Click on Privacy Dashboard to access Microsoft’s Privacy Dashboard.
- Sign in to your Microsoft account linked to your device.
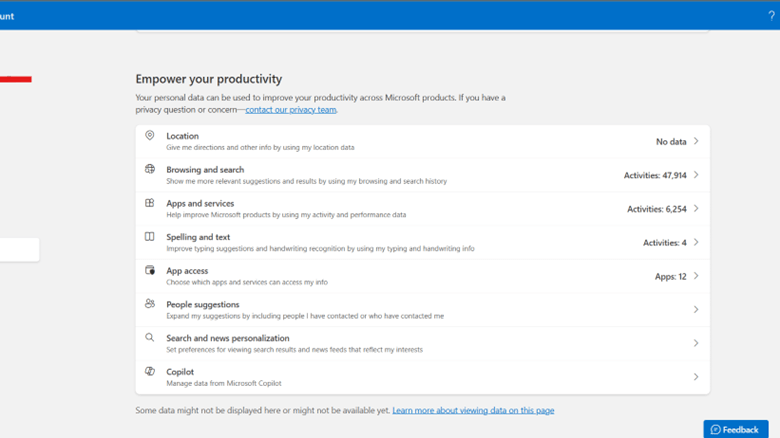
- Scroll down to find the data types under your Activity History.
How to clear activity history from Windows 10 cloud
Step 1: Clearing activity history from Windows 10 settings
- Press the Windows key.
- Click on Settings.
- Select Privacy
- Choose Activity History from the side panel.
- Click on the Clear button under “Clear Activity History.”
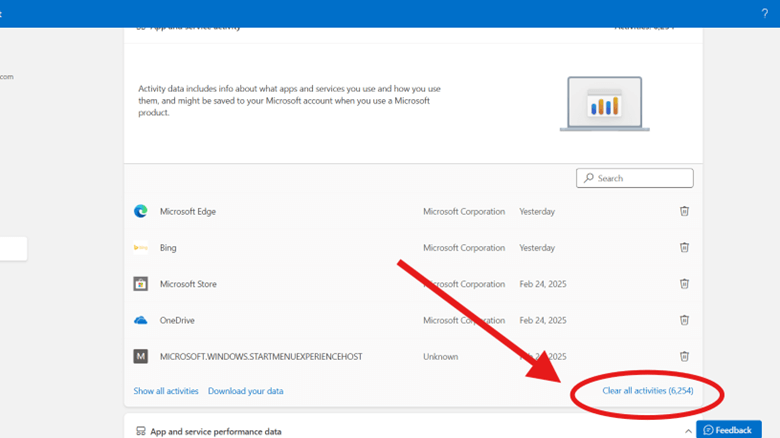
Step 2: Deleting activity history from Microsoft cloud
- Log in to Microsoft Privacy Dashboard (www.privacy.microsoft.com).
- Under More privacy resources, click on the Privacy Dashboard dropdown.
- Go to the Privacy Dashboard.
- Scroll down to find your Activity
- History.
- Select the activity data type you’d like to modify.
- Scroll down and click Clear all activities to delete Activity data.
How to disable activity history collection in Windows 10
- Press the Windows key.
- Click on Settings.
- Select Privacy
- Choose Activity History from the side panel.
- Un-check the box next to “store my activities on this device.”
Why you might want to clear your activity history
While its services may offer a lot of convenience, more people are growing concerned with how organizations use their data. The number of reported instances of identity theft was over 300% higher in 2023 than 20 years ago (ConsumerAffairs), and the FTC calculated the total losses related to identity theft to be around $10.2 billion in 2024. Identity theft occurs every 22 seconds (IdentityTheft.Org). Experts are also warning about the increasing number of such cases.
Consumer data is also being sold without consent—even among trusted brands. In January 2025, the FTC took action against General Motors for sharing customers’ personal information without their consent.
Data leaks can put your organization at risk, which is even more reason to cover your bases. Using two-factor authentication, automating security patches, and implementing a strong recovery plan with plenty of backups gives your organization a solid line of defense against these major security breaches. While it can be tedious, enforcing strict security policies prevents your company from experiencing its own IT horror story.
Troubleshooting & common issues
Your Activity History may still appear in your logs after deletion. Why? Microsoft stores a backup of your activity info on the cloud, which gets re-downloaded every time you sign into a ‘synced’ device. Microsoft’s data retention policies are also a factor.
Additionally, your browser could still have cookies or cached data associated with past activities, causing them to pop back up in your “Browsing and search” history.
Delayed syncing can also happen across your other devices. Bad network connections and software problems contribute to this, so Microsoft regularly pushes updates with new bug fixes to improve data synchronization. To manually check for any available Windows updates/“force” an update, do the following:
- Press the Windows key.
- Click on Settings.
- Using the search box, type Windows Update.
- Click on Check for updates.
- If an update is available, select Download and install to start the update process.
Lastly, clear all linked accounts on your device to make sure their activity history isn’t showing on your Timeline. Here’s how:
- Press the Windows key.
- Click on Settings.
- Select Privacy.
- Choose Activity History from the side panel.
- Disable all linked accounts under “Show activities from these accounts.”
Additional privacy best practices
You can never be too safe, so take full advantage of the Microsoft Privacy Dashboard and configure your settings for peace of mind. Additional programs can also be tweaked here, with Microsoft Edge and Xbox services being the most notable ones.
You should also check any Microsoft services that track your offline activities to see if they’re turned off (e.g. Find My Device, Location Tracking). Doing this can reduce your digital footprint, minimize energy consumption for keeping and tracking information, and enhance your privacy. We discuss this further in this guide, “What is Green IT?”
But if you prefer that all your personal data stay in one place, consider switching to a local account. Unlike Microsoft accounts, these are created and managed in-device and are completely separate from the web.
While that means not having access to cloud services, you mostly won’t need it if you only use your computer for web browsing and basic office work. Plus, your personal data won’t be connected to any Microsoft account, making you less vulnerable to cyberattacks.
It’s like keeping all your cash under your mattress instead of in the bank. Similarly, unforeseeable events like fires, earthquakes, hardware damage, and real-life theft can put your precious files in danger if you aren’t careful.
Be in control of your Microsoft activity history
Your Microsoft Activity History tracks and records your search history, app usage, and more. To clear the activity history on your system, access your settings from the Start menu, access your Privacy settings, navigate to the Activity History tab, and clear your history on the device.
Visit your privacy dashboard to remove Windows 10 activity history from the cloud. Keep in mind that data retention policies, synced devices, and third-party trackers (e.g., cookies, tracking pixels) may stop you from fully removing your stored history.
Your data tells threat actors everything they need to know about your work habits, which apps you rely on the most, and your preferences. Data privacy is essential, especially when thousands of employees across a network are involved.
Running regular audits ensures robust security measures are in place in your IT infrastructure, allowing your business to focus on projects that drive growth with peace of mind.


