As technicians, how often do we get calls, that turn out to be just another crashed service? This used to happen to me a lot in my MSP days. And while it’s an easy manual fix, we could save a ton of time for ourselves and our clients if we could monitor and automatically reboot those services. Read on as I show you how to do just that!
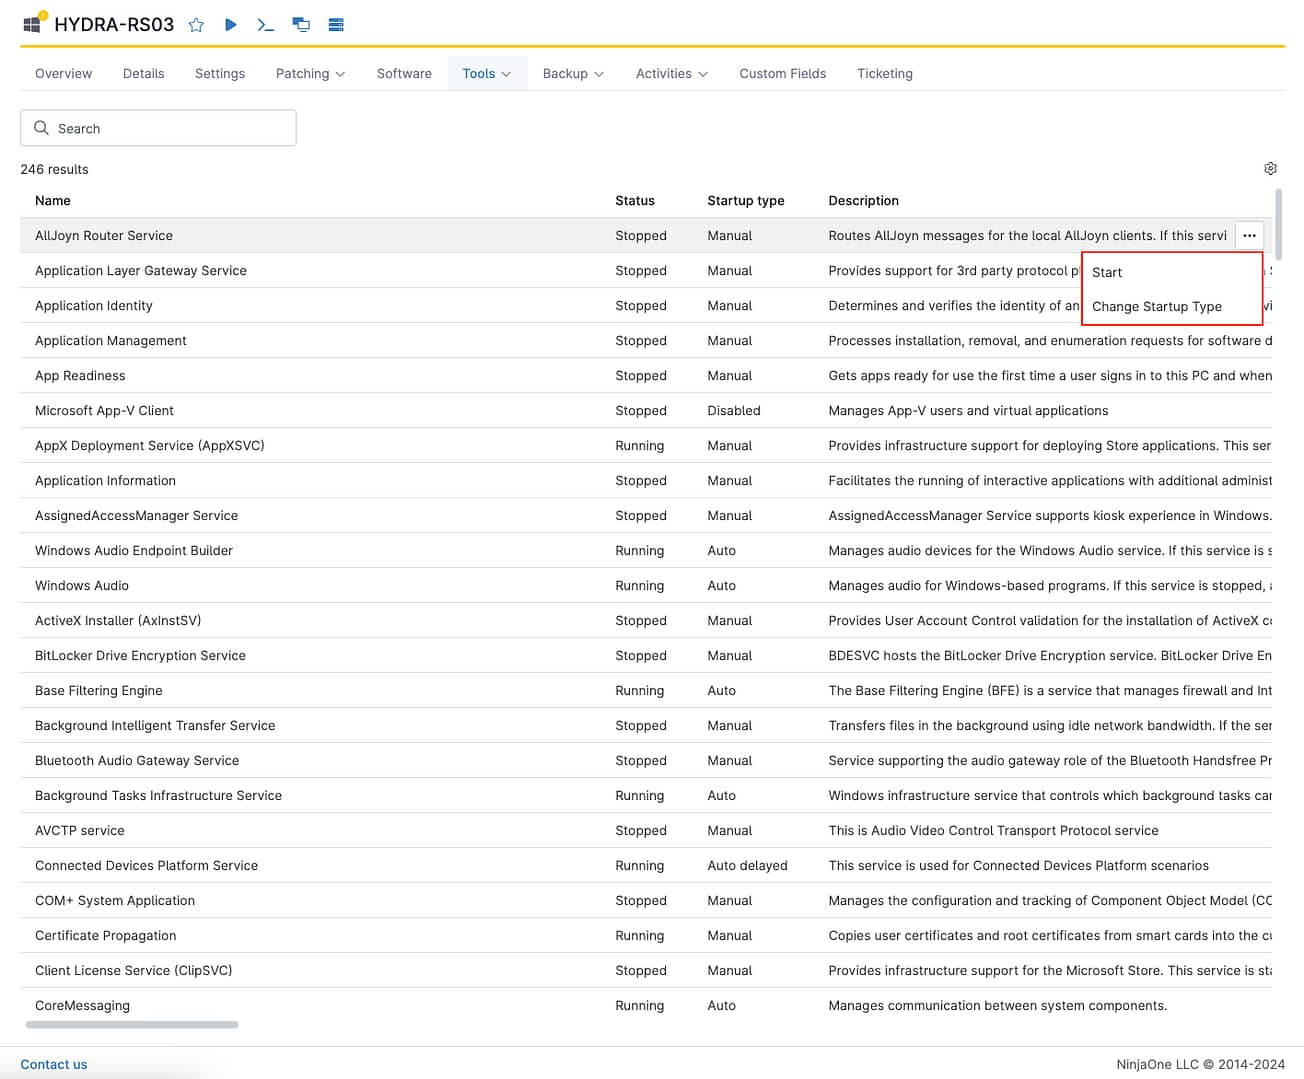
The example I’ll use in this article is the print spooler service because it’s one that we’ve all had to start up again after a crash, at least once or twice. Now, of course, with NinjaOne, you can easily view the services running on a machine. Simply open the device and navigate to Tools>Service Manager, to view a list of all the services on the device and their status.[PB1] You can even start, stop, or restart them all without ever opening a remote session. That’s pretty cool! Let’s make it even cooler though!
Open up or create a policy to monitor the print spooler on any device with that policy and set up the automation. Go to Administration>Policies>Agent Policies and select the policy you want to use. The policy editor opens to the conditions page by default which is right where you need to be.
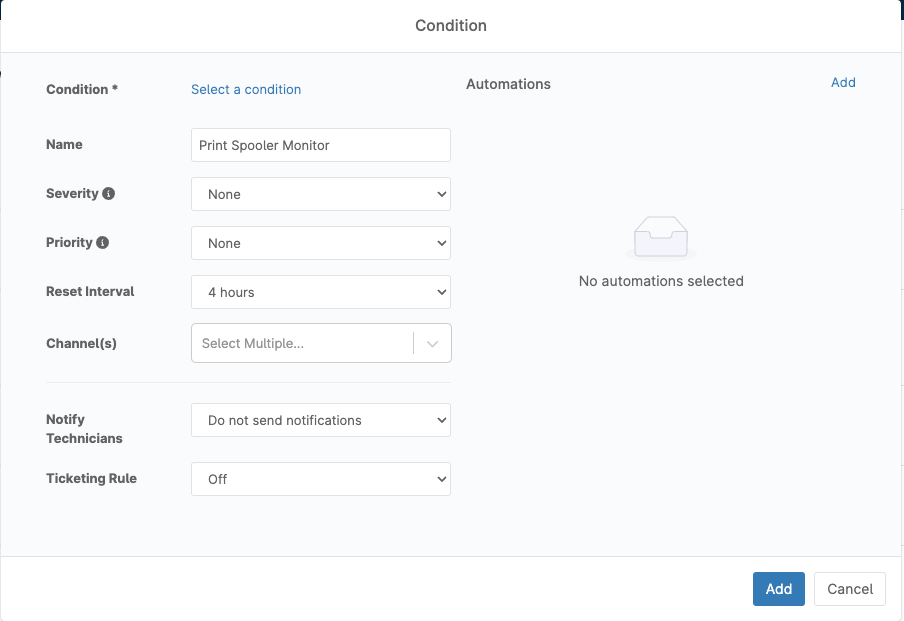
To create a new condition, click the “Add a condition” button and you’ll see a new window to build your own condition. Give it a name that describes what the condition is doing. There are a lot of options, but for this article, we’ll focus on just a few of them. You can read even more about conditions on our Dojo Conditions page.
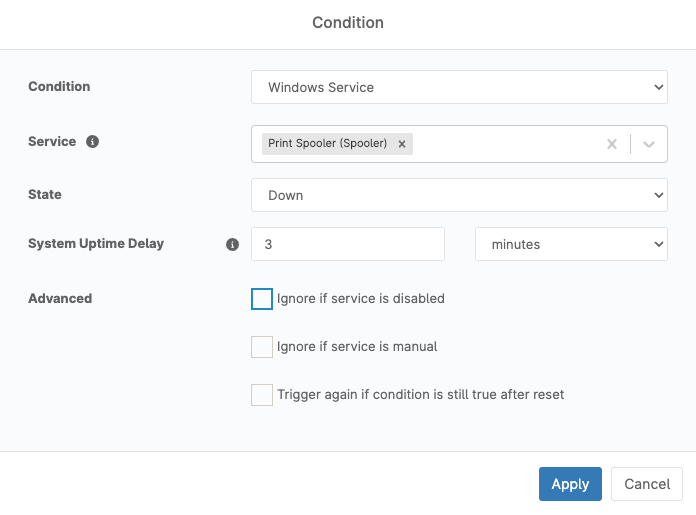
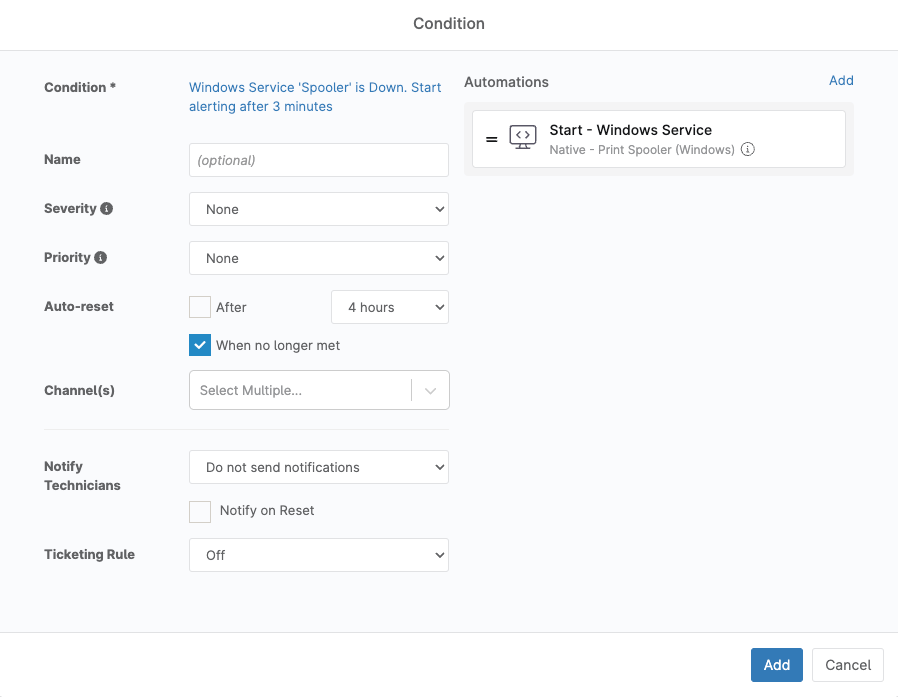
Once you’ve given the condition a name, it’s time to make some magic! Click the “Select a condition” link right above the condition name. In the dropdown, select “Windows Service” and then, in the next box select a service to monitor. This dropdown is auto populated based on the services installed on any device within your NinjaOne instance, so you should always be able to find what you need. The “State” drop down should default to “Down” which is what you need in this example, so leave that as it is, and then fill in the rest of the options to fit your situation. When using a condition like this on a policy it’s wise to check the “Ignore if service is disabled” and/or the “Ignore if service is manual” boxes so that you don’t receive false alerts for devices set up in either of these conditions. Once you’ve completed this condition setup, click “Apply.”
Pro Tip: You can add multiple services to the same condition.
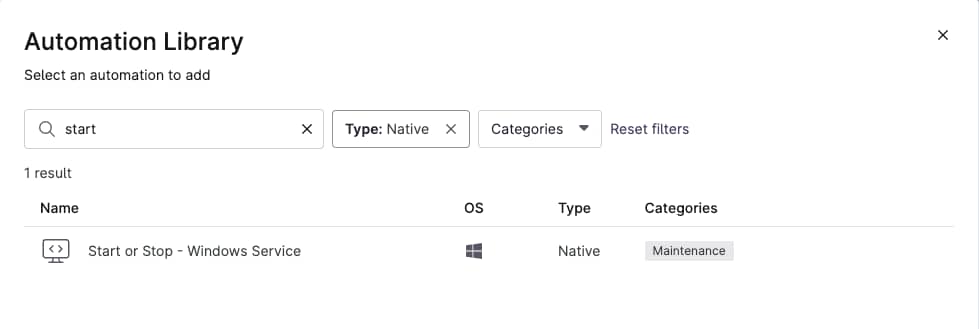
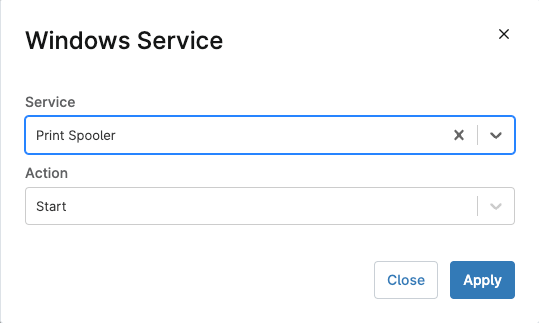
The next step is to add an automation. Automations are scripts. NinjaOne has a ton of built-in scripts and you can also add your own. Go to our Dojo Custom Scripts page to learn more about adding your own scripts. The Automations section is on the right side of the Conditions window. On the Automations section, click add. For this example, we’ll use the native script for starting and stopping windows services. Search for “Start or Stop – Windows Service” in the search box, and then select the script. This will open a new window where you can select which service(s) to act on, and what action to take. This example uses the print spooler; click “Start Action” then click “Apply.”
The next step is to set an auto reset for “When no longer met” and uncheck the “After X time” box. This is a preference, you can have it reset whenever you like, but we’ve found it helpful to have the condition showing on the device dashboard to let technicians know the service is stopped just in case the script can’t bring it back up for some reason.
You can also set “Channel(s)” to decide if and how to get notifications for this. Visit the Channels Dojo page for more on that, technician notifications, and ticketing rules. Once you have all that set to your organization’s needs, you can click the “Add” button in the bottom right and you’re all done! Below is what our sample looks like.

