Since the addition of custom fields to Ninja, we’ve had the ability to read from and write to device-level custom fields via scripts and the terminal. Organization-level custom fields (available as part of Ninja’s documentation functionality) have always been readable via scripts, but up till now they have not been writable.
With Ninja’s 5.3.5 release, we’ve added the ability to write to organization-level custom fields via scripts or the terminal for automatic documentation. The 5.3.5 release is available in CA / OC / EU instances today and will be available in NA on September 21st.
Save yourself hours of manual documentation and automate IT documentation
Frequently there is data that would be useful for scripting across all or many endpoints in an organization. This information can be collected and added to NinjaOne manually, but allowing organization-level custom fields to be written via script allows for almost unlimited possibilities for automated documentation.
A few real-world use cases for writing to organization custom fields include:
- Extracting license keys from existing endpoint setups and documenting those license keys automatically.
- Extracting and documenting tenant IDs for applications like Azure, Printix, Keeper, and other multi-tenant solutions.
- Extracting and documenting application, tool, and hardware configurations as an XML, YAML, or JSON blog from the endpoint.
The most critical benefit of this new feature is users’ ability to automate tasks like these and save their team from spending hours on manual documentation. For more advanced users, these extracted license keys, tenant IDs, and configurations can then be referenced in a script or with conditions to monitor and alert on changes, deploy software, or join a device to a tenant automatically.
How to write to organization custom fields in Ninja
1) Appoint a delegate machine
Writing to organization custom fields requires the use of a delegate. This stops multiple devices from writing to an organization-level field simultaneously which could cause unintended outcomes. Delegates can be set up in the organizations tab, under documentation.
2) Setup your custom field
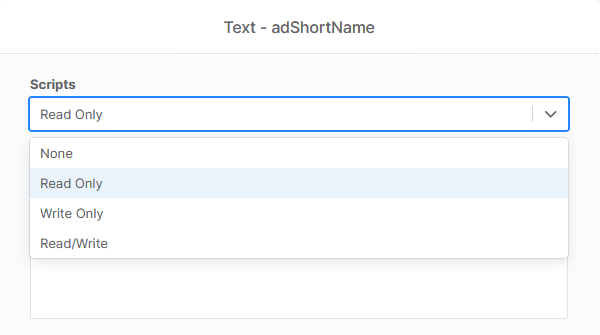
You’ll need an organization-level custom field to write to. These fields are set up as forms in the Documentation app. To write to a field via script or terminal, you’ll need to set the scripts field to ‘Write Only’ or ‘Read/Write’.

3) Write your script
This update added three new commands for scripting in Ninja:
- Ninja-Property-Docs-Set $TemplateID “$DocumentName” $AttributeName
- Ninja-Property-Docs-Set-Single “templateName” “fieldName” “new value”
To make this more real-world, let’s outline what it may look like to automatically document an Azure tenant ID with Ninja.
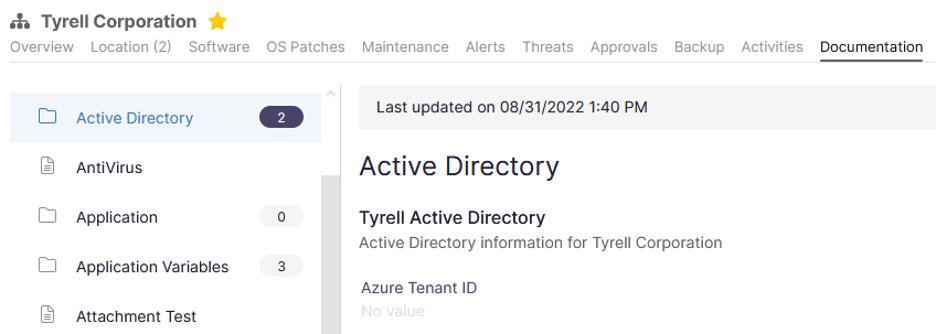
Let’s assume we’ve assigned our delegate and created the document below.
Let’s write our script:
- The Template ID / Name is “Active Directory”
- The Document Name is “Tyrell Active Directory”
- The Attribute Name is azureTenantID
$tenantId = (Get-AzureADTenantDetail).objectId

Ninja-Property-Docs-Set ‘Active Directory’ ‘Tyrell Active Directory’ azureTenantID $tenantId
4) Deploy your script
Finally, you need to deploy your script on the appropriate delegate endpoint. Once the script has been run, the script will write to the organization-level custom field and complete with success.
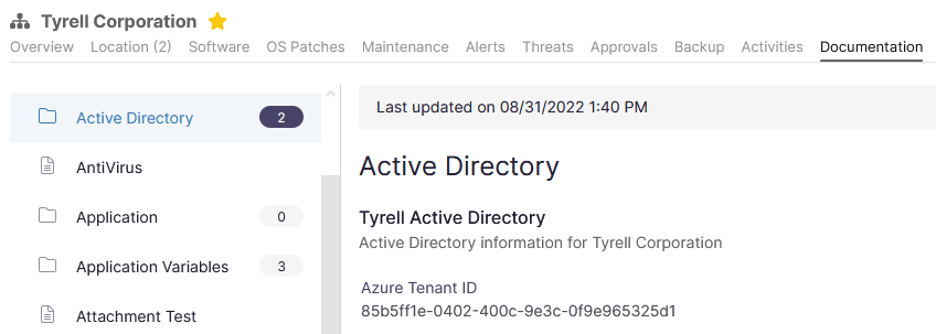
We then run this on our delegate machine to update the template.
Want to see Ninja in action?
Watch a short free demo, or try these features out for yourself by signing up for a no-obligation free trial.


