

This guide demonstrates how to back up and restore printers in Windows 10 and Windows 11. It provides step-by-step instructions for using the Windows Print Management snap-in and the Printer Migration wizard.
Understanding printer settings and configurations
Printer drivers are the software required for your Windows PC to communicate with your printer hardware. While Windows can find drivers for most modern printers through the Windows Update service, in some cases, you need to install drivers from the manufacturer for full functionality.
This makes it useful to be able to back up Windows printer drivers and settings (and later restore them), in case you are unable to locate the original drivers that came with your device. Windows provides the Printer Migration wizard tool to do this. You can also automate adding and removing printers using PowerShell scripting.
How to back up printers in Windows 10 and Windows 11
Both of the below processes for using the Windows Print Management snap-in and the Windows Printer Migration wizard will create a .printerexport backup file. This file can be restored to the same system or transferred from one computer to another to migrate printer drivers and settings and includes the settings and drivers for both local and network printers.
Note that printer settings and driver backups created on a 32-bit PC will only work on other 32-bit PCs running the same Windows operating system, with the same also applying to 64-bit devices.
If you are reinstalling Windows, you may also want to backup and restore all of your device drivers.
Using the Printer Migration wizard
All versions of Windows 10 and Windows 11 include the Printer Migration wizard, except for Windows Home editions. To export printer drivers and settings using the wizard:
- Right-click on the Start button and select Run
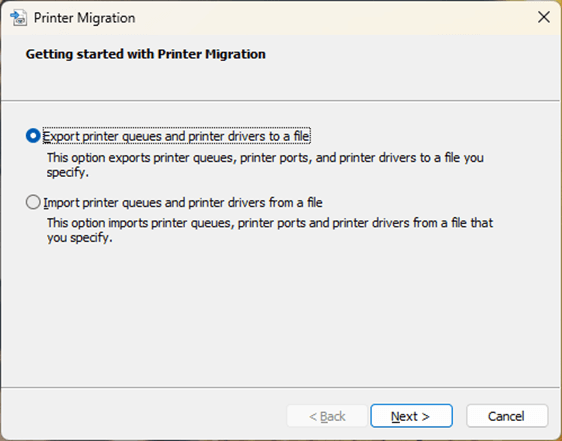
- Enter printbrmui.exe in the Run dialog and press OK to open the Printer Migration wizard
- Select Export printer queues and printer drivers to a file and then click Next
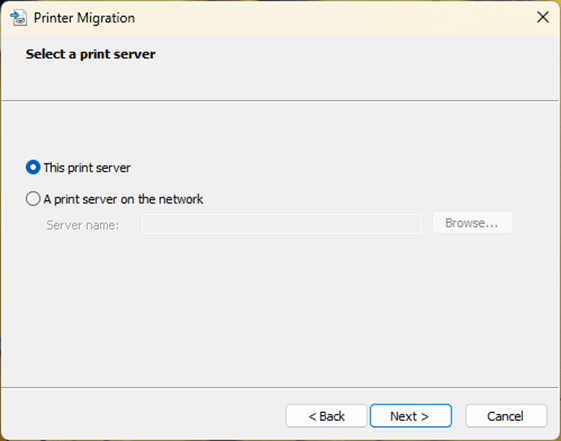
- To back up the printers on the current device, select This print server, or enter the network address of another PC you want to back up printers for (you may be prompted for credentials for the remote PC if choosing the latter)
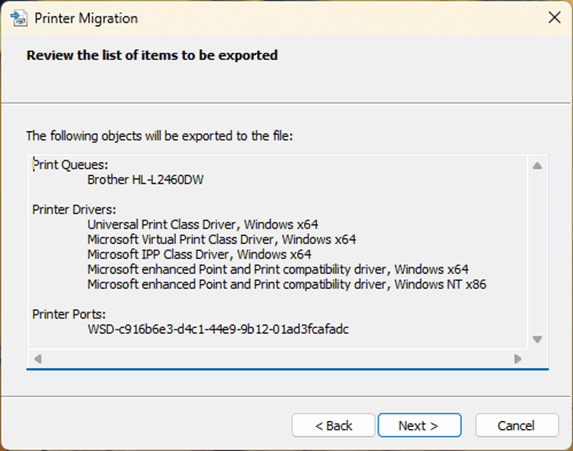
- You will be presented with a list of what will be backed up and saved to the .printerexport file, click Next to continue
- Click Browse and select the location and file name to save the printer settings to, then press Next

- A success message will appear once the export has successfully completed. Press Finish to close the wizard
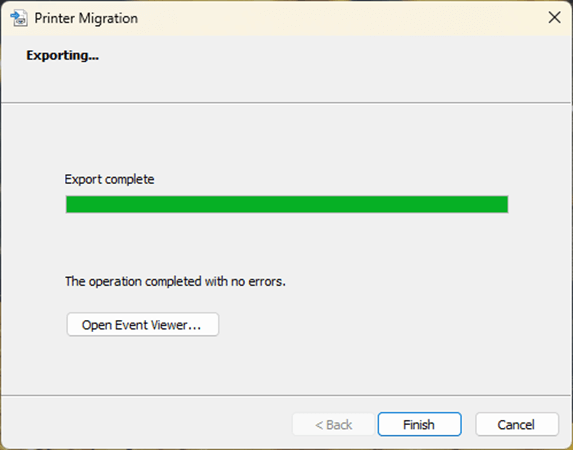
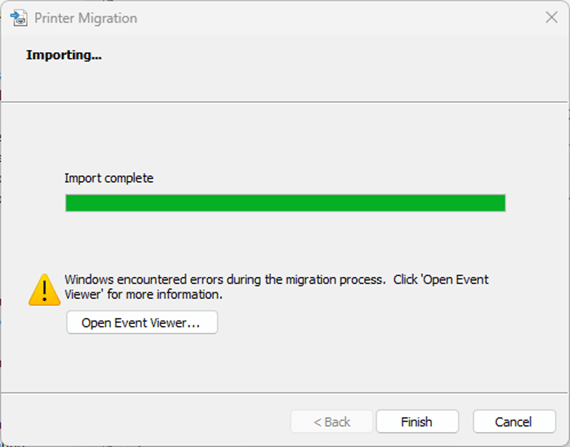
- If the process fails, a button to open the Event Viewer will be displayed to assist with diagnosing the issue.
Using the Windows Print Management snap-in console
The Windows Print Management console can also be used to back up and restore printer drivers and settings. However, this is not included in Windows 10/11 Home editions.
- Right-click on the Start button and select Run
- Type printmanagement.msc in the run dialog and press the Enter key
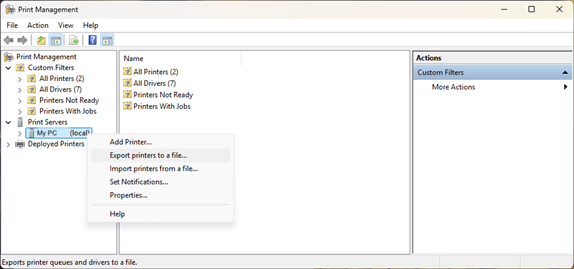
- Expand Print servers in the left navigation tree
- Right-click on your PC and select Export printers to a file
- Confirm the settings that will be exported and press Next
- Choose the location and name to save the .printerexport file to and press Next
- Press Finish once the process has completed
How to restore printers in Windows 10 and Windows 11
The following instructions cover restoring printers in Windows 10 and Windows 11.
Using the Printer Migration wizard
To restore printers from a .printerexport file that was exported using the Printer Migration wizard:
- Right-click on the Start button and select Run
- Enter printbrmui.exe in the Run dialog and click OK to launch the Printer Migration wizard
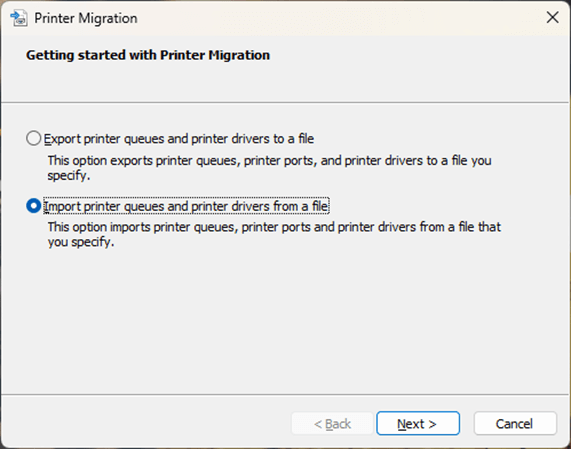
- Select Import printer queues and printer drivers from a file and press Next
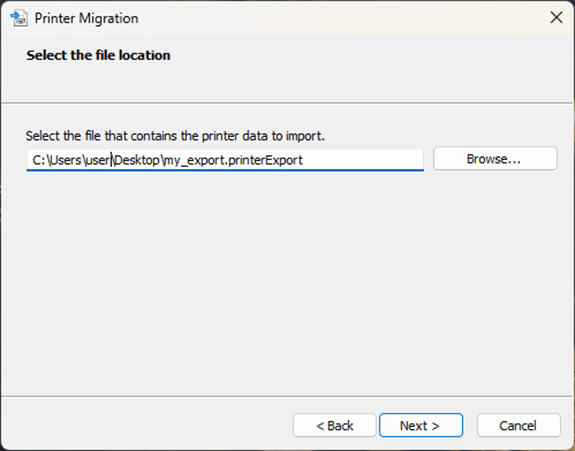
- Click the Browse button and choose the .printerexport file to import/restore
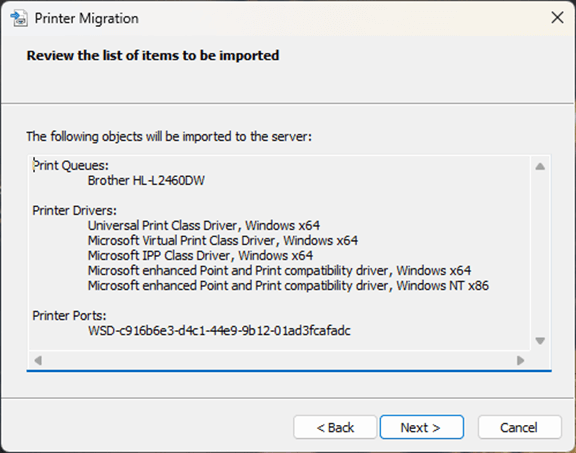
- Look over the list of items to be imported to confirm the changes that will be made, and press Next to continue
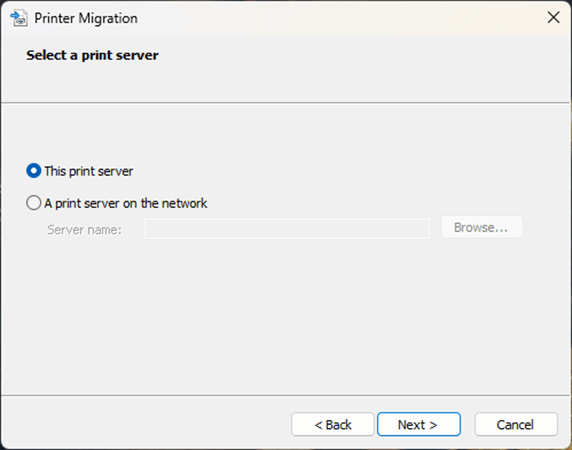
- Select This print server to restore the printers to the current PC, or select a print server on the network to restore to (note, you may need to supply credentials)
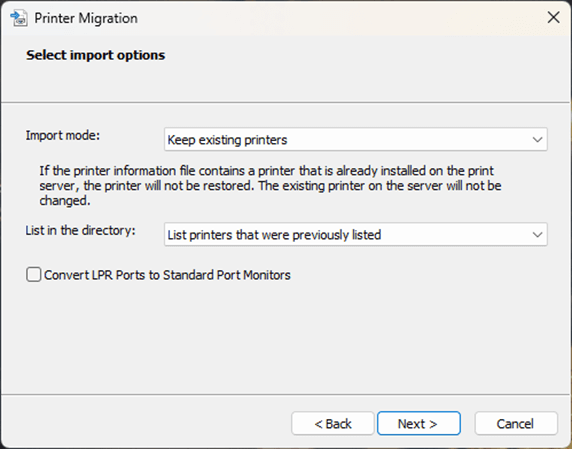
- Change the Import mode to either Keep existing printers or Overwrite existing printers, leave the List in the directory as List printers that were previously listed, and keep the option to Convert LPR ports to Standard Printer Port Monitors unchecked, then press Next
- On successfully restoring the printer settings and drivers, press Finish to close the Printer Migration wizard
Using the Windows Print Management snap-in console
The option to restore printers using the Windows Print Management console is not included in Windows 10/11 Home editions. To import printers using the Print Management console on Pro and Enterprise versions of Windows:
- Right-click on the Start button and select Run
- Type printmanagement.msc in the run dialog and press the Enter key
- Expand Print servers in the left navigation tree
- Right-click on your PC and select Import printers from a file
- Choose the .printerexport file to import and press Next
- Review the settings that will be restored and press Next
- Change the Import mode to either Keep existing printers or Overwrite existing printers, and leave the other settings as-is
- Press Next to start the import, and Finish once the process has completed
Automate printer backup and restore in enterprise and education
Automation is key in the efficient management of devices and printers in enterprise and education. Remote monitoring and management (RMM) by NinjaOne integrates with your Windows domain, allowing you to view computer configuration (including printers), deploy policies, and directly assist users with printing and other Windows issues.


