

This is a step-by-step guide on how to calibrate your monitor in Windows. Display calibration ensures accurate colors, optimal brightness, and balanced contrast, which can reduce eye strain and make your work more efficient and productive. This overview is especially beneficial if you notice inaccuracies in your monitor settings or are switching to a different working environment. Regular calibration is key to maintaining the best possible image quality.
Understanding display calibration in Windows
Display calibration helps you fine-tune the settings of your monitor so you can achieve the most accurate color reproduction and image clarity. It involves adjusting parameters such as gamma (ensuring a balanced grayscale), brightness and contrast (ensuring detail visibility), and color balance (ensuring colors appear as intended) to manage standardized values.
You may think this is only important for companies heavily relying on visual production, such as graphic design, gaming, or video editing. However, understanding your monitor calibration settings is crucial in strengthening your company’s operational efficiency. Calibrated monitors not only improve screen color accuracy, but they are also crucial in creating and maintaining a comfortable work environment. A well-calibrated screen in Windows 10/11 significantly reduces eye strain and fatigue–providing optimal brightness settings for workers.
A great way to think about calibration is to compare it to a pair of prescription eyeglasses. People can still “see” objects without their glasses, but they work so much faster and with much less stress when wearing one.
Step-by-step guide to calibrating your screen
To calibrate your display, you need the right tools. Windows offers a free and accessible built-in calibration tool, but there is also third-party software that helps you obtain professional-grade accuracy. Choosing among them depends on your specific needs and IT budget.
1. Simultaneously press the Windows key + R to open Run.
2. Type “dccw” and press “Ok” to open the display color calibration wizard.
3. Press Next.
*Alternatively, you can simply type “calibrate display color” in the Windows search bar.
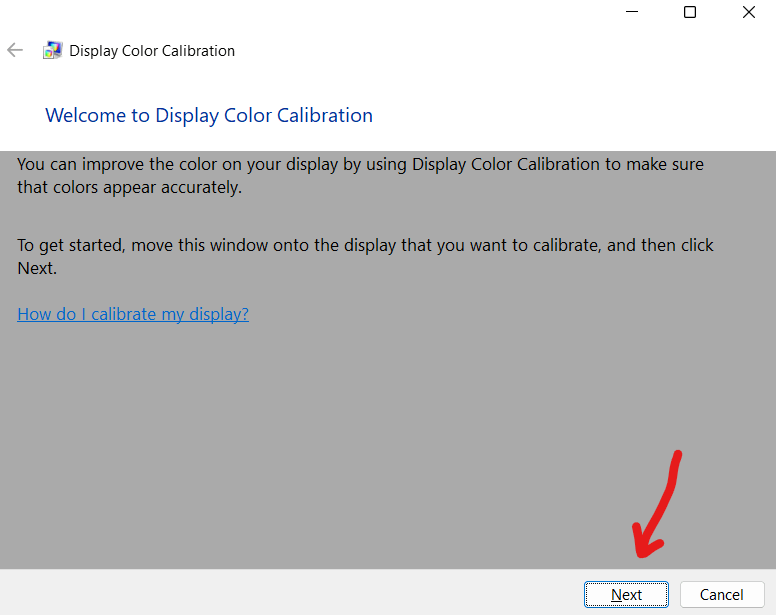
*If you have multiple displays, move the Display Color Calibration window into your desired display. If you only have one display, you can simply press Next, as shown.
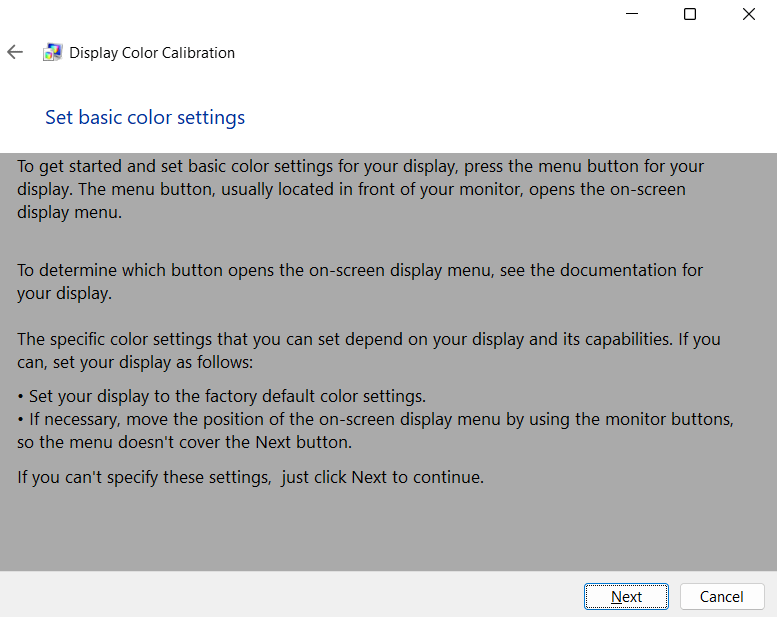
4. Read the “set basic color settings” menu. Continue to press Next.
5. Read the next menu, “How to adjust gamma”. Press Next.
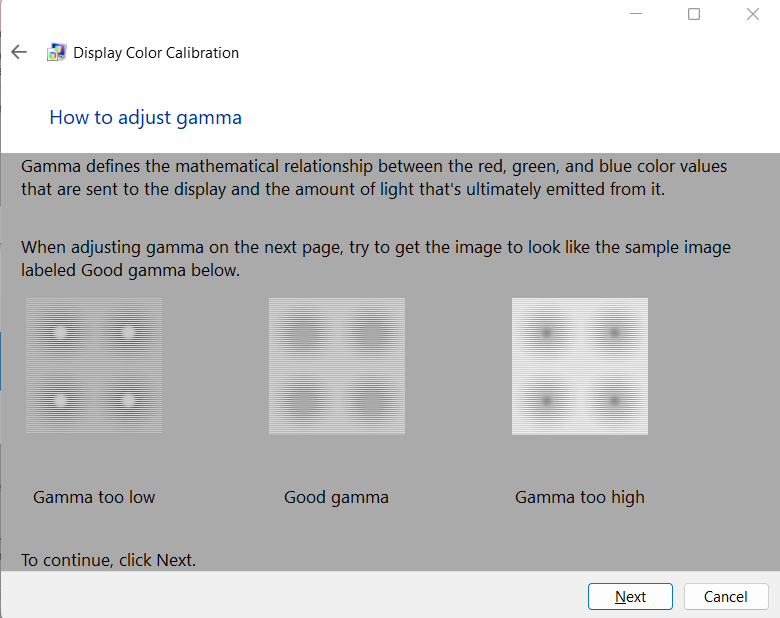
6. Follow the on-screen instructions. Move the slider to adjust gamma until it is as close to “good gamma” (as seen above) as possible. Click Next.
7. You will be directed to “Find the brightness and contrast controls for your display”. Read the menu and press Next.

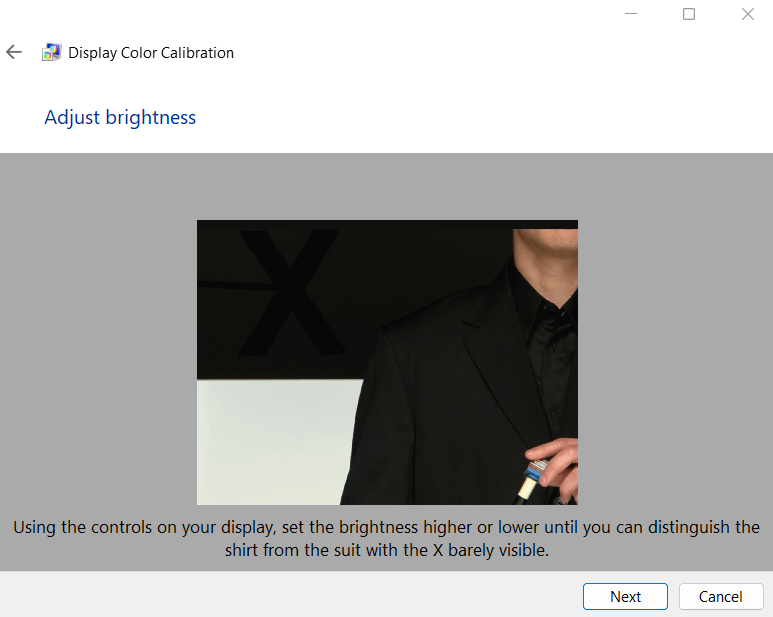
8. Read the next menu and take note of the different brightness examples. Click Next to adjust brightness.
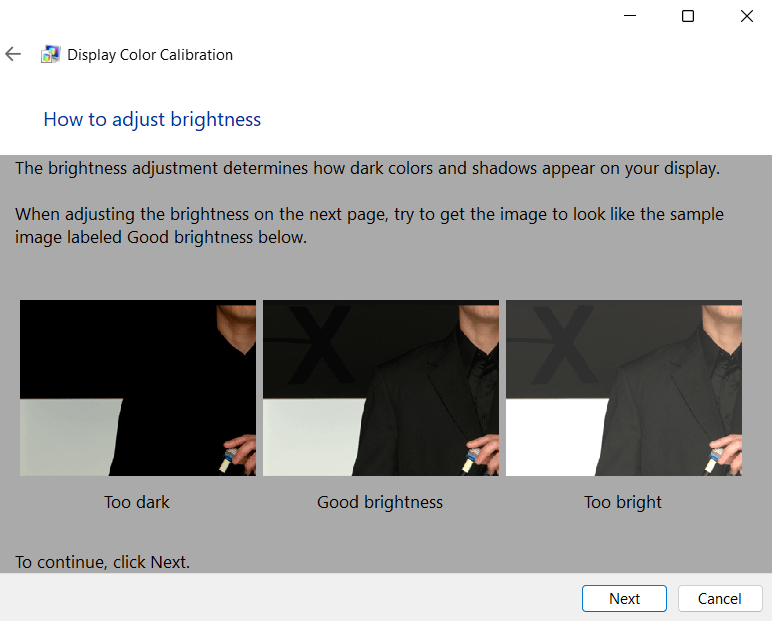
9. Follow the on-screen instructions and adjust the brightness of your display until it matches the previous example of “good brightness.” Then click Next.
10. You will now see some contrast examples. Click Next.
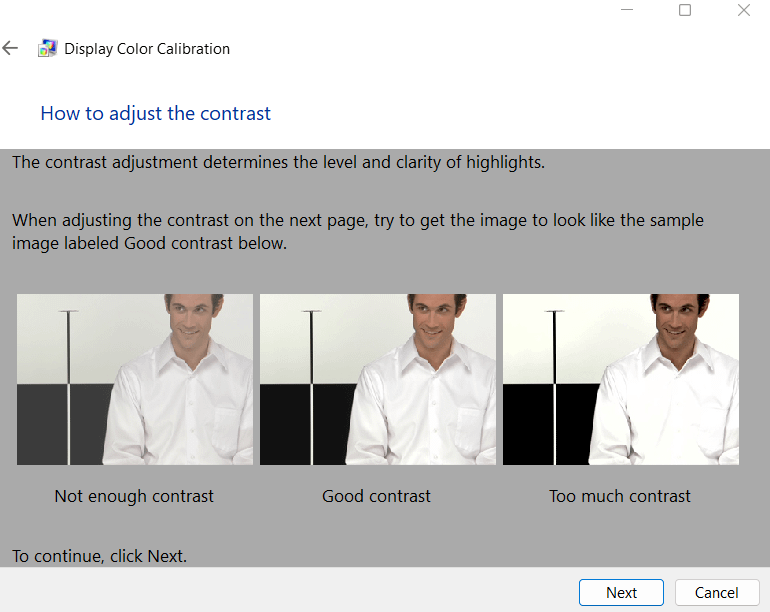
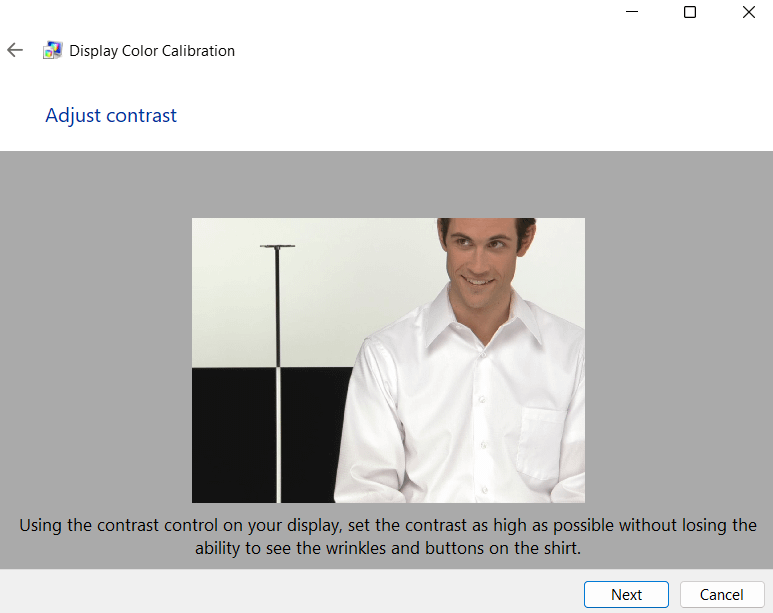
11. As with the previous parameters, adjust the contrast control until you match the picture to “good contrast”.
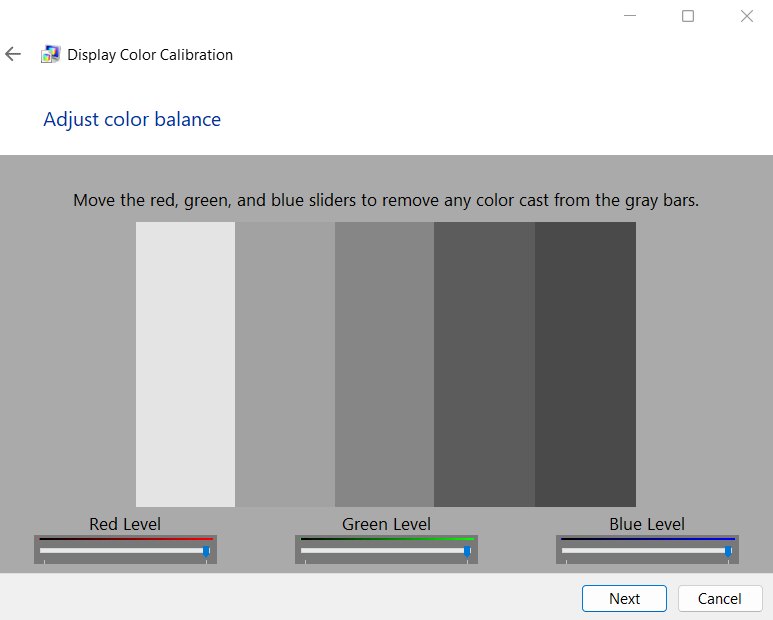
12. You will now be directed to some color balance examples. Note them down and click on Next.
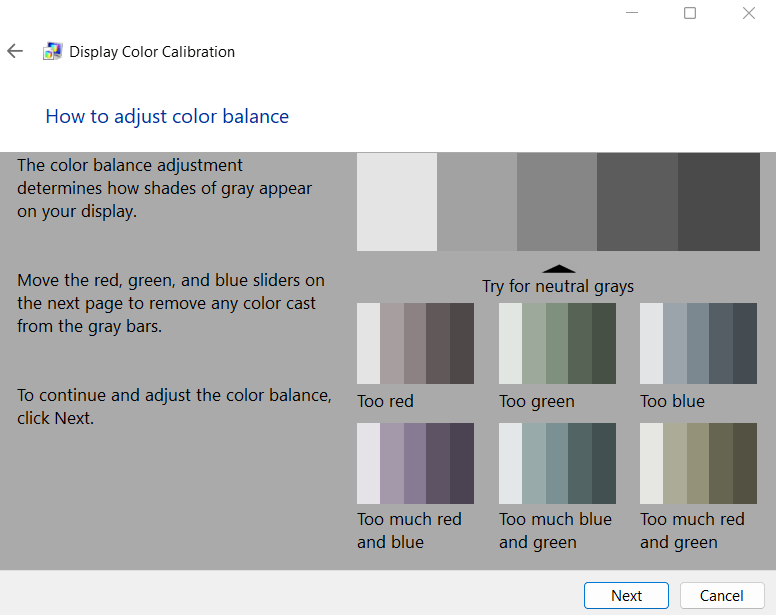
13. Move the red, green, and blue slides to remove any color cast from the gray bars. Click Next.
14. Check the box that says “Start ClearType Tuner” and press Finish.
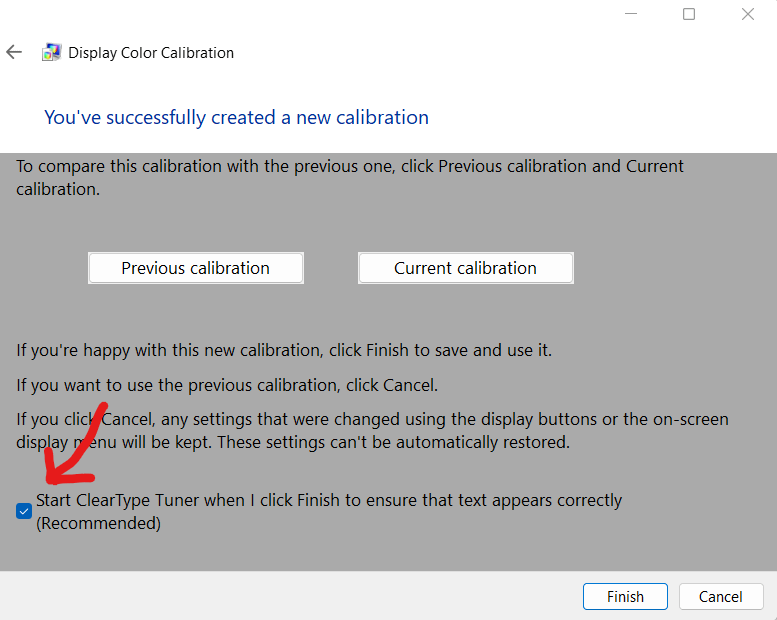
15. Once you are satisfied with your adjustment, save the new calibration profile. Test the results by viewing high-quality images or videos to ensure that colors and details appear accurate.
Using third-party calibration tools
For advanced users or professions, third-party tools can offer more precise adjustments. Some popular options include:
- CallMAN: A feature-rich tool used by many professionals for its advanced capabilities.
- DisplayCAL: A versatile, open-source solution that supports a range of devices.
- Hardware calibration devices: TOols like the X-Rite i1Display calibrate display with improved accuracy by measuring light output directly.
These tools often provide the best display calibration settings for graphic design and other visual resource-heavy jobs. While the built-in Windows tool suffices for casual use, third-party options are worth considering for critical tasks.
Troubleshooting common issues
Even with the best monitor calibration tools, you can still encounter some issues. Here are some tips on how to improve color accuracy on Windows monitors:
- Overly bright or dim displays: Revisit your brightness and contrast settings. For brightness, ensure the screen is bright enough to reveal details in shadowy areas without making the blacks look gray. Adjust contrast so that the bright areas retain details without washing out.
- Color banding: This is often caused by improper gamma or color balance settings. To resolve this, fine-tune your gamma settings and balance color channels (red, green, blue). If the issue persists, consider using a third-party calibration device.
- Misaligned gamma: Improper gamma settings can make images look overly dark or unnaturally washed out. To resolve this, use the built-in Windows calibration tool and match the gamma slider to the target pattern. Ensure that no areas are too dark to distinguish or overly light.
- Persistent calibration issues: If you repeatedly encounter issues despite adjustments, reset your monitor and restart the calibration process. Ensure that your display drivers and firmware are up-to-date, as outdated software can cause inconsistencies. Use a reliable patch management tool like NinjaOne to help you with this process.
Tips and best practices for optimal calibration
When searching for how to calibrate your monitor in Windows 10/11, here are a few tips to consider:
- Perform calibration in a well-lit room or in the exact environment you will be working in. This ensures a more accurate calibration.
- Position your screen at eye level and a comfortable viewing distance. A slight tilt or incorrect height can distort perceived colors and brightness.
- Make sure to clean your screen before calibration. Dust or fingerprint smudges can alter the way light interacts with your display.
- Calibrate regularly to ensure consistent quality, especially for more demanding visual tasks. Consider setting a reminder to calibrate every month or after significant usage changes.
- Ensure your hardware is up-to-date to avoid conflicts or inaccuracies. Check the manufacturer’s website for the latest software updates.
- Use reference images or videos to help you fine-tune your settings and test the results effectively.
- Take breaks during calibration, especially if you are constantly online. Prolonged exposure to a monitor can lead to fatigue and reduce your ability to make accurate adjustments.
How to calibrate your monitor in Windows
Optimizing your monitor calibration settings is often underestimated in its usefulness and importance. Nevertheless, display calibration is a game-changer for anyone seeking optimal quality and comfort. By investing a little time into fine-tuning your settings, you can unlock your monitor’s full potential—in turn, helping you become more efficient and productive.
Frequently Asked Questions (FAQs)
1. Can I calibrate my laptop screen the same way as a desktop monitor?
Yes, you can, especially if your laptop has Windows as its operating system.
2. Is manual calibration better than automated tools?
Manual calibration is sufficient for most users, but automated tools can provide more precise configurations.
3. What are ICC profiles, and should I use them?
ICC profiles are files that define how colors are displayed on your screen. Use them for consistent results, especially if you’re using third-party calibration tools.


