Key Points
- How to change drive letters in Windows
- Disk Management
- Right-click Start → “Disk Management”
- Right-click the drive → “Change Drive Letter and Paths” → “Change”
- Command Prompt
diskpart→list volume→select volume X→assign letter=Y- Use
remove letter=Yto clear a letter
- Third-party software
- Tools like MiniTool Partition Wizard or AOMEI Partition Assistant for more complex tasks
- Disk Management
- How to assign drive letters to disconnected or external drives in Windows
- Disk Management → “Action” → “Change Drive Letter and Paths” → “Add” → pick a letter
- For removable drives, you can set a letter once and Windows often reuses it
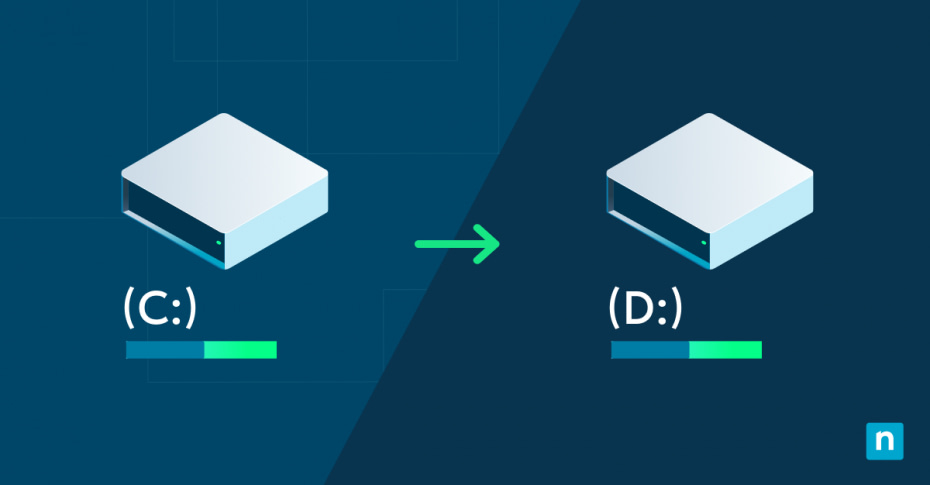
Managing your computer’s storage can sometimes feel like organizing a chaotic library. One effective way to bring order to this digital chaos is learning how to change and assign drive letters in Windows 10. Whether you want to set a drive letter for a new disk, rename a drive letter of an existing one, or assign letters to disconnected drives, there are simple ways to accomplish each one.
Centrally manage endpoints and automate the most time-consuming IT tasks with NinjaOne.
Start your 14-day free trial of NinjaOne endpoint management.
Benefits of organizing drives with custom drive letters
Before diving into the how-to, look at why you might want to change drive letters in the first place. Customizing your drive letters can offer several advantages:
- Improved organization: By assigning specific letters to different types of drives (e.g., C for system, D for data, E for external), you can quickly identify the purpose of each drive.
- Consistency across multiple computers: If you use multiple machines, setting the same drive letters across all of them can make file management much easier.
- Software compatibility: Some older programs may expect certain files to be on specific drive letters. By changing drive letters, you can accommodate these requirements without physically moving files.
- Network mapping: When setting up network drives, using consistent drive letters can simplify access for all users.
Methods for changing and assigning drive letters
Now that you understand the benefits, you probably want to know, “How do I change drive letters in Windows 10?” There are several methods available, each with its own advantages.
Using Disk Management
Disk Management is a built-in Windows tool that provides a graphical interface for managing your drives. Here’s how to use it to set drive letters:
- Right-click on the Start button and select “Disk Management.”
- Right-click on the drive you want to modify.
- Choose “Change Drive Letter and Paths.”
- Click “Change” and select a new drive letter from the drop-down menu.
- Click “OK” to confirm the change.
The Disk Management tool is straightforward and doesn’t require any advanced technical knowledge. It’s perfect for most users who need to occasionally change or set drive letters for their disks.
Using Command Prompt
For those who prefer working with command-line interfaces, the Command Prompt offers a powerful way to set drive letters. Here’s how to do it:
- Open Command Prompt as an administrator.
- Type “diskpart” and press Enter.
- Type “list volume” to see all available volumes.
- Select the volume you want to modify by typing “select volume X” (replace X with the volume number).
- To assign a new letter, type “assign letter=Y” (replace Y with your desired letter).
- To remove a drive letter, type “remove letter=Y”.
While this method might seem more complex, it offers more flexibility and can be easily automated with scripts.
Using third-party software
There are also numerous third-party tools available that can help you change drive letters. These often provide additional features beyond what Windows offers natively. Some popular options include MiniTool Partition Wizard and AOMEI Partition Assistant. These tools can be particularly useful if you need to perform more complex drive management tasks alongside changing drive letters.
Best practices to set and rename drive letters
While changing drive letters is relatively straightforward, there are some best practices you should follow to retain system stability and maintain good organization:
Avoid frequently changing drive letters for system stability
Changing drive letters too often can lead to confusion and potential system instability. It may also disrupt software or scripts that rely on specific paths. Once you’ve set a drive letter, try to stick with it unless absolutely necessary to change it.
Use consistent naming conventions for better organization
Develop a system for assigning drive letters and stick to it. Consider reserving certain ranges of letters for specific types of drives. This can make it easier to identify the nature of a drive at a glance.
For example, you might use C for your system drive, D for data, E-H for external drives and I-Z for network drives. Consistent drive lettering not only helps with organization but also makes it easier to locate files and manage storage across multiple devices.
Confirm no conflicting drive letters across connected devices
When you connect a new drive, Windows automatically assigns it the next available letter. However, this can sometimes lead to conflicts, especially with network drives. Always check for potential conflicts when assigning new letters.
How to assign a letter to a disconnected drive
Sometimes, you may need to assign a letter to a disconnected drive. This can be useful for setting up network drives or preparing for a drive you plan to connect later. Here’s how to do it:
- Open Disk Management.
- Click on “Action” in the top menu.
- Select “Change Drive Letter and Paths.”
- Click “Add” and choose the letter you want to assign.
- Click “OK” to confirm.
Remember, this assigned letter will only take effect when the drive is connected.
Managing drive letters for external and removable drives
External and removable drives present unique challenges when it comes to drive letter management. Here are some tips:
- Consistency across computers: If you use the same external drive on multiple computers, try to assign it the same letter on each machine for consistency.
- Automatic assignment: Windows can automatically assign the same letter to a specific external drive each time it’s connected. To set this up:
- Connect the drive.
- Open Disk Management.
- Right-click on the drive and select “Change Drive Letter and Paths.”
- Click “Change” and select the desired letter.
- Check “Enable automatic drive letter assignment.”
- Disconnected drives: If you frequently connect and disconnect drives, you might want to leave certain letters unassigned for these drives to use.
Troubleshooting common issues
Even with careful planning, you might encounter some issues when you set drive letters. Here are some common problems and their solutions:
- “The drive letter is already in use”: This error occurs when you try to assign a letter that’s already taken. To resolve it, first change the letter of the conflicting drive, then assign the desired letter to your target drive.
- Unable to change system drive letter: Windows protects the system drive (usually C:) from being changed to prevent system instability. It’s generally not recommended to change this drive letter.
- Programs can’t find files after changing drive letters: Some programs store absolute file paths. After changing a drive letter, you may need to update these paths in the program settings.
- Network drives not showing up: If network drives aren’t appearing with their assigned letters, try disconnecting and reconnecting them or restarting your computer.
🥷 NinjaOne endpoint management has been consistently rated #1 by G2 for years.
Advanced techniques for drive letter management
For power users and IT professionals, you have some advanced techniques for managing drive letters:
- Using Group Policy: In enterprise environments, you can use Group Policy to manage drive mappings across multiple machines.
- PowerShell scripting: PowerShell offers powerful scripting capabilities for automating drive letter management tasks.
- Registry editing: While not recommended for beginners, advanced users can directly edit the registry to manage drive letters.
Streamline your endpoint management today. Easily manage, patch and support all your endpoints with NinjaOne — the top choice for MSPs and IT teams everywhere. Don’t let complex systems hold you back; simplify your operations with NinjaOne. Try it for free and see the difference!

