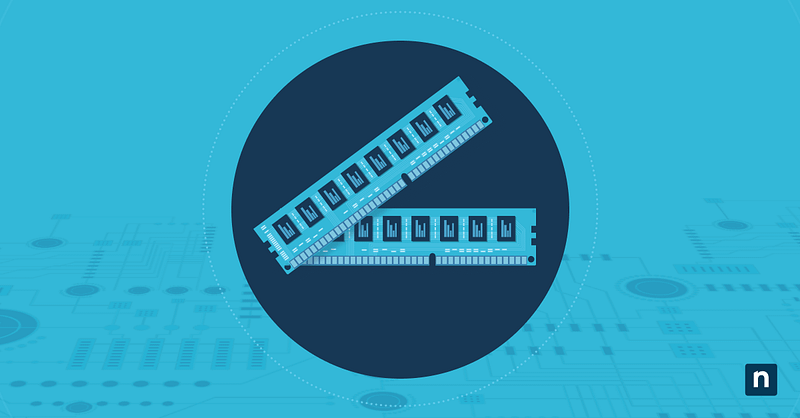
If your computer has been experiencing random crashes, general instability, or the dreaded blue screen of death, faulty RAM might be the cause. Windows 10 includes a built-in diagnostic tool specifically designed to detect memory problems so you can find out relatively quickly!
In this step-by-step guide to checking RAM for errors in Windows 10, we’ll walk you through the process of how to run Windows Memory Diagnostics Tool, interpret its results, and take appropriate action if problems are detected. Whether you’re experiencing issues or just want to perform preventative maintenance, this article will help you ensure your system’s memory is functioning properly.
What is the Windows Memory Diagnostics Tool?
The Windows Memory Diagnostics Tool is how to check for faulty RAM in Windows 10 without third-party software. Its primary purpose is to identify hardware issues within your system’s memory modules that could lead to system instability, data corruption, or application crashes. By methodically testing memory cells and their ability to store and retrieve data correctly, this tool helps pinpoint whether your RAM is the source of system problems you may be experiencing.
Troubleshoot your Windows endpoints with ease.
How it works and what it checks for
The Windows Memory Diagnostics Tool works by writing various test patterns to every memory location and then reading those patterns back to verify they match what was written. This process checks for several types of memory issues:
- Stuck bits (memory cells that are stuck in either a 0 or 1 state)
- Adjacent bit interference (where writing to one memory location affects nearby locations)
- Pattern sensitivity (where specific patterns of data cause errors)
- Timing issues (problems with memory refresh rates)
- Memory addressing errors (failures in properly accessing specific memory locations)
The tool runs through multiple test passes, with each pass becoming progressively more thorough. Basic tests can be completed in minutes, while comprehensive scans may take several hours depending on the amount of RAM installed in your system.
When to use the Memory Diagnostics Tool in Windows
You should consider running the Windows Memory Diagnostics Tool in the following situations:
- After experiencing blue screen of death (BSOD) errors, especially those with error codes like MEMORY_MANAGEMENT, PAGE_FAULT_IN_NONPAGED_AREA, or IRQL_NOT_LESS_OR_EQUAL
- When your system crashes or freezes randomly with no clear pattern
- If applications terminate unexpectedly without warning
- When you notice data corruption in files that were previously working correctly
- After installing new RAM modules to verify they’re functioning properly
- As part of regular system maintenance, particularly for systems that run critical applications
- If you’re experiencing unusual behavior like system slowdowns, graphical glitches, or frequent application errors
Running this diagnostic tool as a first troubleshooting step can save considerable time, as memory issues can manifest in ways that mimic software problems or other hardware failures.
How to run the Memory Diagnostics Tool in Windows 10
Method 1: Using the Start Menu
The most straightforward way to access the Windows Memory Diagnostics Tool is through the Start menu. Here’s how to do it:
Launch the tool via the Start menu
- Click on the Windows Start button in the lower-left corner of your screen.
- Type “Memory Diagnostics” in the search box.
- From the search results, click on “Windows Memory Diagnostic” to open the tool.
- A dialog box will appear with two options for running the diagnostic test.
Restarting immediately or running the test later
When you launch the Windows Memory Diagnostics Tool, you’ll be presented with two options:
- Restart now and check for problems (recommended): Select this option if you’re ready to run the test immediately. Save and close all open applications before selecting this option, as your computer will restart without further warning.
- Check for problems the next time I start my computer: Choose this option if you want to continue working and have the memory test run automatically the next time you restart your computer.
After selecting either option, Windows will restart, and the Memory Diagnostics Tool will run before Windows loads, displaying a blue screen with white text that shows the progress of the test.
Method 2: Using Command Prompt
For users who prefer command-line interfaces or need to run the tool from a script, the Command Prompt method offers additional flexibility.
Using mdsched.exe
- Press Windows key + R to open the Run dialog.
- Type cmd and press Enter (or press Ctrl+Shift+Enter for administrative privileges).
- At the Command Prompt, type mdsched.exe and press Enter.
- The same Windows Memory Diagnostics Tool dialog box will appear with the two restart options as described in Method 1.
Alternatively, you can use the following commands for specific actions:
- To run the diagnostic immediately: mdsched.exe /r
- To schedule the diagnostic for the next reboot: mdsched.exe /s
Options available after restart
Once your computer restarts and the Windows Memory Diagnostics Tool begins running, you’ll see a blue screen interface with the following information and options:
- Status information: Displays the current test pass, the test being performed, and the overall completion status.
- F1 key: Press this to access additional options for the test.
- F10 key: Press this to exit the diagnostic tool and continue booting normally.
When you press F1, you can customize your test with these options:
- Test Mix: Choose between Basic, Standard, or Extended test sequences.
- Cache: Toggle the cache on or off during testing.
- Pass Count: Set how many times the test sequence should repeat.
The Standard test mix is selected by default and is sufficient for most troubleshooting scenarios. The Extended mix performs additional tests but takes significantly longer to complete.
Understanding Memory Diagnostics test results
After the Windows Memory Diagnostics Tool completes its analysis, you’ll need to know where to find the results and how to interpret them. The tool doesn’t prominently display a detailed report upon completion, but Windows does record the outcome where you can access it.
How to access the diagnostic report after the test completes
When the memory diagnostic test finishes, your computer will automatically restart and boot into Windows normally. Unlike many troubleshooting tools, the Memory Diagnostics Tool doesn’t automatically display a results window. Instead, a brief notification may appear in the system tray (notification area) shortly after you log in, indicating whether any problems were found.
If you miss this notification or want to see more detailed information, you’ll need to check the Windows Event Viewer.
Using Event Viewer to find test results
- Right-click on the Start button and select “Event Viewer” from the menu. Alternatively, press Windows key + R, type eventvwr.msc, and press Enter.
- In Event Viewer, navigate to the following location in the left sidebar:
- Windows Logs > System
- In the right panel, click on “Filter Current Log” (or use the “Find” feature).
- In the filter dialog, enter “MemoryDiagnostics-Results” in the “Event sources” field and click OK.
The Event Viewer will now display only the memory diagnostic test results. Double-click on the most recent event to view detailed information.
Interpreting results (no errors vs. detected issues)
The Event Viewer entry will contain one of two general outcomes:
No errors detected
If your memory is functioning properly, you’ll see a message similar to:
The Windows Memory Diagnostic tested the computer’s memory and detected no errors.
This indicates that your RAM passed all the tests successfully, and memory issues are likely not the cause of any system problems you might be experiencing. If you’re still having system stability issues, you may need to investigate other potential causes such as storage device problems, overheating, driver conflicts, or software issues.
Detected issues
If problems are found, the message will indicate that hardware errors were detected:
The Windows Memory Diagnostic tested the computer’s memory and detected hardware errors.
In this case, the report may include additional details such as:
- The specific memory module with the issue (if your system has multiple RAM sticks)
- The type of error detected (e.g., stuck bits, addressing errors)
- The memory address range where errors occurred
- Recommendations for further action
If errors are detected, this strongly suggests that one or more of your RAM modules are faulty and should be replaced. In systems with multiple RAM sticks, you may need to test each module individually to identify which one is problematic.
It’s important to note that even a single memory error is cause for concern. Unlike some hardware issues that might cause intermittent problems, memory errors typically worsen over time and can lead to data corruption, so you should always address them quickly.
What to do if memory errors are found
If the Windows Memory Diagnostics Tool detects errors in your RAM, don’t panic. While faulty memory can cause significant system instability, the issue is often fixable with some straightforward steps. Here are common steps to take if your test results indicate memory problems:
Reseating RAM modules
Sometimes, memory errors occur not because the RAM is defective, but because it’s not properly seated in its slot. Dust or oxidation on the contacts can also cause connection issues that appear as memory errors.
- Power down your computer completely and unplug all cables.
- Ground yourself by touching a metal surface or using an anti-static wrist strap to prevent static electricity damage.
- Open your computer case following the manufacturer’s instructions.
- Locate the RAM modules on the motherboard (they’re typically long, thin components held by clips on both ends).
- Release the retention clips at each end of the RAM module.
- Carefully remove each memory module by pulling it straight up out of its slot.
- Inspect the gold contacts at the bottom of each module for dust or corrosion. If present, gently clean them with a soft, lint-free cloth. For stubborn oxidation, use isopropyl alcohol (90% or higher) and allow it to dry completely.
- Inspect the RAM slots on the motherboard for dust or debris, and if necessary, use compressed air to clean them.
- Firmly reinsert each module into its slot, applying even pressure until the retention clips snap into place.
- Close the computer case, reconnect all cables, and power on the system.
- Run the Windows Memory Diagnostics Tool again to see if reseating resolved the issue.
Running additional memory tests (e.g., MemTest86)
While the Windows Memory Diagnostics Tool is useful, it may not detect all types of memory issues. For more thorough testing, consider using MemTest86, which is widely regarded as the gold standard for memory testing:
- Download MemTest86 from the official website (it’s available as a free download).
- Create a bootable USB drive using the tool provided in the download.
- Boot your computer from the USB drive by changing the boot order in your BIOS/UEFI settings.
- Let MemTest86 run for several complete passes (at least 4 passes are recommended, which may take several hours).
- Monitor for errors during the test. Even a single error indicates a problem with your RAM.
MemTest86 provides more detailed information about errors, including the specific memory addresses where failures occur, which can help identify whether particular RAM modules are at fault.
Replacing faulty RAM
If reseating doesn’t solve the problem and additional testing confirms memory errors, it’s time to replace the faulty RAM:
- Identify which RAM module(s) are faulty if you have multiple sticks:
- If possible, test each module individually by installing one at a time and running the diagnostics.
- Pay attention to which memory addresses show errors, as this can help identify the problematic module.
- Purchase compatible replacement RAM:
- Determine your computer’s RAM specifications (speed, type, and form factor).
- For desktop computers, you can usually mix RAM from different manufacturers as long as the specifications match.
- For laptops, it’s often best to check the manufacturer’s recommendations for compatible memory.
- Install the new RAM following the same procedure used when reseating:
- Ensure proper orientation (the notch in the module should align with the slot).
- Insert the module firmly until the retention clips engage.
- Test the new RAM thoroughly:
- Run both the Windows Memory Diagnostics Tool and MemTest86 to verify the replacement has resolved the issue.
- Stress test your system with demanding applications to ensure stability under load.
- Monitor system performance over the next few days for any signs of instability that might indicate remaining issues.
Alternative memory testing tools
While the Windows Memory Diagnostics Tool provides a convenient built-in solution for troubleshooting memory issues in Windows 10, several third-party alternatives offer more comprehensive testing capabilities. These tools can be valuable when you need more detailed diagnostics or when the Windows tool doesn’t identify issues despite persistent symptoms.
MemTest86
MemTest86 is widely considered the industry standard for memory testing and offers several advantages over the Windows Memory Diagnostics Tool:
- Test coverage: Includes 13 different test algorithms compared to Windows’ more limited test suite
- Detection capability: Can identify subtle and intermittent errors that Windows might miss
- Detailed reporting: Provides precise information about error locations, types, and patterns
- Operating system independence: Runs before any OS loads, eliminating potential interference
- Hardware information: Displays detailed technical specifications of installed memory
- Configuration options: Offers extensive customization of test parameters and sequences
However, MemTest86 requires creating bootable media and has a more technical interface that may intimidate less experienced users.
Other notable alternatives
MemTest86+: An open-source fork of the original MemTest86 with some enhanced features
HCI MemTest: Runs within Windows and can test memory while the operating system is running
TestMem5 (TM5): Popular in overclocking communities for its ability to detect errors in highly-tuned systems
Karhu RAM Test: A paid tool known for quickly finding memory errors, popular among enthusiasts
AIDA64: A comprehensive system diagnostic tool that includes memory testing capabilities
When should I use a third-party tool instead of the built-in Windows option?
Consider using third-party memory testing tools in the following scenarios:
- Persistent issues despite clean Windows test: If the Windows Memory Diagnostics Tool reports no errors but you continue experiencing symptoms consistent with memory problems (system crashes, blue screens, random application failures)
- Overclocked systems: If you’ve overclocked your RAM or adjusted memory timings, third-party tools offer more sensitivity to subtle timing errors
- New system builds: When assembling a new computer, more thorough testing ensures components are functioning correctly before you begin using the system
- Intermittent problems: For issues that occur infrequently, longer and more comprehensive tests have a better chance of detecting errors
- Hardware enthusiast needs: If you need detailed information about error patterns to diagnose specific issues with memory controllers or motherboard components
- Multiple passes required: When you need to run extended testing over many hours or days to verify stability under prolonged use
- Professional environments: In business or enterprise settings where system reliability is mission-critical
For most users, a good approach is to start with the Windows tool for convenience, and if problems persist or more information is needed, progress to a more comprehensive solution like MemTest86.
Frequently Asked Questions (FAQs)
Q: How long does the Windows Memory Diagnostics Tool take to complete?
A: The time required for the Windows Memory Diagnostics Tool to troubleshoot memory issues in Windows 10 varies depending on several factors:
- Amount of RAM: The more memory installed in your system, the longer the test will take. A system with 32GB of RAM will take significantly longer to test than one with 8GB.
- Test settings: Using the Standard setting (default) typically takes 30-45 minutes for a system with 16GB of RAM. The Basic setting completes faster, while the Extended setting can take several hours.
- Pass count: Each additional pass multiplies the testing time. By default, the tool runs one pass, but you can configure it to run multiple passes for more thorough testing.
- System hardware: The speed of your processor and memory can affect testing time, with newer hardware generally completing tests more quickly.
As a general guideline, expect the default test to take approximately 20-30 minutes for systems with 8GB of RAM, 30-45 minutes for 16GB, and 45-90 minutes for 32GB or more.
Q: Can I use my PC while the test is running?
A: No, you cannot use your PC while the Windows Memory Diagnostics Tool is running. The tool operates at a pre-boot level, meaning it runs before Windows loads. This approach is necessary because:
- Testing memory requires exclusive access to read and write to all memory locations
- The operating system itself uses RAM, which would interfere with testing
- For accurate results, the test needs to control all aspects of memory allocation
When you initiate the test, your computer will restart, and the test will run in a specialized environment. Only after the test completes will your computer boot back into Windows. Plan accordingly and save all your work before starting the diagnostic.
Q: What should I do if the tool freezes during the test?
A: If the Windows Memory Diagnostics Tool appears to freeze or stop responding during testing, follow these steps:
- Be patient first: Some tests take longer than others, and what appears to be a freeze might be a particularly intensive test. Wait at least 15-20 minutes before assuming the tool has truly frozen.
- Force a restart: If you’re confident the tool has frozen, press and hold the power button on your computer until it shuts down, then power it back on.
- Consider the freeze a diagnostic clue: A freeze during memory testing often indicates a serious memory problem. The test may have encountered critically faulty memory that prevented it from continuing.
- Try a different testing approach:
- Run the Windows Memory Diagnostics Tool again, but select the Basic test mix instead of Standard or Extended
- Try testing with only one RAM module installed at a time to identify if a specific module is causing the freeze
- Use a third-party tool like MemTest86 that might handle severe memory errors differently
- Check for hardware issues beyond memory: If the diagnostic repeatedly freezes at the same point, consider potential motherboard issues, particularly with the memory controller or BIOS settings.
Q: Is this tool available in Windows 11 and older versions?
A: Yes, the Windows Memory Diagnostics Tool is available across multiple Windows versions:
- Windows 11: The tool is included and functions identically to the Windows 10 version.
- Windows 10: Fully supported in all editions and builds.
- Windows 8/8.1: Available with the same functionality.
- Windows 7: Included and fully functional.
- Windows Vista: First version to include the tool as a standard component.
- Windows XP: Available as part of the Windows Memory Diagnostic, which was a separate download from Microsoft.
Looking for a third-party tool to help manage your Windows systems?
In summary
The Windows Memory Diagnostics Tool provides Windows 10 users with a powerful yet accessible way to identify potential RAM issues before they lead to serious system problems. By understanding how to run this built-in utility, interpret its results, and take appropriate action when issues are detected, you can maintain system stability and extend the lifespan of your computer.
While memory problems can be frustrating, they’re often straightforward to resolve once identified — whether through reseating RAM modules or replacing faulty hardware.
Remember that proactive memory testing is a valuable part of routine system maintenance, not just a troubleshooting step when problems arise. By incorporating occasional memory diagnostics into your maintenance routine, you can catch potential issues early and ensure your system continues to run reliably for years to come.


