Key Points
Remote Desktop Gateway (RD Gateway) enables secure, authenticated, and encrypted remote access to internal corporate resources via HTTPS.
- Install the RD Gateway role on a supported Windows Server, ensuring proper DNS, firewall, Active Directory, and SSL certificate setup.
- Configure Connection Authorization Policies (CAP) to control who can connect and Resource Authorization Policies (RAP) to define which resources users can access.
- Apply best practices by defining user permissions, creating access policies, customizing RD Gateway properties, and setting appropriate security parameters.
- Monitor and maintain RD Gateway by checking Event Viewer logs, tracking SSL certificate expiry, and ensuring timely renewals to prevent outages.
The modern work environment is no longer confined to the traditional office space. Employees need seamless and secure access to internal resources when working from home, traveling, or in satellite offices. Remote access solutions bridge the geographical gap, enabling users to connect to the corporate network from virtually anywhere.
While various remote access solutions exist, Microsoft’s Remote Desktop Gateway (RD Gateway) is key. But what is Remote Desktop Gateway server and how does it secure remote access to corporate networks?
In this guide, we will help you understand RD Gateway, offer a step-by-step approach to configure the gateway for remote desktops, provide an overview of security considerations, and discuss how best to address common issues.
What is RD Gateway?
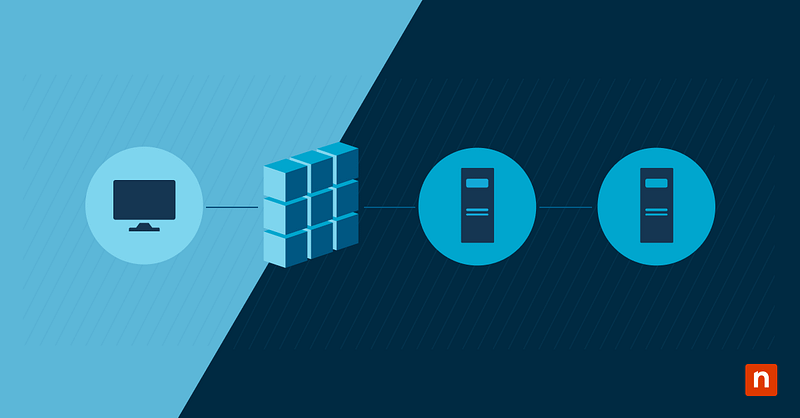
RD Gateway, Microsoft Remote Desktop Gateway, or simply Remote Desktop Gateway, is a role service in Windows Server that enables authorized remote users to connect to resources within an internal corporate network over a secure channel. It acts as an intermediary between remote desktop clients and the target internal network, ensuring that connections are authenticated, encrypted, and routed through a secure tunnel.
It acts as a gateway between the public internet and the internal network, shielding it against unauthorized access.
Enhance RDG by utilizing NinjaOne Remote Access to create a secure and efficient remote access infrastructure.
Reasons to use Remote Desktop Gateway
Organizations often ask how secure Remote Desktop Gateway (RD Gateway) is. There are several reasons an organization may elect to use RD Gateway to manage remote server connectivity. These include:
- Securing access to internal resources: RD Gateway ensures secure access by authenticating users and routing connections through a common location. This is particularly crucial when dealing with sensitive information or compliance requirements.
- Encryption and data protection: To further address the question of how secure is Remote Desktop Gateway, RD Gateway encrypts data transmitted using the Remote Desktop Protocol (RDP) with HTTPS, preventing unauthorized interception and ensuring the confidentiality and integrity of information transmitted between the client and the internal network.
- Centralized access control and auditing: Administrators can establish centralized access controls, defining user permissions and groups. Additionally, RD Gateway provides robust auditing features, allowing organizations to monitor and track user activities for compliance and security purposes.
- Simplified remote desktop configuration: RD Gateway simplifies the configuration of remote desktop connections by mediating between remote clients and internal resources. This eliminates the need for complex networking setups and facilitates a streamlined user experience.
- Enhanced user experience and productivity: By providing a secure and seamless connection to internal resources, RD Gateway enhances user experience, promotes productivity among remote employees, and reduces potential connectivity issues.
How Does Remote Desktop Gateway work?
Microsoft Remote Desktop Gateway is an intermediary that mediates connections between remote desktop clients and internal resources. It authenticates users, ensures secure data transmission, and facilitates the seamless flow of information between the remote client and the internal network.
Employing a two-step authentication ensures that users are first authenticated through a secure login process. Once authenticated, the RD Gateway verifies the user’s authorization to access the requested internal resources.
The HTTPS protocol tunnels connections to the internal network through a secure channel. This ensures that data transmitted between the client and the internal network is encrypted, safeguarding it from potential eavesdropping or tampering.
RD Gateway is compatible with many remote desktop clients, including the native Windows Remote Desktop Connection client, third-party applications, and even mobile devices. RD Gateway uses load balancing to distribute incoming connections across multiple servers. This maintains performance and availability during high traffic.
Installing RD Gateway
Before setting up RD Gateway, there are several steps that you need to take into consideration first:
Windows server: Ensure you have a Windows Server operating system installed, such as Windows Server 2022 or Windows Server 2019. This provides the foundation for running the RD Gateway role.
Network infrastructure:
- DNS: Ensure your DNS records are correctly configured and accessible within your network. The DNS server must resolve the server’s hostname and IP address.
- Firewall rules: Open the required firewall ports on the Remote Desktop Gateway server and any intermediate firewalls. Allow TCP port 443 for HTTPS, which secures RD Gateway communication. Do not open port 3389, as RD Gateway encapsulates RDP traffic within HTTPS.
Active Directory: Users must have the appropriate permissions to access the Remote Desktop Gateway server and its resources. That’s why one of the prerequisites is having a domain environment with Active Directory for user authentication and authorization.
SSL certificate: A valid SSL certificate from a trusted authority secures communication between the Remote Desktop Gateway server and clients, ensuring data confidentiality and integrity.
Installation
- Open Server Manager: Launch Server Manager on your Windows Server. This is the central management tool for Windows Server.
- Add Roles and Features: Navigate to the “Manage” menu and select “Add Roles and Features.” This wizard will guide you through adding the necessary roles and features to your server.
- Select RD Gateway: Choose “Role-Based or Feature-Based Installation” and select the appropriate server. In the “Select server roles” section, locate and select “Remote Desktop Services” and then “Remote Desktop Gateway.” Follow the on-screen prompts to complete the installation.
Install SSL Certificate
- Obtain certificate: An SSL certificate authenticates the Remote Desktop Gateway server to clients and encrypts communication. Therefore, it’s essential to only acquire a valid SSL certificate from a trusted certificate authority.
- Import certificate: Use the Microsoft Management Console (MMC) to import the certificate into the local computer’s personal store. This makes the certificate available for use by the RD Gateway.
- Configure RD Gateway: Open the RD Gateway Manager, navigate to the server node, and select the “Properties” option. Under the “SSL Certificate” tab, select the installed SSL certificate to associate it with the RD Gateway server.
Setting Up RD Gateway
Configure Server:
- Network settings: The Remote Desktop Gateway server’s network settings, including IP address, subnet mask, and default gateway, must be correct. This step is important to enable the server to communicate with other devices on the network.
- Define access rules: A Connection Authorization Policy (CAP) lets you control who can access the remote desktop environment. You can employ this by creating CAPs to specify users or groups who can connect to the Remote Desktop Gateway.
Creating Connection Authorization Policy (CAP)
Create VPN connections: VPN connections provide a secure tunnel for traffic to reach the RD Gateway. Sometimes, you are also required to create Virtual Private Network (VPN) connections to cater to remote locations or networks that need access to the RD Gateway.
DNS settings: Verify that the server can resolve DNS names correctly. This is essential for accessing network resources.
Set conditions: Preset conditions help you implement additional security measures and restrictions. Define conditions for access, such as specific IP addresses, time periods, or device types.
Creating Resource Authorization Policy (RAP)
Grant access: Creating a Resource Authorization Policy (RAP) lets you control which resources are accessible to different users. Create RAPs to grant users or groups access to specific resources within the internal network.
Define permissions: Specify the level of access (e.g., full control, read-only) for each resource. This determines what actions users can perform on the resources.
RD Gateway configuration best practices
Once RD Gateway has been installed, several configuration steps are required to align with remote access best practices:
Establish Remote Desktop Gateway policies
Define Remote Desktop Gateway policies to control user access, connection parameters, and security settings. Launch the RD Gateway Manager and navigate to the “Policies” node. Right-click, and select “Create New Authorization Policies.” Follow the prompts to define access policies based on user groups, resource authorization, and connection parameters.
Define user access permissions and groups
Configure user access permissions and groups to determine who can connect to the RD Gateway and the internal resources. Navigate to “Server Manager” and select “Remote Desktop Services” from the left-hand menu. Under the “Collections” node, select the collection you want to configure. In the “Tasks” pane, click on “Edit properties,” and under the “User Groups” tab, define the user groups allowed to connect.
Customize RD Gateway properties
Customize RD Gateway properties to align with your organization’s requirements and security policies. Launch the RD Gateway Manager, navigate to the server node, right-click, and select “Properties.” Adjust settings such as timeout periods, device redirection, and logging options to match your organization’s needs.
Troubleshooting common configuration issues
If errors or difficulties arise during or after the setup process, check the Event Viewer for any RD Gateway-related events or errors. This can provide insights into potential issues.
A common RD Gateway, resulting in a total service outage, is related to SSL certificate expiration. Regularly monitor the expiry date of your SSL certificate and configure reminders to allow sufficient time for a new certificate to be secured and installed before the existing one expires to prevent connectivity issues.
Boost the security and efficiency of your remote access setup by integrating NinjaOne Remote Access with RDG.
Secure your remote connections the right way – watch how to set up Remote Desktop Gateway.
Embrace the full potential of RD Gateway
Setting up a Remote Desktop Gateway provides secure and efficient remote access. Proper setup, maintenance, and operation ensure the RD Gateway functions as a reliable access point for organizations
RD Gateway is pivotal in ensuring encrypted and authenticated connections, allowing organizations to embrace remote work without compromising security.
NinjaOne Remote is NinjaOne’s remote access tool integrated directly into NinjaOne RMM. Built from the ground up, it offers a strong and secure RDP tool using our own gateway. Watch a demo or sign up for a free trial to see Ninja Remote in action.


