

Key Points
- Clean installation of Windows 10 is possible even without a USB. You can use Reset This PC, Windows Recovery Environment, an ISO file, or a network share.
- Reset This PC (Local reinstall or Cloud download) is the fastest and most reliable built-in option.
- If Windows won’t boot, use Windows Recovery Environment > Troubleshoot > Reset this PC to reinstall from the cloud.
- After installation, use your backed-up drivers to get your device back online and up-to-date. You can then delete the win_setup partition and expand your system partition to use the whole disk.
- Always back up files and drivers before starting, as a clean install may erase your data.
This tutorial demonstrates how to install Windows 10 without a USB or DVD. It includes step-by-step instructions for installing Windows without a USB flash drive or DVD, using only the internal storage or cloud tools. It also explains how to do this while retaining device drivers and other files on a separate partition.
💡If you prefer a visual guide, watch How to Clean Install Windows 10 without a USB Flash Drive or DVD [Video]
Windows clean install prerequisites and precautions
If malware or system corruption has left your Windows PC in an unstable state, it may be necessary to completely reinstall Windows. This is challenging on devices without DVD drives or limited USB ports, but can be achieved using built-in Windows tools. As re-installing Windows has the potential to wipe your device (especially if you are working with a damaged device), you should ensure the following before you continue:
- Back up your files and data to a separate device
- Ensure your device is connected to a stable internet or network connection if relying on these to reinstall Windows to prevent the process from being interrupted (and potentially leaving your device unbootable)
- Make sure Windows is as up-to-date as possible
- Make sure you have enough disk space available to use your chosen method
- Disconnect any USB devices that aren’t needed (i.e., only keep your keyboard and mouse plugged in, as an input device is required for all of these methods)
- Most modern systems use a digital license automatically reactivated after reinstall. Only record your product key if you are using a retail or legacy key.
Before you begin, you should also back up your device drivers and either copy them to the cloud or a network location, or to an extra partition that will be retained through the Windows installation process.
NinjaOne’s remote monitoring platform allows Helpdesks to stay ready and agile.
Method 1: Using the “Reset This PC” built-in Windows feature
Windows includes a built-in tool for resetting Windows to its default settings and removing all applications and configurations called Reset This PC. This is the first method you should attempt as it is the fastest and most reliable.
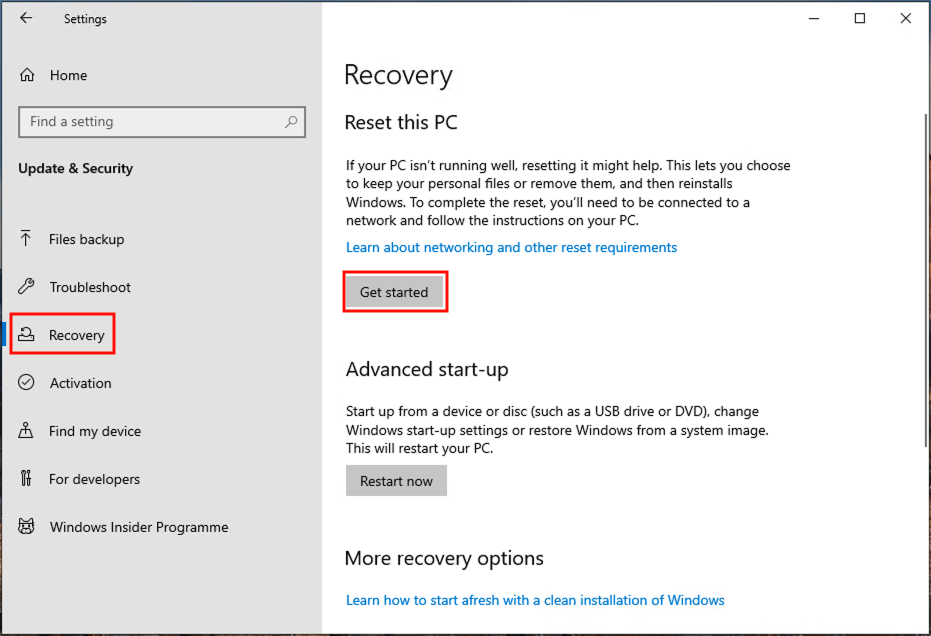
- Right-click on the Start button and select Settings
- In the Settings app, click Update & Security
- In the navigation menu to the left, select Recovery
- Under Reset this PC, click the Get started button
- Choose whether to Keep my files or Remove everything (note that when you keep your files, this only includes files in your user profile, and you should back them up to a separate device as a precaution)
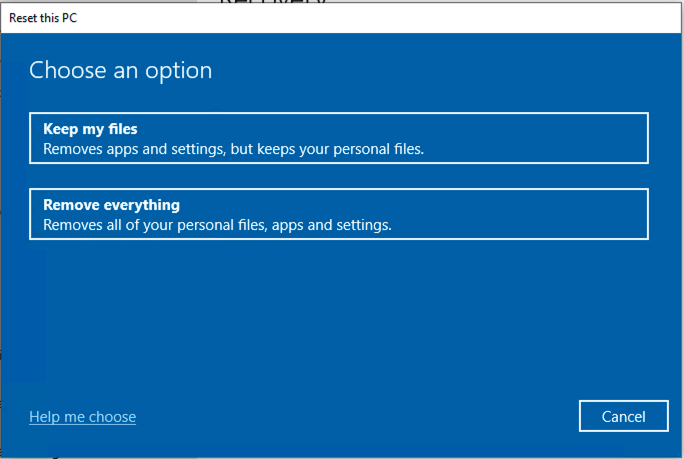
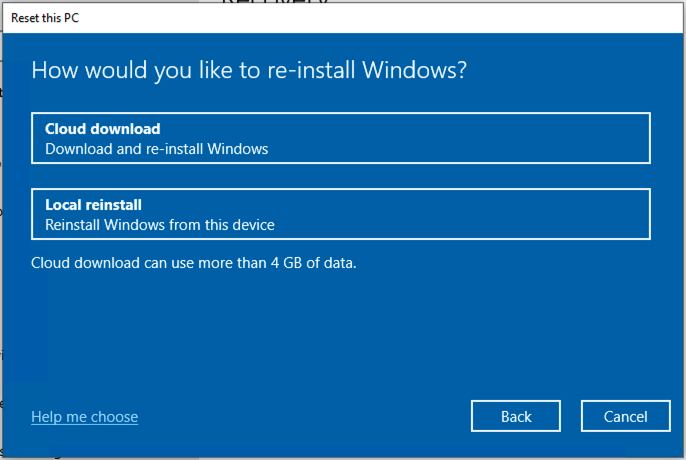
- You will then be prompted whether to perform a clean install of Windows 10 using a Cloud download or Local reinstall
For the fastest clean install of Windows 10, you should choose the Local reinstall option. If, however, you are concerned about missing or corrupted system files and want to install Windows with the latest updates, you should select the Cloud download option.
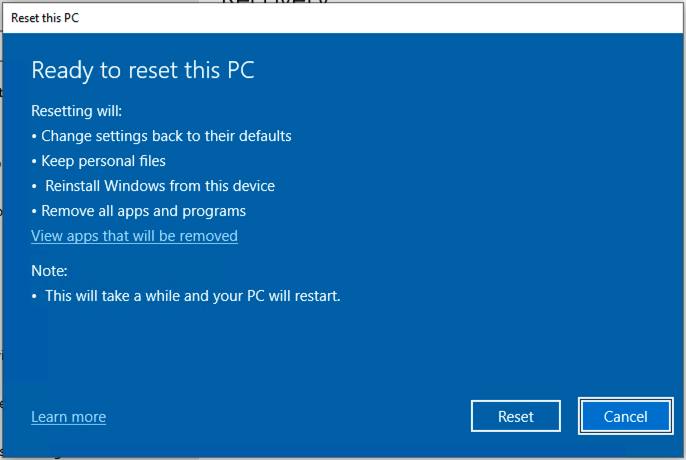
- Change any Additional settings that are relevant to you such as whether pre-installed apps should be re-installed and click Next
- On the Ready to reset this PC screen, confirm the options that you have selected and that the actions that will be taken are correct, and click Reset to reset your PC
Method 2: Using Windows 10 Cloud Recovery from Windows Recovery Environment
If your Windows PC cannot boot normally due to corrupted/missing system files, you can try to use the Reset This PC feature from the Windows Recovery Environment (Windows RE) to do a clean reinstall of Windows from the cloud:
- Start your PC in the Windows Recovery Environment by holding the Shift key as it boots, or using a Windows Recovery USB stick (your device may also boot directly into the Windows Recovery Environment if it has failed to boot several times in a row)
- Select Troubleshoot
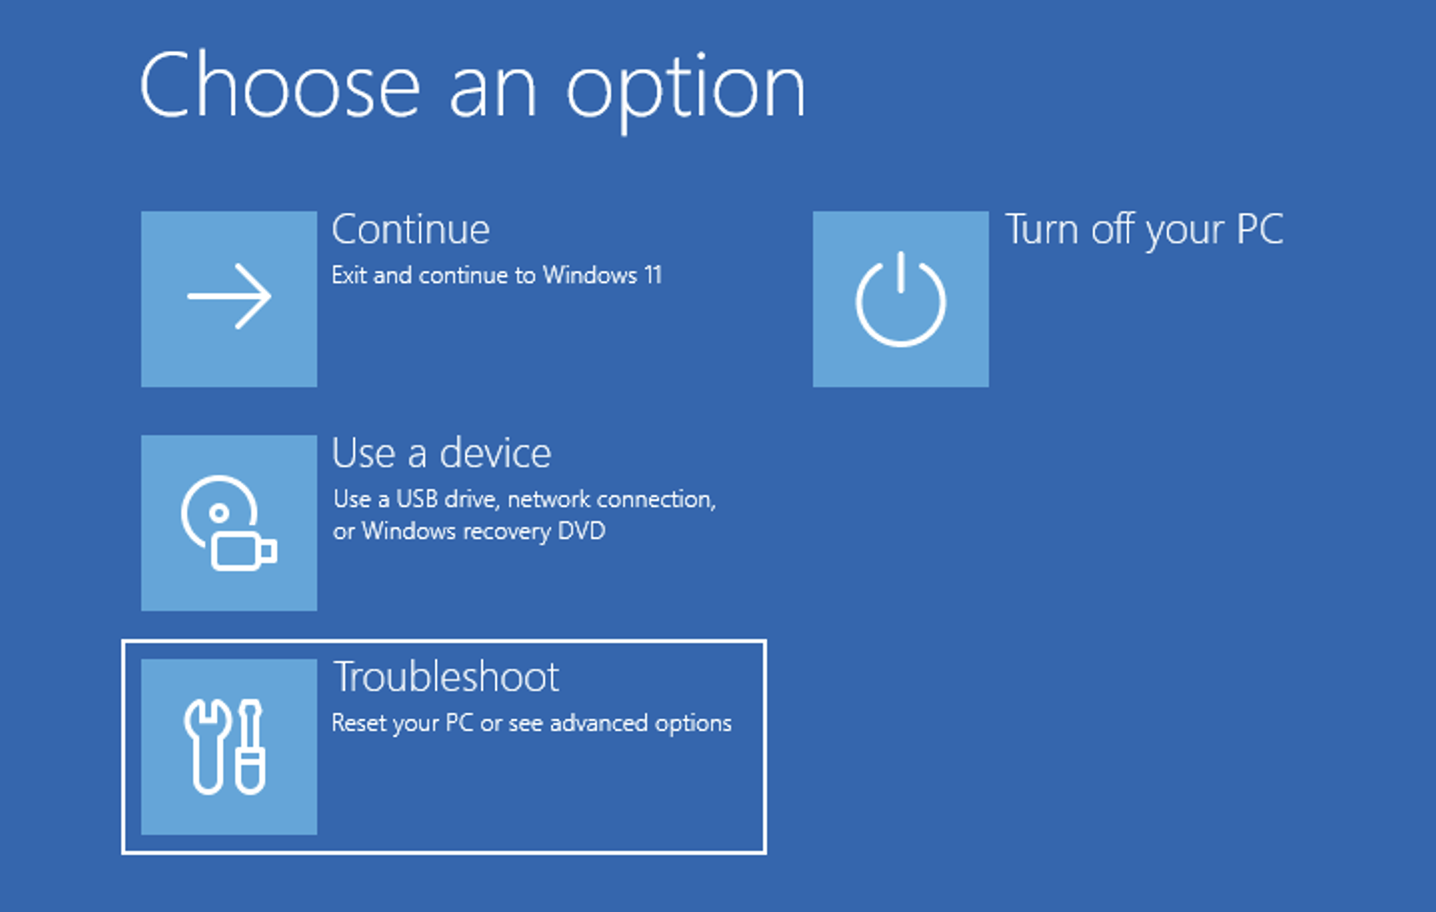
- Select Reset this PC
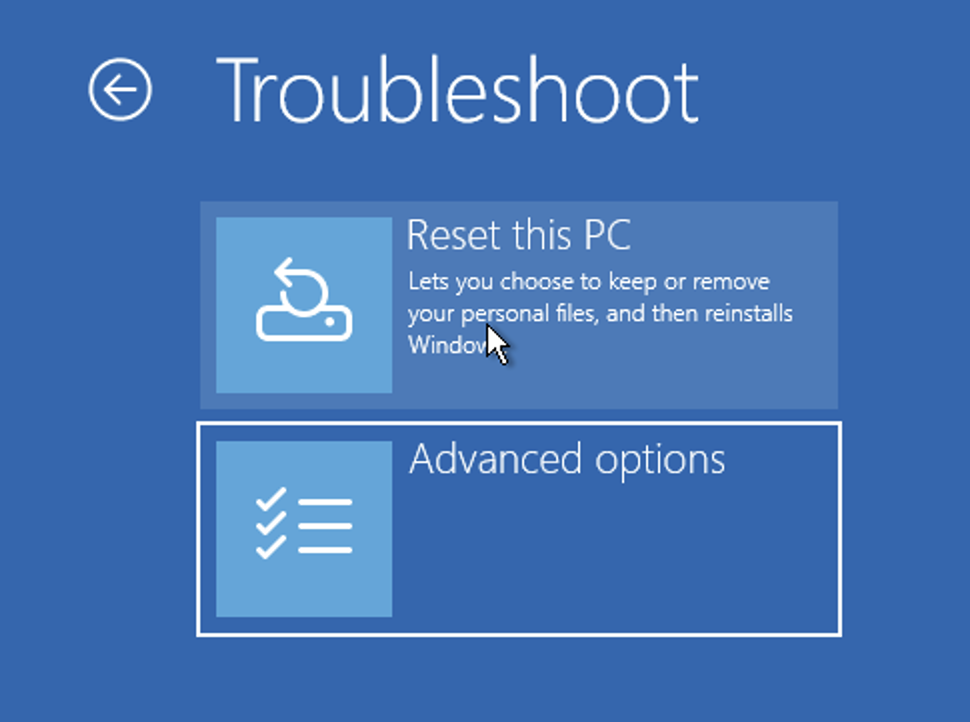
- Choose whether to Keep my files or Remove everything
- Your device will then reboot, and you will need to enter the login information for an administrator
- You will then be prompted to select whether to perform a clean install of Windows from a Cloud download or a Local reinstall (select Cloud download in this case)
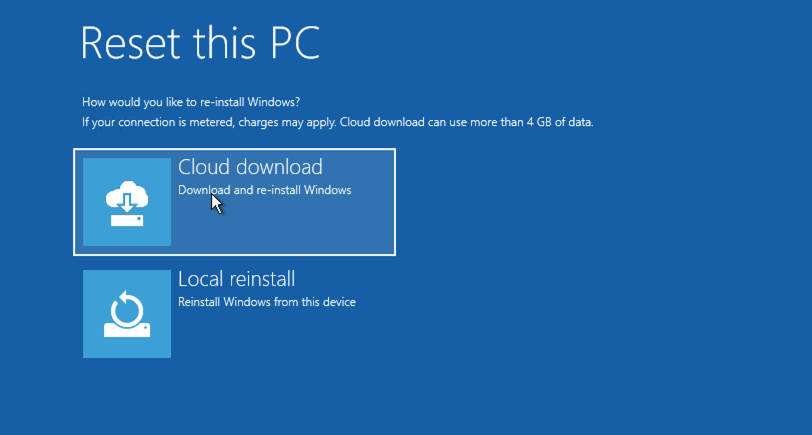
- Click the Reset button after confirming the actions that will be taken to reset and reinstall Windows

Method 3: Using the Windows 10 ISO
If, for some reason, you cannot use the Windows Reset this PC feature, you can also perform a clean install of Windows 10 without a DVD or USB flash drive using the Windows installation ISO disk image. This method is more complex and has the potential for making mistakes, and should be used as a last resort. Note that this method does not retain your user files unless you manually copy them.
Part A: Create a new partition to hold Windows installation files and drivers
You will need a separate partition to hold Windows installation files, drivers, and any other files you want to survive and be available in the fresh install of Windows 10. Follow these instructions to create one by shrinking your current primary partition and creating a new partition of at least 10GB in size.
Name the new partition win_setup, create a folder called win_setup_iso, and a folder named drivers in the new partition.
Part B: Download and extract the Windows 10 ISO
- Download the Windows 10 media creation tool or ISO disk image from Microsoft, selecting the correct language and version for your hardware (32 or 64 bit)
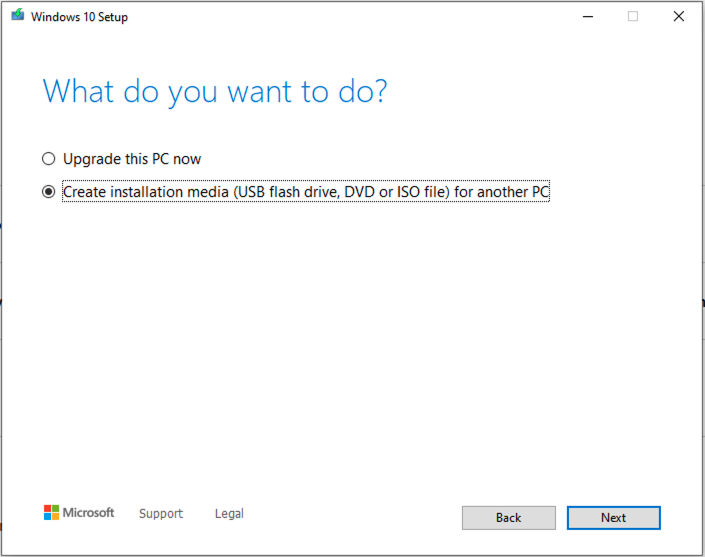
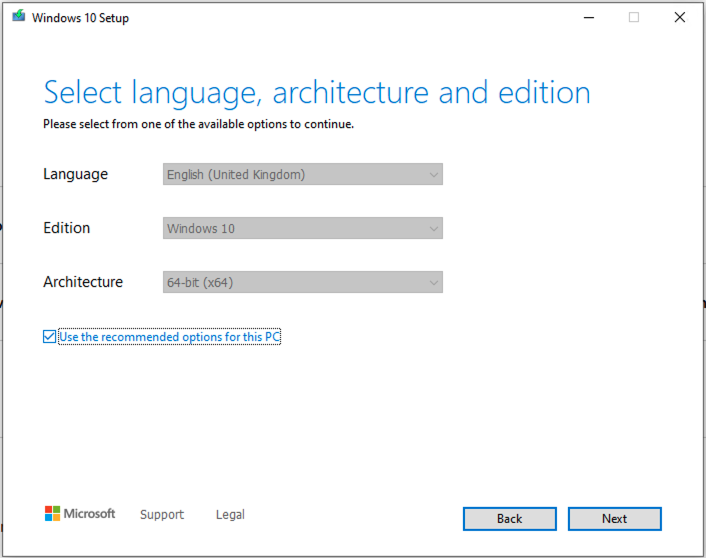
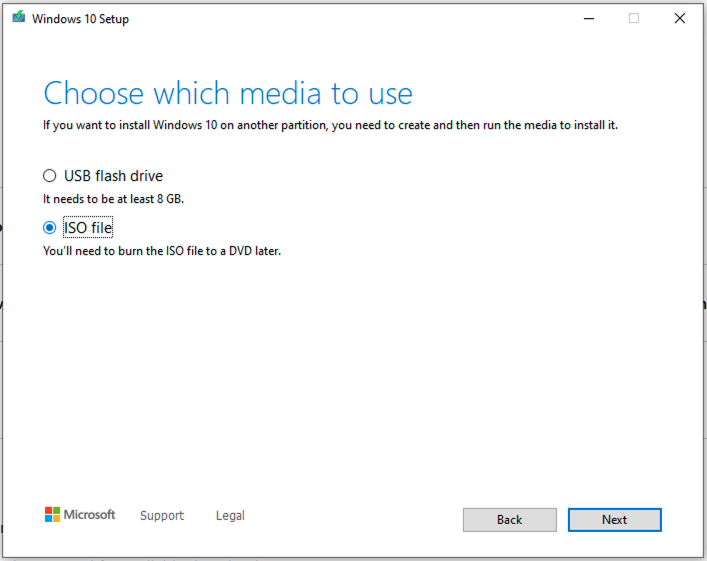
- If you downloaded the Windows media creation tool, open it and select Create installation media when prompted, then choose the correct language, architecture, and edition for your device, and finally choose ISO file and save it to your desktop
- Once you have downloaded the Windows 10 installation ISO image to your desktop, right-click on the .iso file and select Mount to view the files in it
- Select all the files in the ISO image and copy them into the win_setup_iso directory on the partition created in part A above
Part C: Back up your drivers and files and copy them to the new partition
Download or back up the drivers for your display, networking, input, and other devices so that they can be installed again later. Then, copy them to the driver’s directory created in part A.
You can also copy other files you want to keep to this volume, but you should back them up to a separate device in case there is a problem, and you need to delete all partitions.
Part D: Open the Command Prompt in recovery mode
Restart your device into advanced recovery mode by opening the Settings app and then navigating to Update & security > Recovery and clicking Restart now under Advanced startup. Then, follow these steps to start a clean reinstall of Windows without needing to boot from installation media:
- Once your PC has rebooted into advanced startup, click Troubleshoot
- Click Advanced options
- Open the Command Prompt
- You will then be prompted to enter the username and password of an administrator user
Part E: Identify partitions
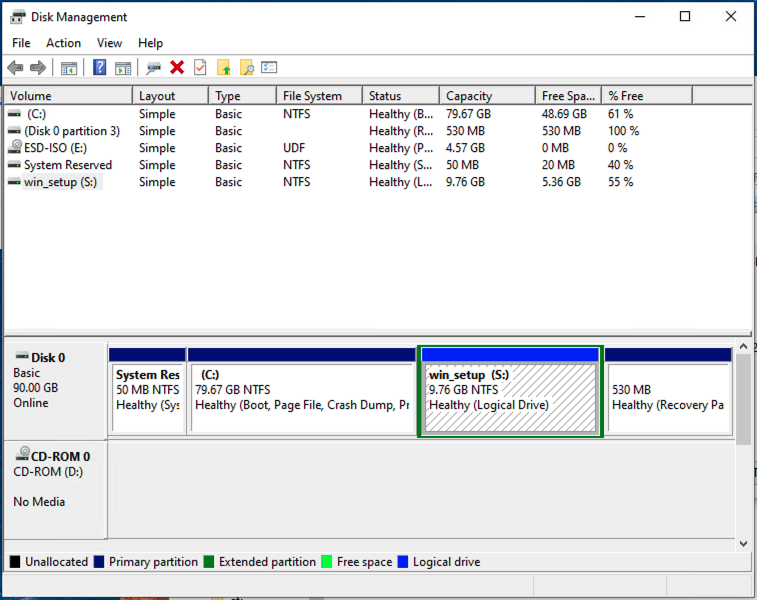
You need to be able to positively identify the win_setup partition that was created in part A so that you do not accidentally delete it during the installation process, as the drive letter may change. To do this:
- Enter the command diskpart into the Command Prompt to open the diskpart disk partitioning tools
- Enter the command list vol
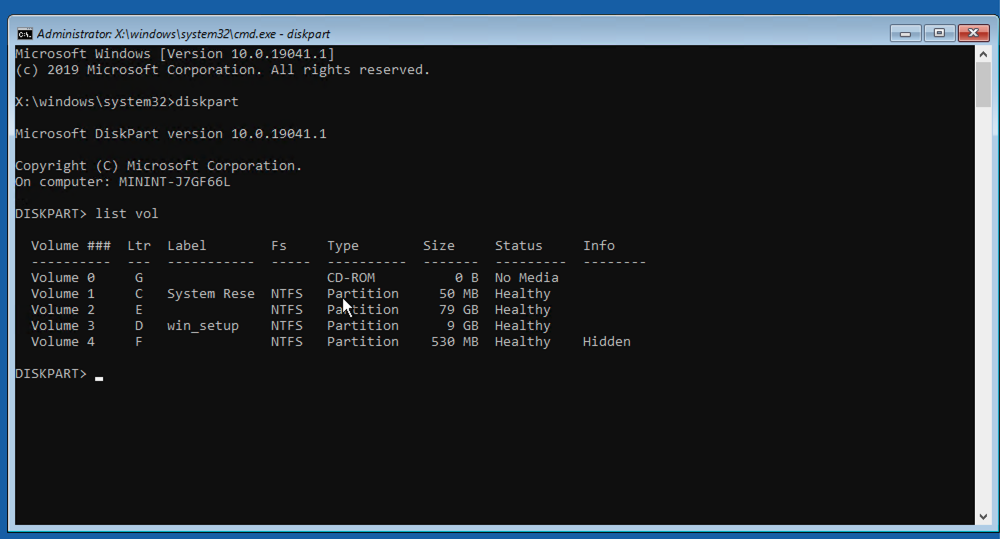
- Make a note of the value in the Volume ### and Ltr (drive letter) columns next to the volume with the win_setup label
- Type exit and press Enter to quit the DiskPart tool
Part F: Start setup for a clean install
You can now reinstall a fresh copy of Windows from the extracted ISO, while retaining the files on the win_setup volume.
- Enter the command D:\win_setup_iso\setup.exe (replacing D:\ with the drive letter noted above) to start the Windows installation
- Select your language and other options and click Next, then click Install now
- Enter your product key if you need one, or select I don’t have a product key if your device is licensed or you want to enter it later, then select the version of Windows to install and accept the license terms
- Select the version of Windows 10 to install
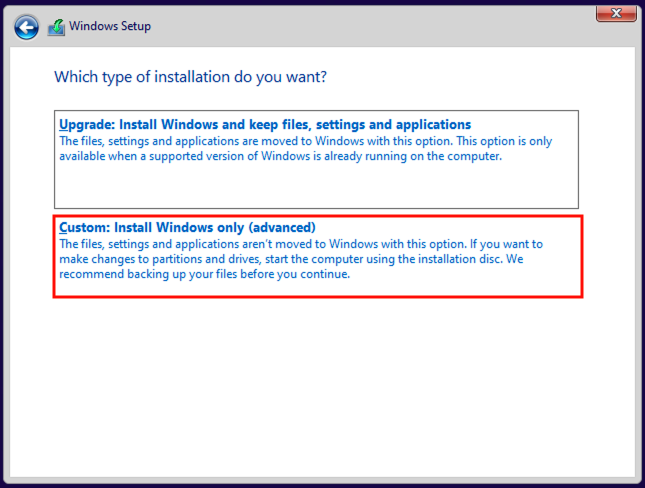
- Select Custom as the installation type
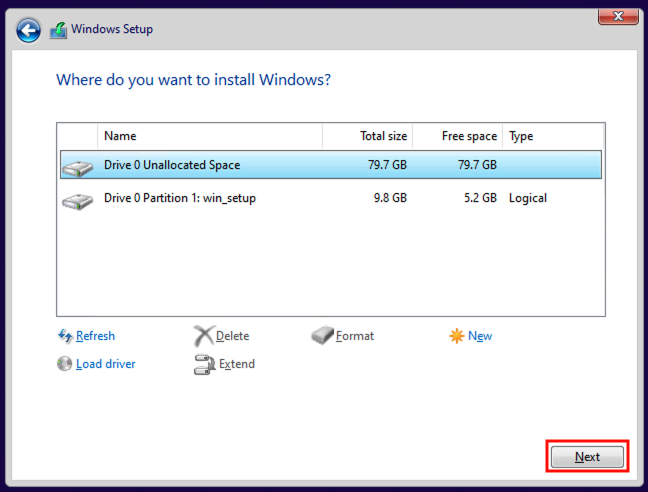
- Select each partition except the one identified as win_setup and then click the Delete button until only the win_setup partition and Unallocated space remain
- Click on the Unallocated space and click Next to create a new partition that fills this space, and install Windows on it
- The Windows installation process will now begin as normal

Method 4: Re-installing Windows without installation media using a network share
The method described above can also be adapted to perform a clean reinstall of Windows on a device over a network connection. This is useful if there is limited storage available for repartitioning.
This requires a second Windows PC that is connected to the same network as the device you want to install Windows on, and a shared folder:
- On the device that you want to host the Windows installation files, create a new folder named win_setup
- Right-click on the folder and click Properties, then navigate to the Sharing tab and click on Advanced Sharing
- Check Share this folder and then click on Permissions
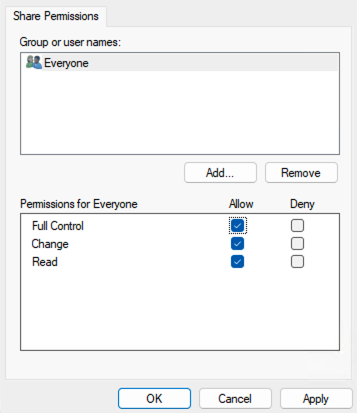
- Select Everyone from the list of Group or user names: and then check the checkbox in the Allow column next to Full control, and then press OK to confirm the change and share the folder
- Perform the steps from part A above, but only create a partition large enough to hold your network drivers
- Follow the steps from parts B and C above, but copy the Windows ISO files to the shared directory rather than the new partition
Then, reboot into Windows Recovery and open the Command Prompt by following the steps from part D above. Then complete the fresh installation of Windows 10 over the network:
- Run the command wpeinit to initialize networking
- Connect to the network share by running the command net use S: “\IPADDRESS\win_setup” (replacing IPADDRESS with the IP address or hostname of the PC you are sharing the ISO files from)
- Run the command S:\win_setup_iso\setup.exe
- Continue with setup per the steps in part F above
Enjoy full visibility on key IT deployments and installations.
Post-installation tasks
Once you have successfully installed a fresh copy of Windows, you can use your backed-up drivers to get your device back online and up-to-date. You can then delete the win_setup partition and expand your system partition to use the whole disk.
Troubleshooting a fresh installation of Windows 10
If you run into trouble due to corrupted system files, malware, or, you may need to run system restore to revert to a previous known good state. You can also attempt to undo a recent system restore.
You can also tryusing the sfc /scannow command to scan for and repair damaged Windows system files. Generally, it is recommended to use the Reset this PC feature rather than copying the contents of the Windows ISO to a new partition to perform a fresh install of Windows.
Installing and recovering Windows remotely and at scale
NinjaOne Backup lets you remotely back up and restore full system images, as well as user files, for Windows 10 and Windows 11 devices. Protect your IT environment by starting your free trial of NinjaOne today.


