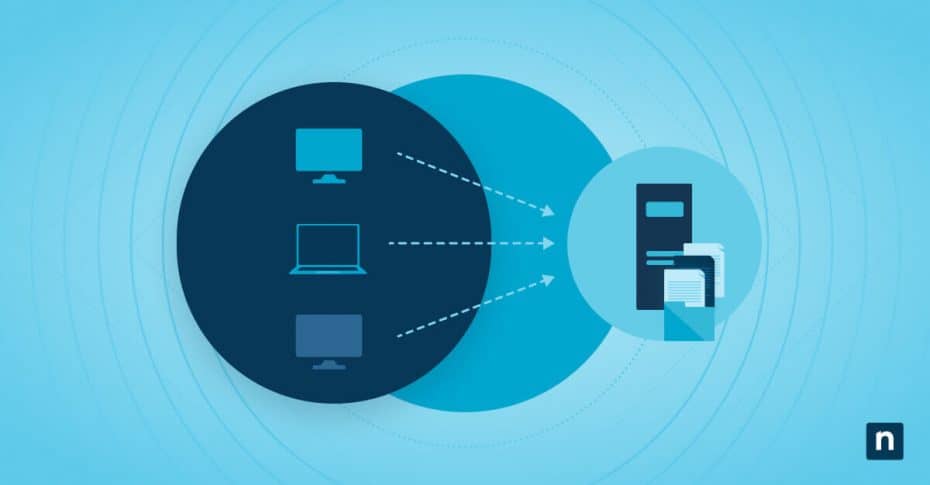
NFS is a protocol that enables users to access files over a network as if they were on their local storage. It facilitates seamless file sharing and data access across networked environments, making it an essential tool for collaborative workspaces and distributed systems.
This guide aims to provide a detailed overview of the Network File System (NFS), its definition, purpose, functionality, and benefits. It will help readers understand the importance of NFS in network environments, how it operates, its advantages over other file-sharing methods, and its typical use cases in both small and large-scale network infrastructures.
History and significance
NFS was originally developed by Sun Microsystems (now Oracle) in the early 1980s, with the first publicly released version, NFSv2, debuting in 1984. NFSv2 provided basic file-sharing capabilities and laid the foundation for future enhancements. In 1995, NFSv3 was introduced, improving performance and supporting larger file sizes.
NFSv4, released in 2000, brought significant enhancements, including strong security using Kerberos, stateful operations, and improved file locking. NFSv4.1, released in 2010, introduced parallel NFS (pNFS) for better scalability and performance in clustered environments. The latest version, NFSv4.2, released in 2016, added features like server-side copy, application I/O advice, and further improved pNFS and security.
NFS has revolutionized data sharing and access in network environments by providing a standardized method for file sharing, enabling more efficient collaboration and data management across diverse systems and platforms. Each version brought improvements such as better performance, security enhancements, and support for stateful protocols, contributing to NFS’s current state as a robust file-sharing solution.
How NFS works
NFS operates on a client-server architecture. The server hosts shared files, while the client accesses these files over the network. This architecture enables centralized management and decentralized data access, making it efficient for various network configurations. NFS is crucial in networking and file sharing because it enables seamless collaboration, centralized storage management, and efficient utilization of resources.
By allowing files to be accessed and shared across a network, it eliminates the need for each user to have a local copy of every file, saving storage space and reducing redundancy. NFS’s cross-platform compatibility ensures that users can access files from different operating systems, fostering collaboration in diverse environments.
Components of NFS
- NFS server: A machine or device that shares its files and directories with other systems over the network. It runs the NFS server software and manages access control and file locking.
- NFS client: A machine or device that accesses shared files and directories from the NFS server. It mounts the shared resources onto its local file system, making them appear as local files.
- Remote Procedure Call (RPC): A stateless, connectionless protocol that allows a program on one computer to run a program on another computer. It is used by NFS for communication between clients and servers.
- NFS protocol: Defines the format and procedures for NFS operations such as file reading, writing, and metadata management. It operates on top of RPC.
Process of file sharing using NFS
The process involves several steps:
- Server exports directories and starts NFS services.
- Client sends a mount request to the server.
- Server processes the request and authenticates the client.
- Server grants access, and the client mounts the shared directory.
- Client requests file access (read/write operations).
- Server processes these requests and transfers the data.
- Client interacts with the file as if it were on local storage.
- Client unmounts the file system when done.
- Server logs activities for monitoring and troubleshooting.
Benefits of using NFS
NFS offers several advantages over SMB and FTP, including better performance in UNIX environments, simplified configuration, and more efficient data handling. Unlike FTP, NFS allows users to mount remote directories directly into their file system. NFS can scale from small home networks to large enterprise environments. Its flexibility allows it to adapt to various network configurations and user needs, making it suitable for different organizational sizes.
NFS reduces the overhead associated with file transfers, resulting in faster access times and improved overall system performance. It is optimized for use in UNIX environments, which further enhances its efficiency. NFS supports various operating systems, including UNIX, Linux, and Windows, enabling seamless file sharing across different platforms. This compatibility ensures that organizations can integrate NFS into diverse IT environments.
NFS is particularly beneficial in environments with large numbers of clients accessing shared resources, such as corporate networks, educational institutions, and research facilities, where it ensures efficient data access and management. NFS can be integrated with numerous operating systems and network devices, making it a versatile solution for diverse IT infrastructures. It supports various versions of UNIX, Linux distributions, and even Windows through additional services.
NFS use cases
NFS is widely used in enterprise file sharing, collaborative workspaces, and environments requiring centralized data management. It supports scenarios like shared project directories and central file repositories. In corporate settings, NFS allows multiple users to access and share critical business data, enhancing collaboration and productivity.
It is in widespread use in development environments where code and resources are shared among team members. Due to its inherently networked nature, NFS is increasingly used in cloud computing, virtualization, and IoT, providing reliable and efficient data access across distributed systems.
It supports virtualized environments where storage resources need to be shared dynamically; in highly networked fields such as astronomy, or genetics research, it facilitates data sharing and collaboration among researchers and students, supporting large datasets and computational workflows.
Universities and research institutions often rely on NFS for managing data-intensive research projects. NFS supports remote work by enabling secure and efficient access to shared files from different locations, helping teams collaborate effectively despite geographical barriers. It ensures that remote users have the same access to data as local users.
Setting up NFS
Setting up NFS requires reliable server hardware and network interfaces, along with NFS server and client software. The operating systems must be compatible, including Linux, UNIX, Windows, and macOS. Ensuring these basic requirements are met will facilitate a smooth setup and operation of NFS in your network environment.
Linux
Install NFS server package:
- In a terminal, update package lists: sudo apt-get update (Debian/Ubuntu) or sudo yum update (RHEL/CentOS).
- Install NFS server: sudo apt-get install nfs-kernel-server (Debian/Ubuntu) or sudo yum install nfs-utils (RHEL/CentOS).
Configure shares in /etc/exports
- Open the /etc/exports file in a text editor: sudo nano /etc/exports
- Add export entries: Specify directories to share and access permissions, one share per line. Example:
/shared_directory 192.168.1.0/24(rw,sync,subtree_check) - Save and close the file.
Start NFS services
- Enable NFS server to start on boot: sudo systemctl enable nfs-kernel-server (Debian/Ubuntu) or sudo systemctl enable nfs (RHEL/CentOS).
- Restart the NFS server to apply changes: sudo systemctl restart nfs-kernel-server (Debian/Ubuntu) or sudo systemctl restart nfs (RHEL/CentOS).
- Check the status of the NFS server: sudo systemctl status nfs-kernel-server (Debian/Ubuntu) or sudo systemctl status nfs (RHEL/CentOS).
Open firewall ports (if applicable)
- Allow NFS service through the firewall: sudo ufw allow from 192.168.1.0/24 to any port nfs (if using UFW) or sudo firewall-cmd –permanent –add-service=nfs && sudo firewall-cmd –reload (when using firewall).
Mount the NFS share on the client
- Create a mount point: sudo mkdir /mnt/nfs_share.
- Mount the NFS share:
- Either mount with sudo mount 192.168.1.1:/shared_directory /mnt/nfs_share OR
- Define the share in /etc/fstab with a line like server_ip:/shared_directory /local_mount_point nfs auto,nofail,defaults 0 0 – it will be automounted on boot or if you run sudo mount -a (will attempt to mount all /etc/fstab defined mounts except those with noauto in their mount options).
- Verify the mount: df -h
Windows (10/11/Server)
Enable NFS server feature
- Windows Server
- Open the Control Panel.
- Navigate to Programs > Turn Windows features on or off.
- Scroll down and check Services for NFS.
- Click OK and wait for the installation to complete.
- Windows 10/11
- Open the Settings app.
- Go to Apps > Optional features.
- Click on View features next to Add an optional feature.
- Search for Services for NFS.
- Check the box and click Next, then Install.
- Wait for the installation to complete.
- Configure sharing settings
- Windows Server
- Open the Server Manager.
- Navigate to File and Storage Services > Shares.
- Click on Tasks and select New Share.
- Choose NFS Share – Quick and click Next.
- Select the server and volume where the share will be created, then click Next.
- Specify the share name and path, then click Next.
- Configure share permissions, adding allowed clients and specifying access permissions (eg. Read/Write).
- Review settings and click Create.
- Windows 11
- Open File Explorer and navigate to the folder you want to share.
- Right-click the folder and select Properties.
- Go to the Sharing tab and click Advanced Sharing.
- Check the box for Share this folder.
- Click on Permissions and add the appropriate permissions (Read/Write) for the users who will access the share.
- Click OK to save the settings.
Start NFS services
- Open a Command Prompt as an administrator.
- Start the NFS client: nfsadmin client start.
- Start the NFS server: nfsadmin server start.
- Check the status of the NFS services: nfsstat.
Open firewall ports (if applicable)
- Open the Control Panel and navigate to System and Security > Windows Defender Firewall.
- Click on Advanced settings.
- Create inbound rules for NFS ports (usually TCP/UDP 2049).
Mount the NFS share on the client
- Open a Command Prompt as an administrator.
- Create a mount point: mkdir Z:\nfs_share.
- Mount the NFS share: mount \\<server_ip>\shared_directory Z:\nfs_share.
- Verify the mount: dir Z:\nfs_share.
macOS
Create a mount point
- Open the Terminal app.
- Create a directory to serve as the mount point: sudo mkdir /Volumes/nfs_share.
Edit /etc/auto_master
- Open /etc/auto_master in a text editor with elevated privileges: sudo nano /etc/auto_master
- Add a new line at the end of the file to include your NFS mount. Eg: /- auto_nfs
- Save and close the file.
Create /etc/auto_nfs
- Create and open /etc/auto_nfs in a text editor: sudo nano /etc/auto_nfs.
- Add the NFS mount configuration. For example:
/Volumes/nfs_share -fstype=nfs,rw,nosuid 192.168.1.100:/srv/nfs - Replace 192.168.1.100:/srv/nfs with your NFS server IP and shared directory.
- Save and close the file.
Reload the automount configuration
- Reload the automount configuration to apply the changes: sudo automount -vc.
Verify the mount
- Check that the NFS share is mounted: ls /Volumes/nfs_share.
- You’re done: If the directory listing shows the contents of the NFS share, the configuration is successful.
Security considerations and best practices
When considering security for NFS, it is essential to use secure authentication methods such as Kerberos, implement data encryption to protect sensitive information, and follow best practices. These best practices include regularly updating software, monitoring access logs, and restricting permissions to enhance security and protect against potential threats. Since NFSv3 the /etc/exports options root_squash and no_subtree_check have been the default, you might need to specify the no_root_squash and subtree_check options to counteract that behavior.
Troubleshooting NFS
Common issues encountered when using NFS include connectivity problems, permission errors, and performance issues. Connectivity problems can often be resolved by checking the network configuration and ensuring that firewall settings are correctly configured to allow NFS traffic.
Permission errors typically arise from incorrect user permissions or misconfigured export settings on the server; verifying and adjusting these settings can usually rectify the problem. Performance issues can stem from various factors, but optimizing network settings and improving server performance often helps in mitigating these challenges and ensuring the efficient operation of NFS.
Tips and techniques for resolution
- Use diagnostic tools: Tools like showmount and nfsstat. can grant insight into NFS behavior.
- Check system logs for error messages: Eg. sudo journalctl -xe.
- Safety first: Test configurations with minimal setups before scaling.
Tools and resources
- Monitoring tools: nfswatch, Nagios, sysstat (ss).
- Management utilities: nfs-utils, rpcinfo.
Monitoring tools and techniques
- Proactive management: Regularly monitor NFS performance and logs.
- Automated alerts: Set up notifications for potential issues.
- Performance tuning: Adjust NFS parameters for optimal performance.
NFS: Enhancing data sharing and collaboration
NFS has shown itself to be a versatile and powerful tool for network file sharing. It remains a crucial tool in modern network environments, offering reliable and efficient file sharing that enhances collaboration and productivity. Its flexibility and scalability make it suitable for various applications.
As technology continues to advance, NFS is poised to play an even more significant role in IT infrastructures, adapting to new challenges and opportunities. Its ongoing development will ensure it remains relevant and useful. Readers are encouraged to delve deeper into NFS, experiment with its features, and consider implementing it in their own network setups to reap its numerous benefits.
With proper understanding and management, NFS can greatly enhance data sharing and collaboration.

