In the world of technology, there are a near infinite number of moving parts, network configurations, Active Directory, users getting added to and removed from groups, data, security and so much more. Trying to keep an eye on all of this can be a genuine headache, so let’s take a look at some ways we can log Active Directory changes with NinjaOne to give you a little bit more breathing room!
Capturing critical EventIDs and configuring notifications in NinjaOne
Active Directory logs all user changes to the Event Log, and while this is helpful, finding them in the Event Log itself can be a chore.Active Directory doesn’t send alerts when changes are made, which is especially critical when users are added to or removed from Administrator groups. What if we could pull the important logs into NinjaOne’s audit log so they’re visible from a familiar interface you’re already working in daily?
We have to turn on some additional logging in Active Directory to make this happen. Thankfully, this is just a quick GPO update. On your Active Directory server, open the Group Policy Management snap-in and open your Default Domain Controller Policy. Then navigate to Computer Configuration>Policies>Windows Settings>Security Settings>Advanced Audit Configuration>Account Management and then enable the Audit Security Group Managment policy. You only need to enable the ‘success’ option for this example, but you can also enable the ‘failure’ option if you want to log failed user changes as well. This could be useful for troubleshooting. For these changes to take effect, you will need to either restart the domain controller or run the gpupdate command.
Now if a user is added to a security enabled group such as Domain Admins, the Event Log will create EventID 4728 and 4729 if an account is removed from a security enabled group. This alone is super valuable insight, but you want to be able to see this data in NinjaOne as well, and maybe automatically send alerts or create tickets for such events.
First, log into NinjaOne and go to Administration>Policies>Agent Policies. From here, you will need to edit an existing policy or create a new one. We suggest creating a new policy for active directory servers. Once you have your policy, you will need to add a new condition to monitor for this eventID.
- From the conditions section of the policy editor click ‘Add a condition.’
- In the condition editor, first click ‘Select a condition.’
- Select the ‘Windows Event’ condition from the condition dropdown.
- Enter ‘Microsoft-Windows-Security-Auditing’ in the Source/Provider Name.
Note: This field must be filled exactly, or the condition won’t trigger correctly. - Enter your desired EventIDs by typing them in one at a time and hitting enter. In this case, as we mentioned earlier in the guide, we used 4729 and 4728 to monitor for users added to or removed from Security-enabled groups.
Pro Tip: You can add other EventIDs, such as 4738 to monitor for additional changes, though we suggest adding those to their own condition(s) so that you have more granular control of the notification, ticketing, and severity settings for different types of changes. - You can also add Text values to add more granularity.
- Hit ‘Apply’ when the settings are to your liking.

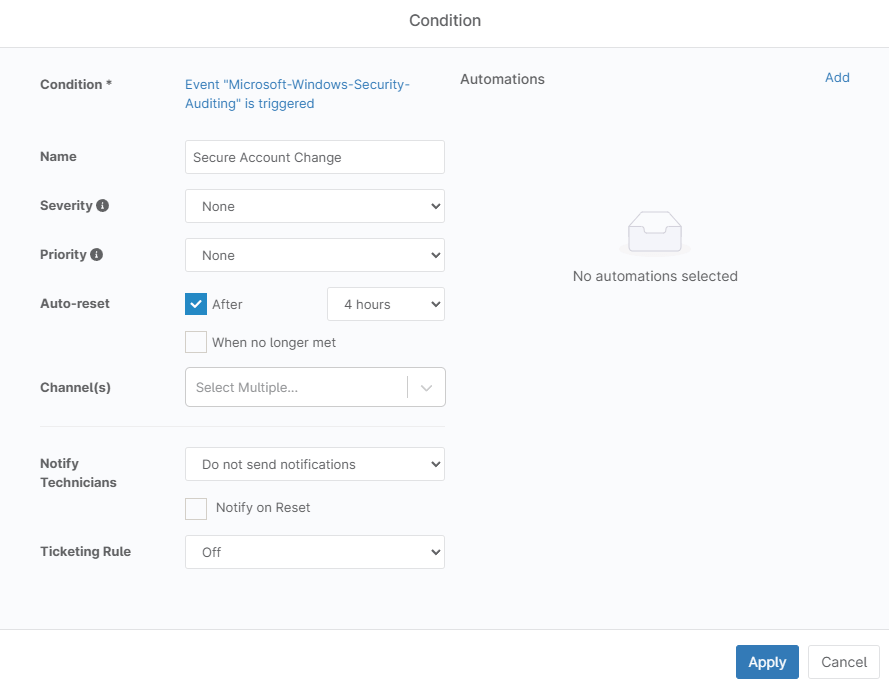
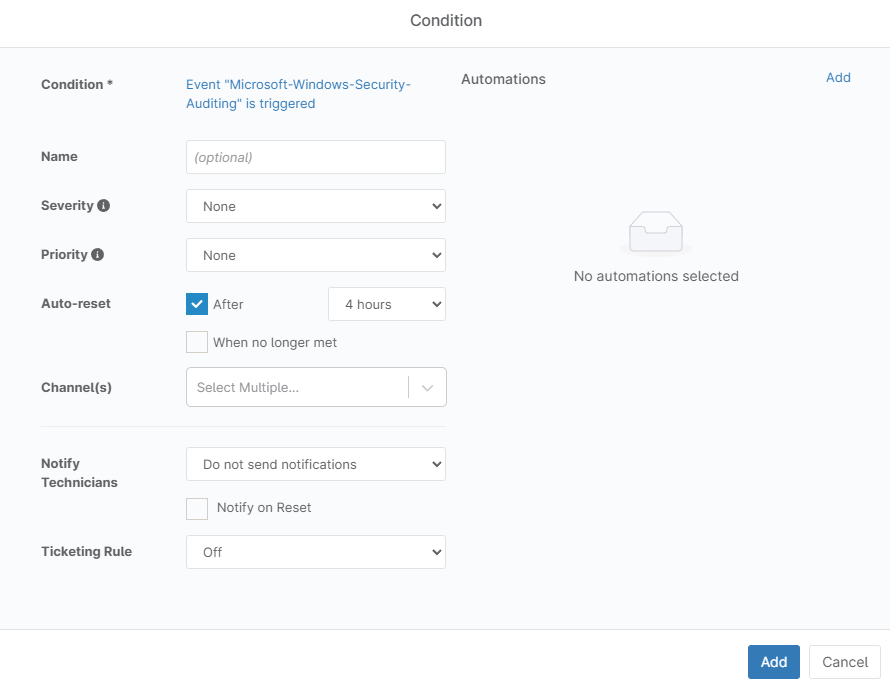
- Name your condition and configure severity, priority, and notification settings in the Condition editor.
- You can set Severity and Priority to add extra information about the criticality of the alert in notifications.
- You can use ‘Channels’ to send notifications to specific notification channels like a cell phone number, or a Slack channel if you have channels configured.
- ‘Notify Technicians’ lets you enable notifications to technicians assigned to the organization the device is in, according to the notification settings they have set in their account.
- ‘Ticketing Rules’ allow you to automatically create tickets when this condition is triggered.
- Once you have all of the settings configured click ‘Add.’

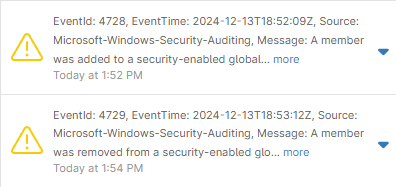
Now, with our condition added, anytime a user is added or removed from a group, it will appear in the device’s activities log in NinjaOne, and an alert will be created on the device overview page. If you enable Channels or notifications, it will also send external alerts!
You can check these alerts by searching for the device in the Device Search grid or navigating to the device from the Dashboard. There will be a yellow caution icon next to the device; clicking on it will show the alert(s). You can click the ‘more’ hyperlink to see the full details of the event log, including the user who was changed, the group they were added to or removed from, as well as the account that initiated the change.

Alternatively, if you navigate to the device and open the activities log, you can see a full log of various events on the device. You can filter Type by ‘Conditions’ to see only activities related to conditions. This information can also be exported for audits and other reports if needed.
Take your monitoring to the next level
You’ve now created an easy way to be alerted of critical changes to any Security Enabled AD groups. As mentioned above, you can also create a condition for 4738 or other EventIDs in order to monitor any number of changes within NinjaOne! You could take this a step further by adding automations to take action when changes are made.
The goal of these conditions isn’t to remove the need for techs to examine these types of changes; rather, it is to draw their attention to such changes and create a log within NinjaOne to track and monitor AD user changes.
Staying on top of critical changes in Active Directory is essential for security and efficiency. Integrating these logs into NinjaOne creates a streamlined, centralized view that saves time, enhances visibility, and supports proactive management. Whether you’re monitoring for key EventIDs or automating responses to user changes, NinjaOne equips you with the tools to stay one step ahead, keeping your IT environment secure and optimized.


