

Backups are a critical part of any IT operation. You never know when a file may be corrupted or accidentally deleted, when a hard drive will suddenly fail, or a system will die. Backups help us recover from such incidents and provide peace of mind. However, something that is often overlooked is the practice of testing your backups, especially full system or image backups. Testing your backups helps ensure that that if the worst happens you know you can recover your image backup to a new drive, or system without issue.
Testing image backups with NinjaOne is straightforward. Start by setting up a staging system on a virtual machine in the cloud or an on-prem server. You can also use a spare desktop system if you have one available. The advantage of using a virtual machine for image testing is you can use it repeatedly for testing.
Considerations
- While you don’t need anything especially powerful for your virtual machine backup test environment, but more vCPUs and RAM will allow for faster restores and thus faster image tests.
- It’s important to consider what you’re restoring. If you’re restoring a domain controller, you won’t want to do that on your primary network because it could create conflicts with controller(s).
- Consider any static IPs configured on the device or server you’re testing the image of to avoid any IP conflicts, or DNS issues with the primary production server/system.
Preparing your test environment
For the purposes of this example, we’re using a simple virtual machine with 8 vCPUs, 16GB of RAM, and a 128GB virtual disk. As mentioned above your test system doesn’t need to have this much horsepower, but more power means faster image testing, and of course, more time to grab that second cup of coffee.
Now that you have your image testing system ready the first tep is to build the ISO, or bootable USB for the NinjaOne Image Restore tool. If you’re using a bare metal system like a physical server or desktop you will need a bootable USB, and if you’re using a virtual machine you will want an ISO.
To build the ISO or bootable USB, download the Image Restore Manager. From the NinjaOne console navigate to Administration>Library>Downloads and click the hyperlink for the Image Restore Manager. When you run this, it creates a few additional files. We recommend creating a sub-folder for the additional files.
Once you’ve run the Image Restore Manager, select the “Create Bootable Media For Image Restores” option.

Fill in the file location for the ISO Image or select the USB device if you’re building a bootable USB. You can also include additional drivers if you have any drivers you want to be able to install during the recovery process. Finally select NinjaRE-10 or 11.
Note: When selecting either NinjaRE-10 or NinjaRE-11 the number refers to the version of Windows that is creating the ISO.
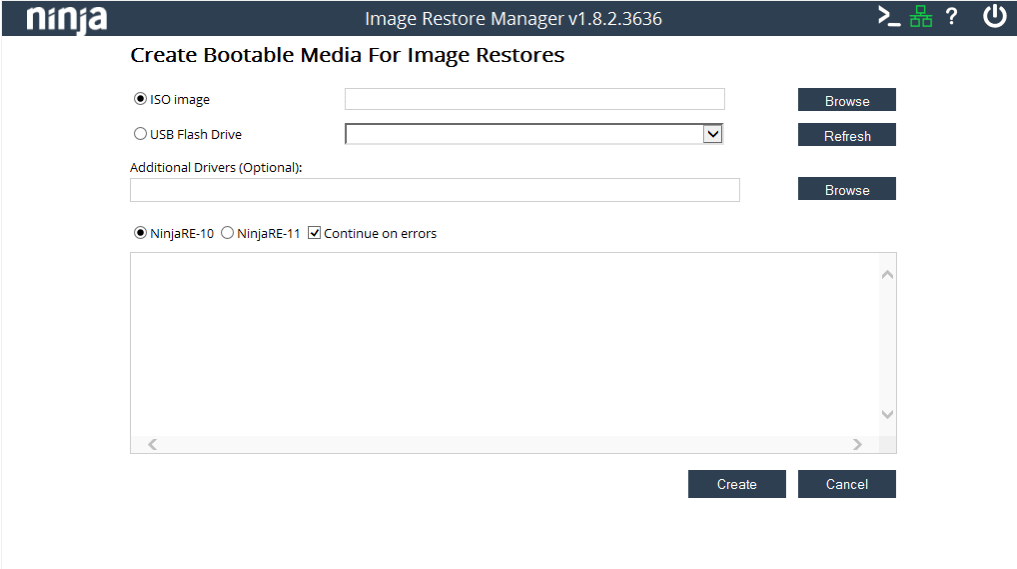
When you’ve finished your selections, click Create and wait for the ISO to finish building. Once it’s finished click Done, and then on the main menu click Exit.
Now that your bootable media has been created, connect it to your device. In the case of a physical system, that’s as simple as plugging it in and booting from USB. On a virtual machine, just attach the ISO as an additional drive, and re-arrange the boot priority as needed.
When you boot into the bootable media, you will be greeted by a familiar interface that’s incredibly similar to the one you just used to create the boot media.
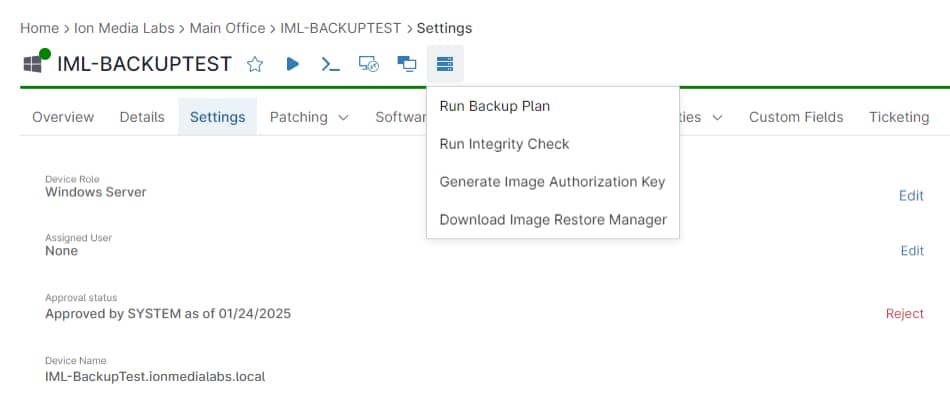
For the next steps, you’ll need an image authorization key. You can find that by navigating to the device you want to restore in NinjaOne, and opening the backup tile (it’s the third option in the dropdown menu).
The default expiration is 14 days. But you can adjust that to whatever timeframe works for your organization. Note that the key is only good for one restore operation. So the next time you test an image you will repeat this step.
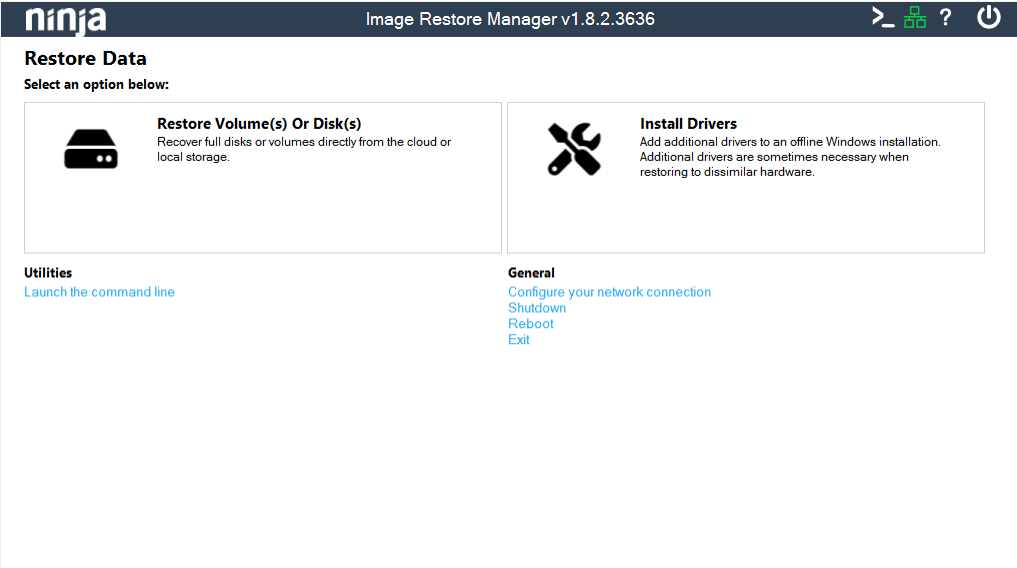
Now that you have your image authorization key you can click “Restore Volume(s) or Disk(s)” to begin the restoration process.
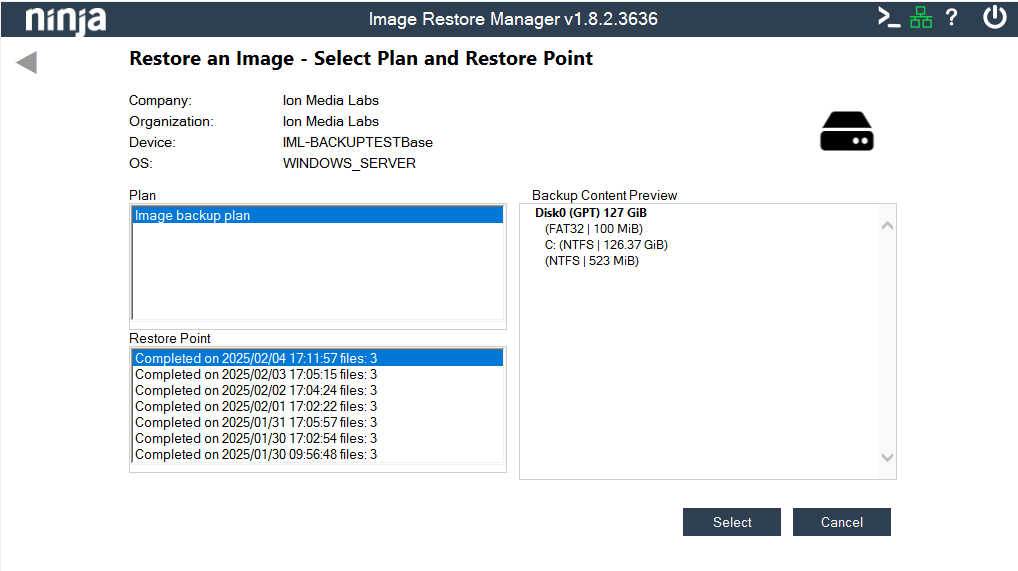
On the next screen you will need to select the backup plan you want to restore from, as well as the restore point.
After that’s done click ‘Select.’ The screen that is displayed shows your backed up disks on the left and the disks available as restore targets on the right. Click and drag your desired backup source to the desired destination disk. After that, double check that your targets and sources are correct and click ‘Select.’ If the target disk doesn’t have a boot partition you’ll be prompted to choose whether to automatically add one.
On the final screen, review the restore plan, check the box to acknowledge that you have reviewed and want to execute it, then click ‘Select’ again. Now you can finish that cup of coffee that’s been getting cold all morning while you wait for the restore to finish. Keep in mind that depending on the amount of data being restored, system resources, and network speed this can take some time.
Finishing up your test
Once your machine has finished the restore, remove the bootable media, and change any boot order settings as needed on the device or virtual machine. Then boot it up and test it. Check for:
- key files and applications
- configurations and settings
Be sure to test any applications, especially if you’re testing an application server.
With that you’re done, you’ve now verified that your backup is recoverable, it’s a good idea to make time for this at least once a month for critical systems.


