

This tutorial demonstrates how to use the Program Install and Uninstall Troubleshooter in Windows 10 and Windows 11. It explains what this troubleshooting tool does, what problems it can fix, and provides detailed steps on its usage. This will help you resolve installation errors in Windows, and repair or uninstall programs that did not install correctly.
What is the Program Install and Uninstall Troubleshooter?
The Windows Program Install and Uninstall Troubleshooter is a tool provided by Microsoft that automatically diagnoses and resolves many issues with software in Windows 10 and Windows 11.
The problems the Program Install and Uninstall Troubleshooter can fix include:
- Fixing installation problems caused by missing/incomplete files, corrupt registry keys, and failed installation processes. These can prevent software from being installed
- Resolving uninstallation issues such as left-over files and registry keys that prevent programs from being completely uninstalled
- Repairing corrupted registry keys
- Removing left-over entries in the Programs and Features list in Windows Settings
Note that while still available in both Windows 10 and Windows 11, the Program Install and Uninstall Troubleshooter is being deprecated in future versions of Windows 11. You will instead need to troubleshoot and repair software installation and uninstallation problems from the Windows Settings app by navigating to Settings > System > Troubleshoot > Other Troubleshooters.
How to download the Program Install and Uninstall Troubleshooter
You can download the Windows Program Install and Uninstall Troubleshooter tool directly from the Microsoft website.
While other Windows support and tutorial websites offer their own downloads of this tool, you should always download software from its official source rather than third parties. This ensures that the files you download are legitimate and less likely to have been infected with malware.
How to use the Windows Program Install and Uninstall Troubleshooter
The Program Install and Uninstall Troubleshooter is not a highly technical tool, and the fixes it suggests are generally safe even for inexperienced users. However, before you use the Program Install and Uninstall Troubleshooter, you should take a full backup of your Windows device. Then, if something goes wrong, you can restore your PC to a working state.
To use the tool, follow these steps:
- Log in as an administrator to your Windows device
- Open the Program Install and Uninstall Troubleshooter by double-clicking on the downloaded file (by default it is saved with the file name MicrosoftProgram_Install_and_Uninstall.meta.diagcab)
- When prompted to Troubleshoot and help prevent computer problems, click Advanced and uncheck Apply repairs automatically, then click Next

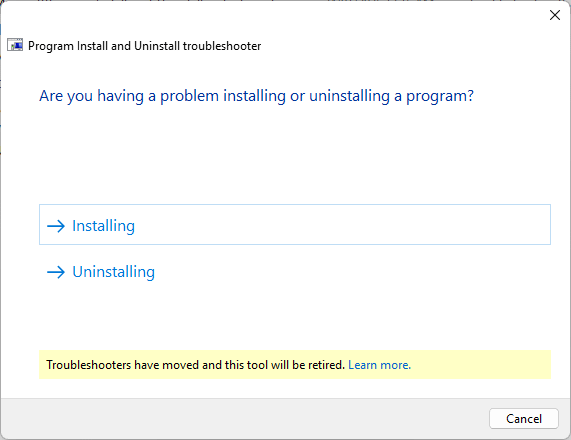
- Once the tool has finished detecting problems, select whether you want to troubleshoot Installing or Uninstalling a program
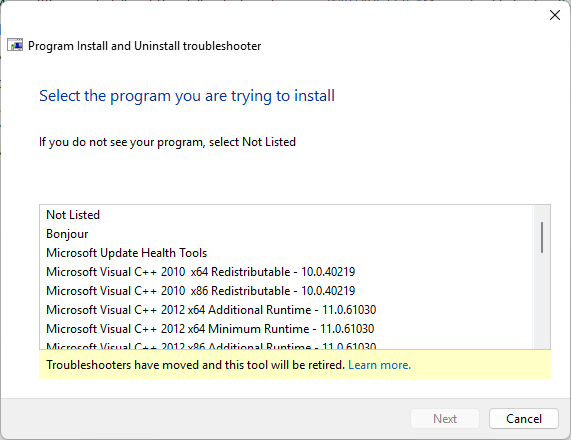
- Then, select the program you want to diagnose installation or uninstallation problems for from the list, or select Not listed if it isn’t there (if your program isn’t listed you’ll have to enter its product code to help the tool find it)
- The troubleshooting tool will then provide suggestions that you can apply to attempt to resolve the issue
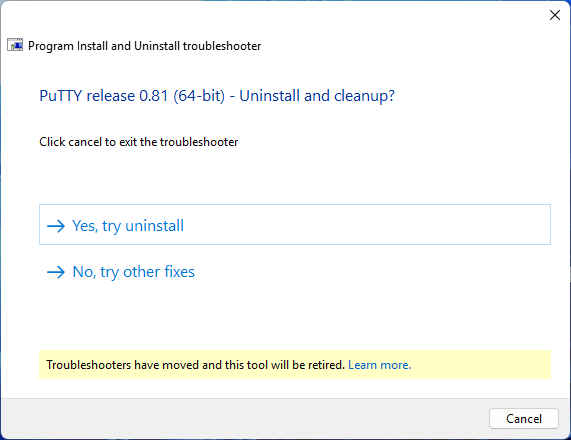
- If the error was successfully diagnosed and fixed, you can close the tool
- Otherwise, you can try to run the Program Install and Uninstall Troubleshooter again, selecting different options
By preventing the troubleshooting tool from applying repairs automatically, you can select only the specific fixes you want to apply, and make sure you approve the actions the tool will take before it takes them. If you are still encountering issues after running the tool, you can use additional built-in Windows repair tools in combination with third-party tools to resolve complex software installation and uninstallation problems and errors.
Limitations of the Program Install and Uninstall Troubleshooter
The Program Install and Uninstall Troubleshooter is best suited for solving issues with software installed using Windows installer files (with the file extension .msi). Errors with software that uses proprietary installation tools or scripts may not be resolvable with this tool and may require manual troubleshooting.
Best practices for preventing Windows program installation/uninstallation issues
You can reduce the chances of running into installation or uninstallation errors in Windows by following these steps:
- Keep your Windows PC up-to-date with Windows Update. You can troubleshoot Windows Update issues by checking the Windows Update logs
- Only download software from trusted, official sources
- Stick to apps from the app store where possible to further avoid possible malware
- Back up before installing software that makes significant changes to your system, such as firewalls and anti-malware
- Install the latest versions of applications as older versions may not be fully compatible with the most recent version of Windows 10 or Windows 11
Maintaining and troubleshooting third-party Windows software at enterprise scale
Using the Windows Program Install and Uninstall Troubleshooter to diagnose and fix software installation and uninstallation errors is a straightforward process for home users, but is not suitable for supporting software installation and uninstallation for multiple machines.
Endpoint management by NinjaOne can automate the process for installing, updating, and uninstalling software in an enterprise environment, as well as assist with troubleshooting with centralized logging, and automatic rollbacks of failed software and update installations. Start your free trial today.


