Feel like you’re working through the same tickets and tasks over and over and over again? Breakout of your IT Groundhog Day time loop with the help of scripts and automation.
Helpdesks and IT teams are inundated with repetitive, time-consuming, often low-value tasks that distract from larger strategic projects. With most IT leaders saying their staff is already stretched thin, this leaves little room for important projects that will lead to greater organizational productivity and efficiency.
Add to this the cost and complexity of point solutions for frequent issues not to mention technician burnout and lost productivity, and the toll of simple remediation tasks (financial, mental, emotional) can creep up quickly.
Does seeing the same tickets come in, again and again, make you want to do this?
The good news: Most of the repetitive, time-consuming, and low-value tasks that plague helpdesks can be automated away through scripts (and Ninja’s automation engine).
The top 10 repetitive IT tasks — and how to automate them
Hop in. This should be fun
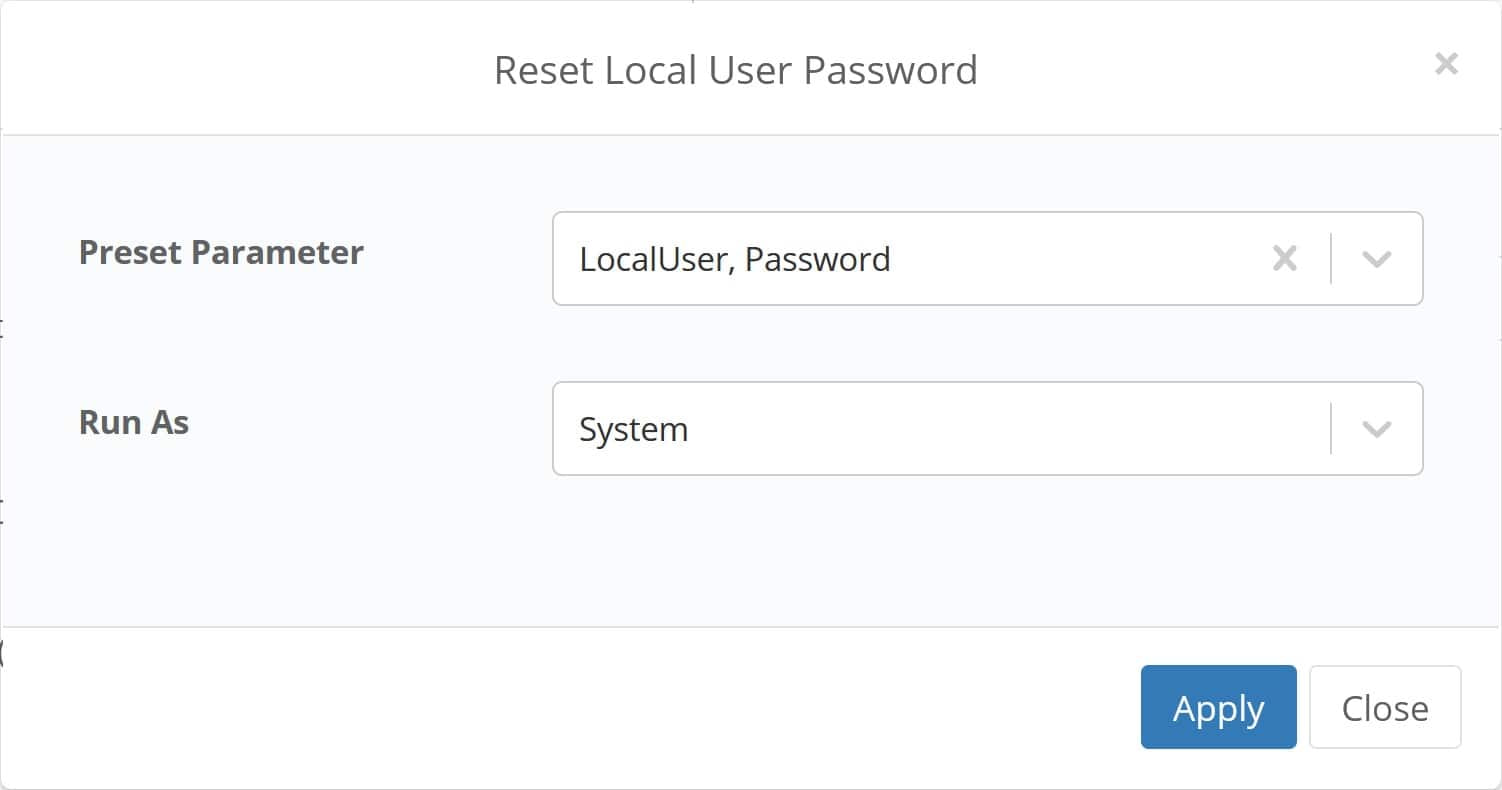
1) Resetting passwords
By some estimates, password resets account for 20 – 50% of all helpdesk tickets. It’s a critical, but low-value task and no matter how quickly you do it, it’s not fast enough. Minimizing the time your team spends on password resets will improve end-user satisfaction and save your team significant time.
How:
- Write a password reset script using a scripting language such as PowerShell or Batch.
Hint: Use script parameters to allow a username and password to be entered at runtime so the script can be reused
- Whenever a password reset is requested, the responding technician can run the password reset script on the appropriate machine, entering the appropriate username and temporary password.
Resources:
- Changing the password for a local account with PowerShell
- Changing the password for an AD account with PowerShell
2) Restarting services
Often, when an application crashes, behaves unexpectedly, or can’t be accessed, the simple solution is to restart the service. This happens frequently enough that it can bog down IT in high-volume, but low-value tickets. This can be especially common with on-premises line-of-business applications used across an organization.
Reducing service restarts to the click of a button — or automating away service restarts — can significantly reduce helpdesk workload.
How:
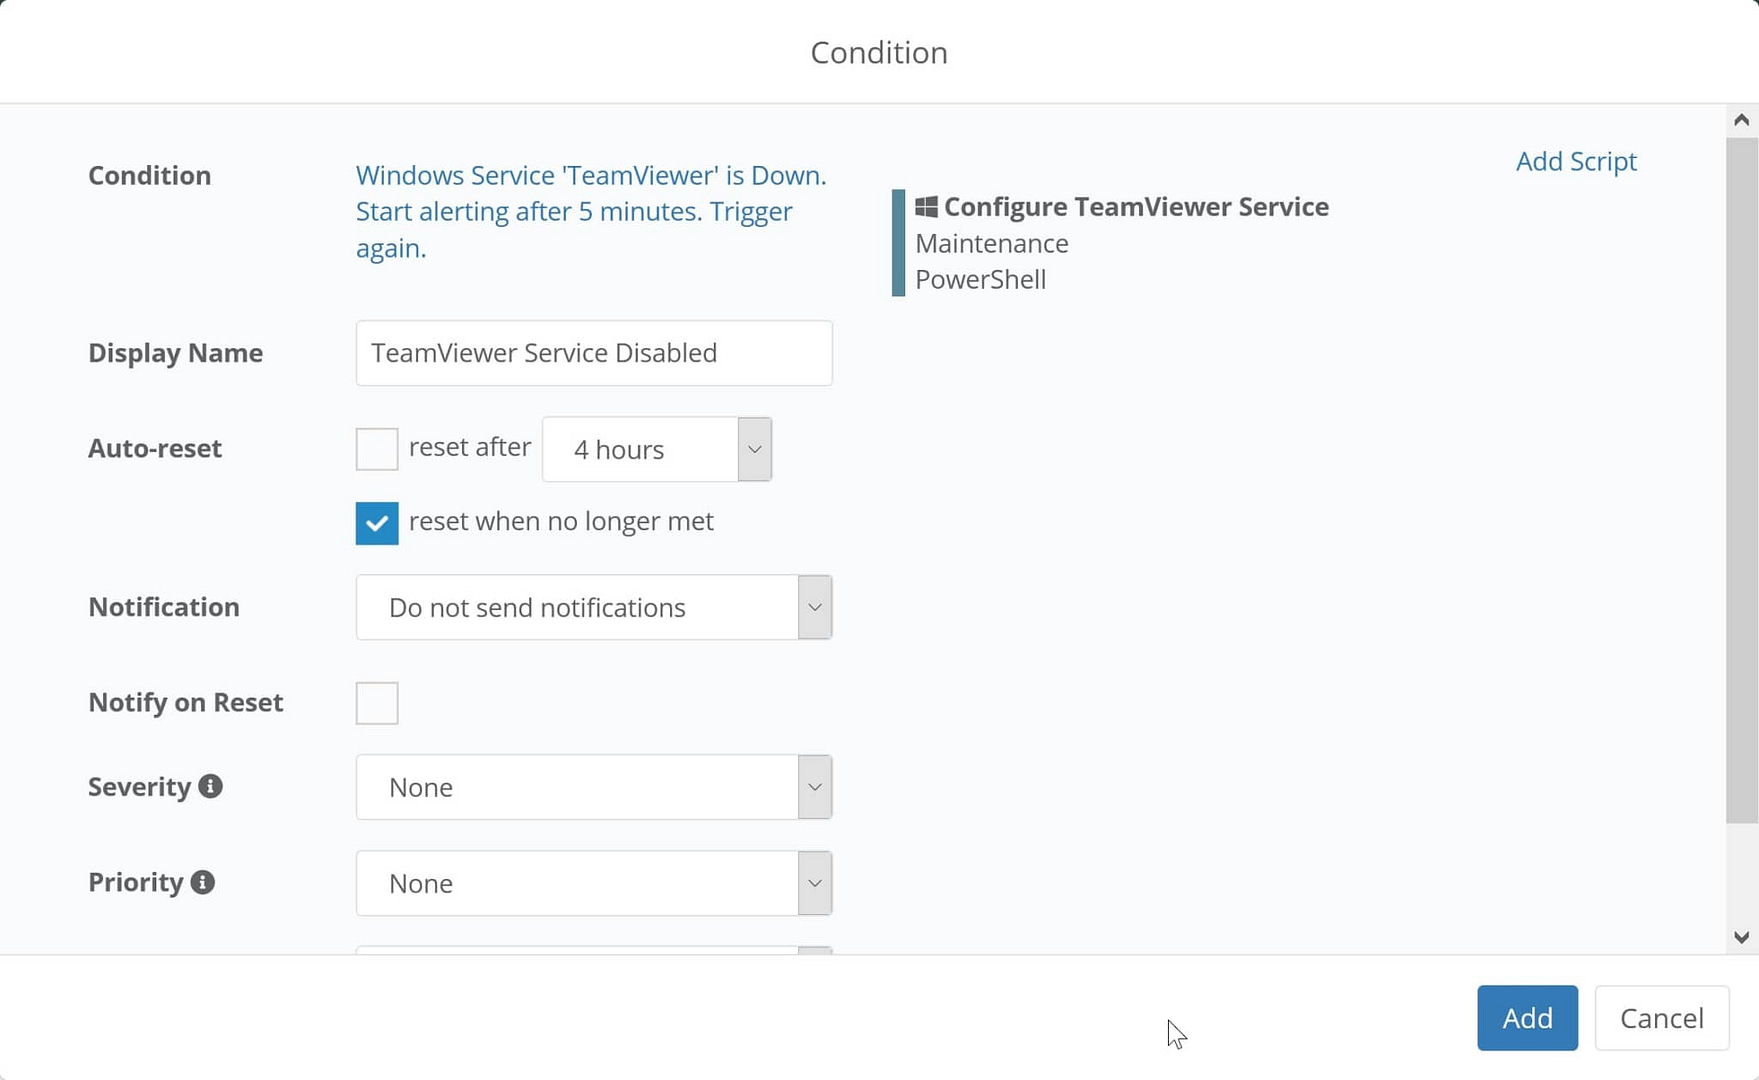
Automatically restart a service when it goes down:
- Create a condition in Ninja that monitors for a Windows Service is down.
Condition: Windows Service
Service: << Service Name >>
State: Down -
Add a script to the monitor
Script: Windows Service
Service: << Service Name >>
Action: Start
Ad-hoc restart a service when it goes down:
- Navigate to the affected device
- Mouse-over the play button and select ‘Script Library’
- Select the ‘Windows Service’ script
- Enter the service name and set action to ‘start’
- Click ‘Apply’
3) Rebooting machines
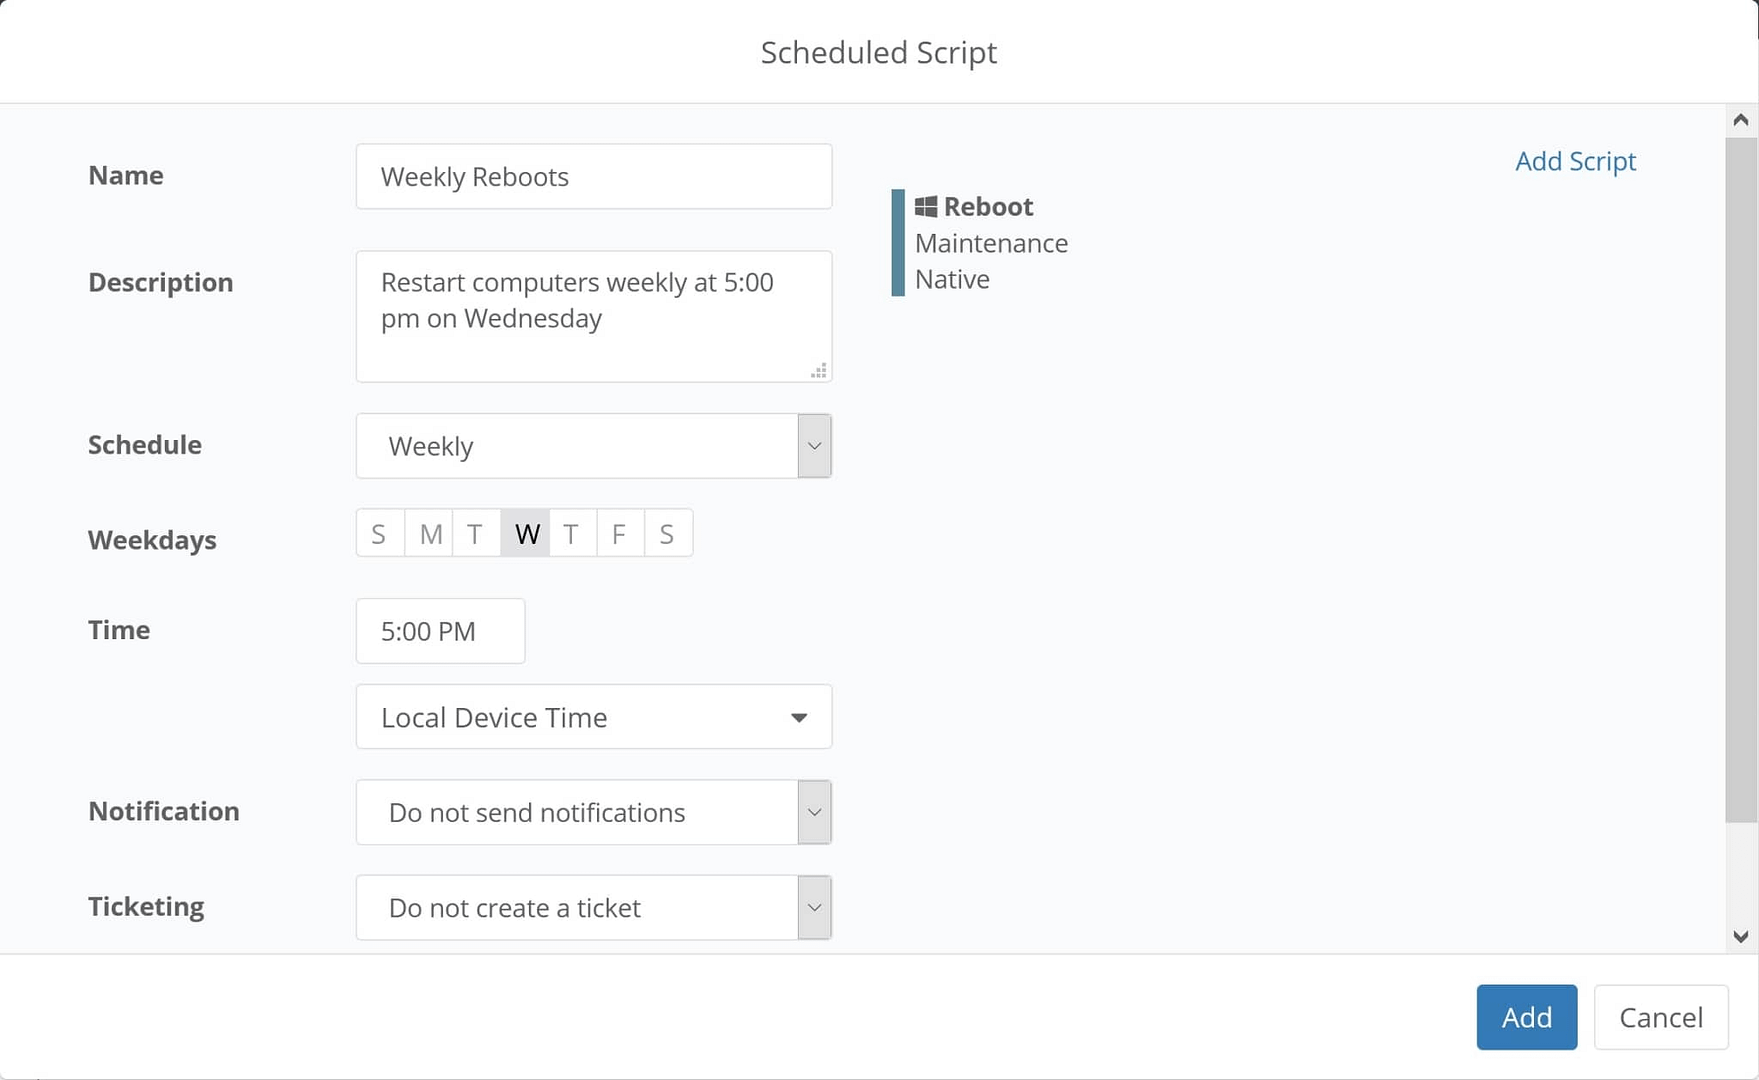
Regular reboots are one of the easiest steps end-users can take to minimize IT issues, improve device efficiency, and ensure device health. Convincing end-users of the value of regular reboots by itself is a challenge. Actually getting end-users to regularly reboot their device is almost impossible.
Avoid relying on end users or taking time to manually restart devices with script automation in Ninja.
How:
Enforce scheduled automatic reboots across many endpoints:
- Navigate to an appropriate policy and select the ‘Scheduled Scripts’ tab
- Click ‘Add a Scheduled Script’
- Set an appropriate schedule based on your preferences (daily, weekly, etc)
- Click ‘add a script’
- Select ‘Reboot’ and save the condition
Schedule automatic reboot endpoints when they haven’t been rebooted for X days:
- Navigate to an appropriate policy and click ‘Add a condition’
- Select ‘System Uptime’ and set days to an appropriate uptime (5, 15, 30, 60 days)
- Click ‘add a script’
- Select ‘Reboot’ and save the condition
Ad-hoc restart a single endpoint:
- Navigate to the device that requires a reboot
- Mouse-over the play button and select ‘Script Library’
- Select the ‘Reboot’ script
4) Backing up and restoring local files
Backup products can be overly complex, difficult to roll out, and unreliable. The cost and complexity can make it difficult to provide adequate data protection to every end user. Ninja includes integrated cloud-based backup software that automatically deploys to Ninja-managed endpoints. File backup and restore are fast and easy. Through our self-service IT portal, users can restore their own files, saving your team time.
How:
Automatically backup critical local files:
- Navigate to an appropriate policy and select the ‘Backups’ tab
- Click ‘Add Plan’
- Set an appropriate frequency for files to be backed up
- Set your file revision preferences – this step is critical to balance data protection needs against storage costs
- Click the ‘Folders’ tab and click ‘Manage’
- Add the folders you want to be backed up and click ‘Save’
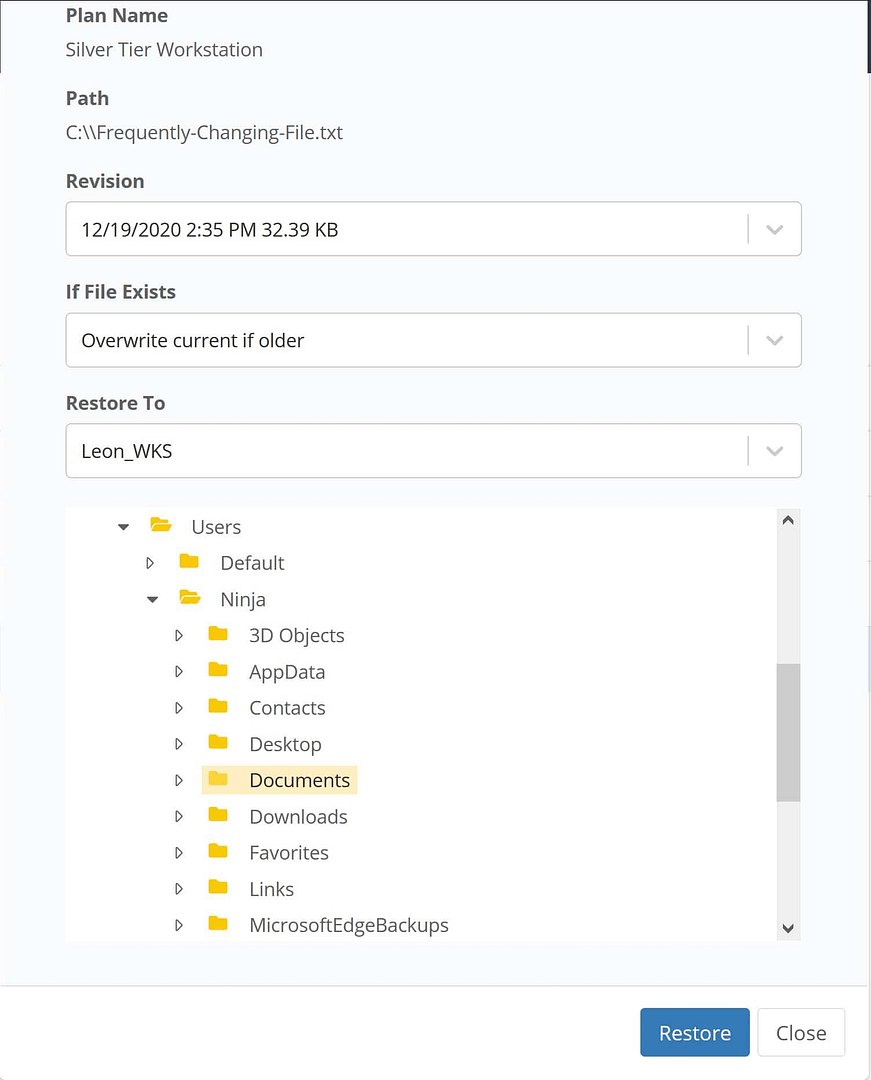
Restore files to end-users:
- Navigate to the device which has files that need to be restored
- Hover over the backup icon and click ‘Manage Backups’
- Navigate to the file that needs to be restored and click ‘restore’
- Select the appropriate revision and where to restore the file and click ‘Restore’
Enable end-users to restore their own files:
- Navigate to ‘Configuration’ and then to ‘Accounts’
- Click ‘Create New User’ and choose ‘End User’
- Enter the user’s details
- Assign the end user to their associated organization
- Enable access to backup
- Assign the user to the machines they should be able to access
- Save
Note: Ninja can provide you with instructions you can give to end-users to teach them to restore their own files.
5) Freeing up disk space
Drives on workstations, laptops, and servers all occasionally fill up. Depending on the use of the endpoint, a full drive can have anywhere from no impact to disastrous outcomes for an organization. Either way, you’re likely to get a ticket, but only after it’s too late.
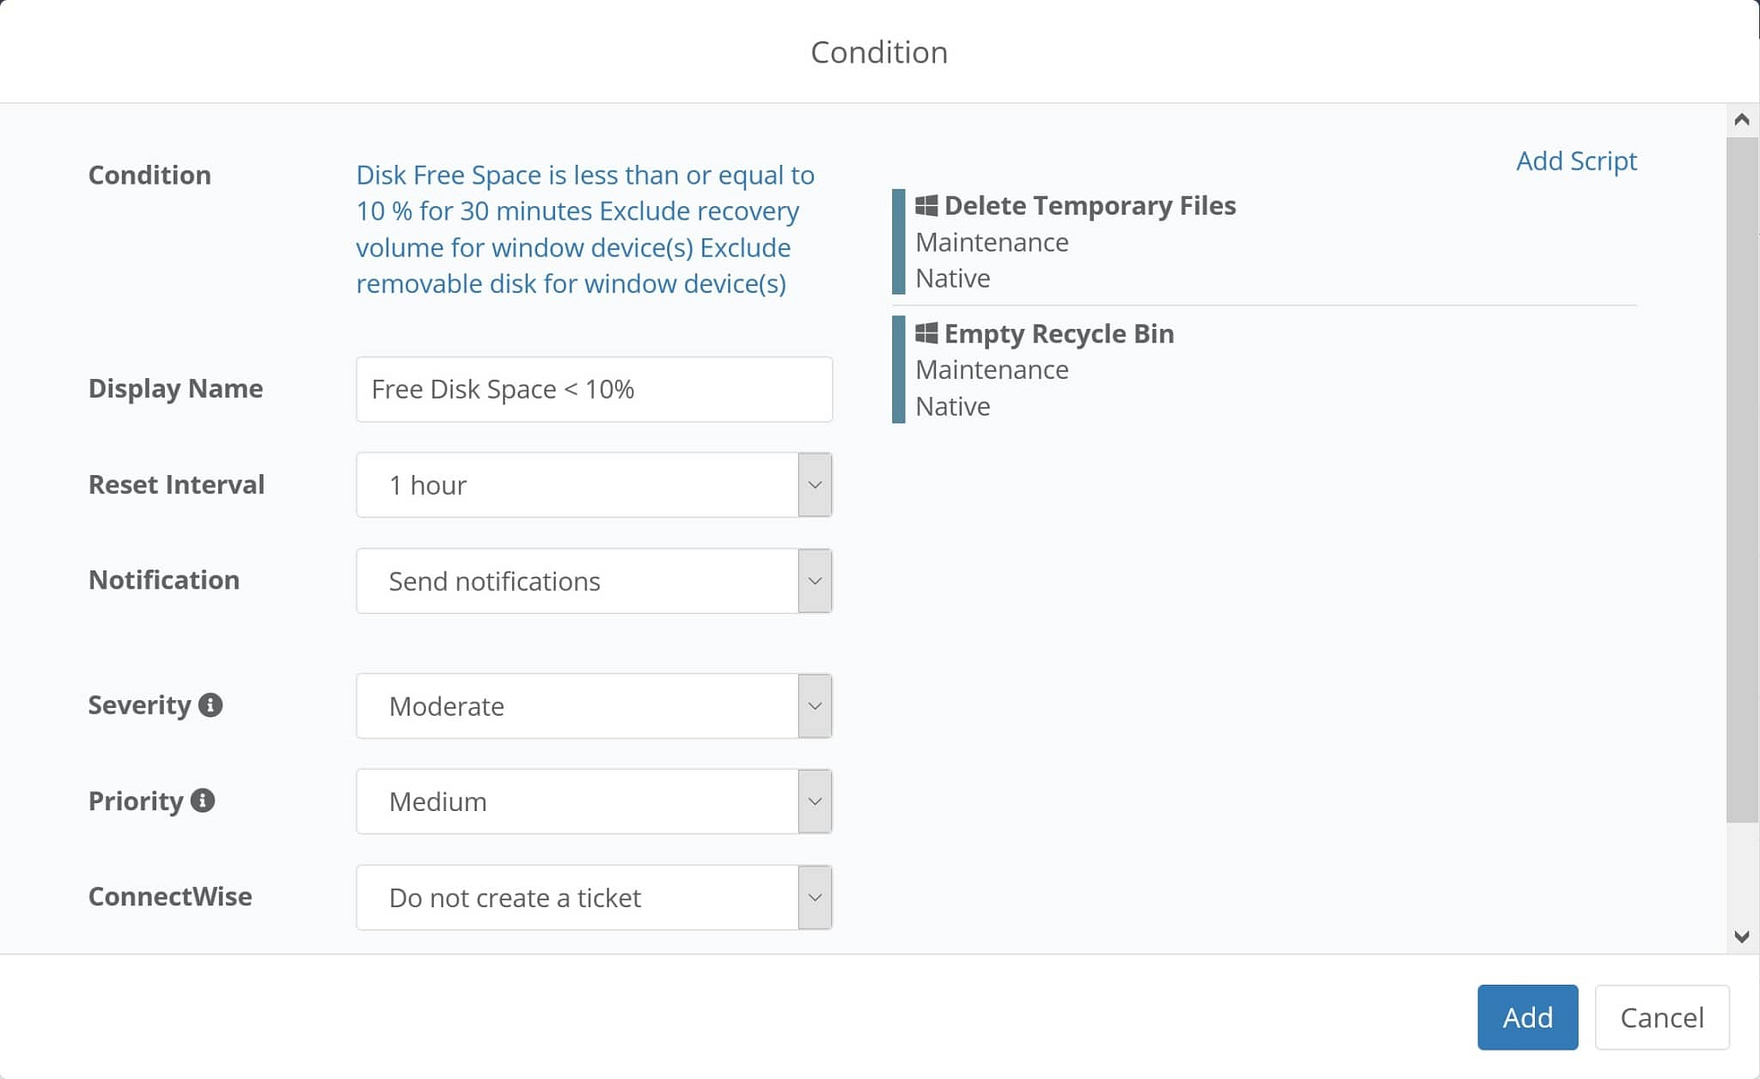
Through proactive monitoring and smart use of scripts, Ninja enables IT teams to automatically remediate full disks to stave off disaster until a technician can find a permeant solution.
How:
Detect and automatically remediate low disk space:
- Create a script to delete/remove unnecessary files
Note: You can use pre-built scripts from Ninja for common unnecessary files, including:
- Delete Temporary Files
- Empty Recycle Bin
- Navigate to an appropriate policy and select the ‘Conditions’ tab
- Click ‘Add a Condition’
Condition: Disk Free Space
Operator: Less than
Threshold Percent: Set to your preference
Duration: Set to your preference - Click ‘Apply’
- Add the script created above
- Click ‘Add’
6) Running antivirus scans and managing alerts
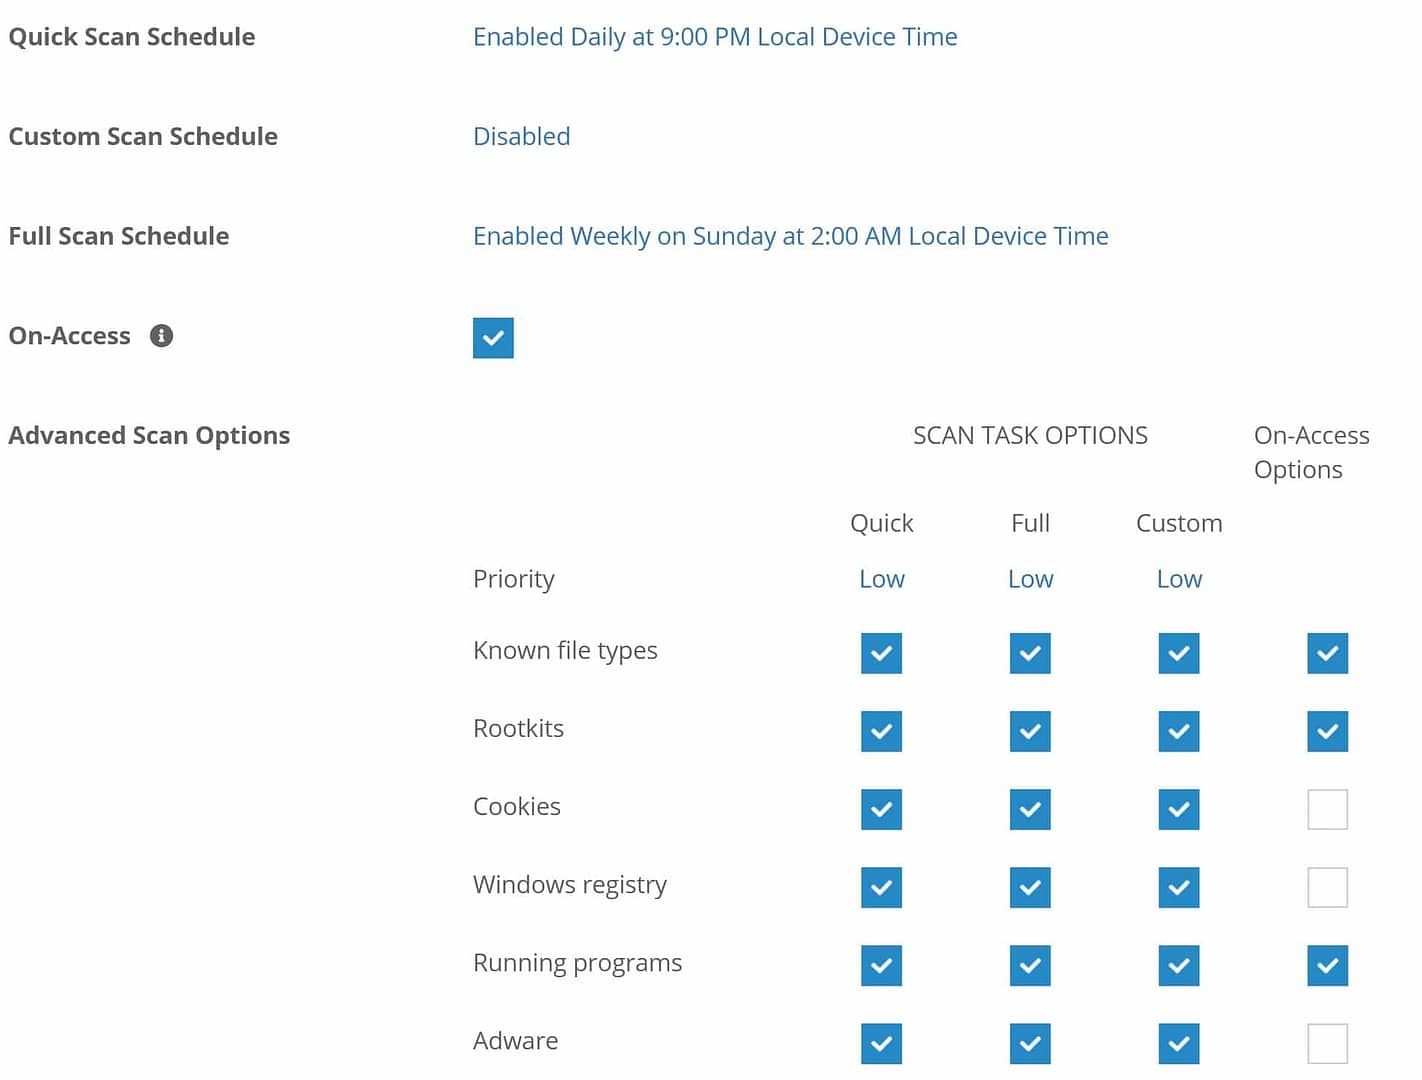
No matter how much security training you provide, someone eventually makes the wrong choice. Ninja’s Bitdefender and Webroot integrations allow you to automatically deploy antivirus to all your endpoints, centrally coordinate scanning preferences, and automate the remediation of threats.
How:
Automate antivirus scanning:
- Enable Bitdefender or Webroot in Ninja
- Navigate to an existing policy or create a new policy
- Navigate to the ‘Antivirus’ tab
- Enable Bitdefender or Webroot
Hint: Once enabled, Ninja will automatically deploy your chosen security solution to endpoints covered under the associated policy - Set your scan and auto-remediation preferences
- Save the policy
Run an ad-hoc scan on an endpoint:
- Navigate to the appropriate device
- Hover over the play button
- Hover over the ‘Antivirus’ menu
- Click ‘scan’
Manage a threat:
- Navigate to the Threats dashboard
- From the active threats dashboard, you can add an exclusion to unblock an infected file
- From the quarantine dashboard, you can delete quarantined files
7) Deploying software
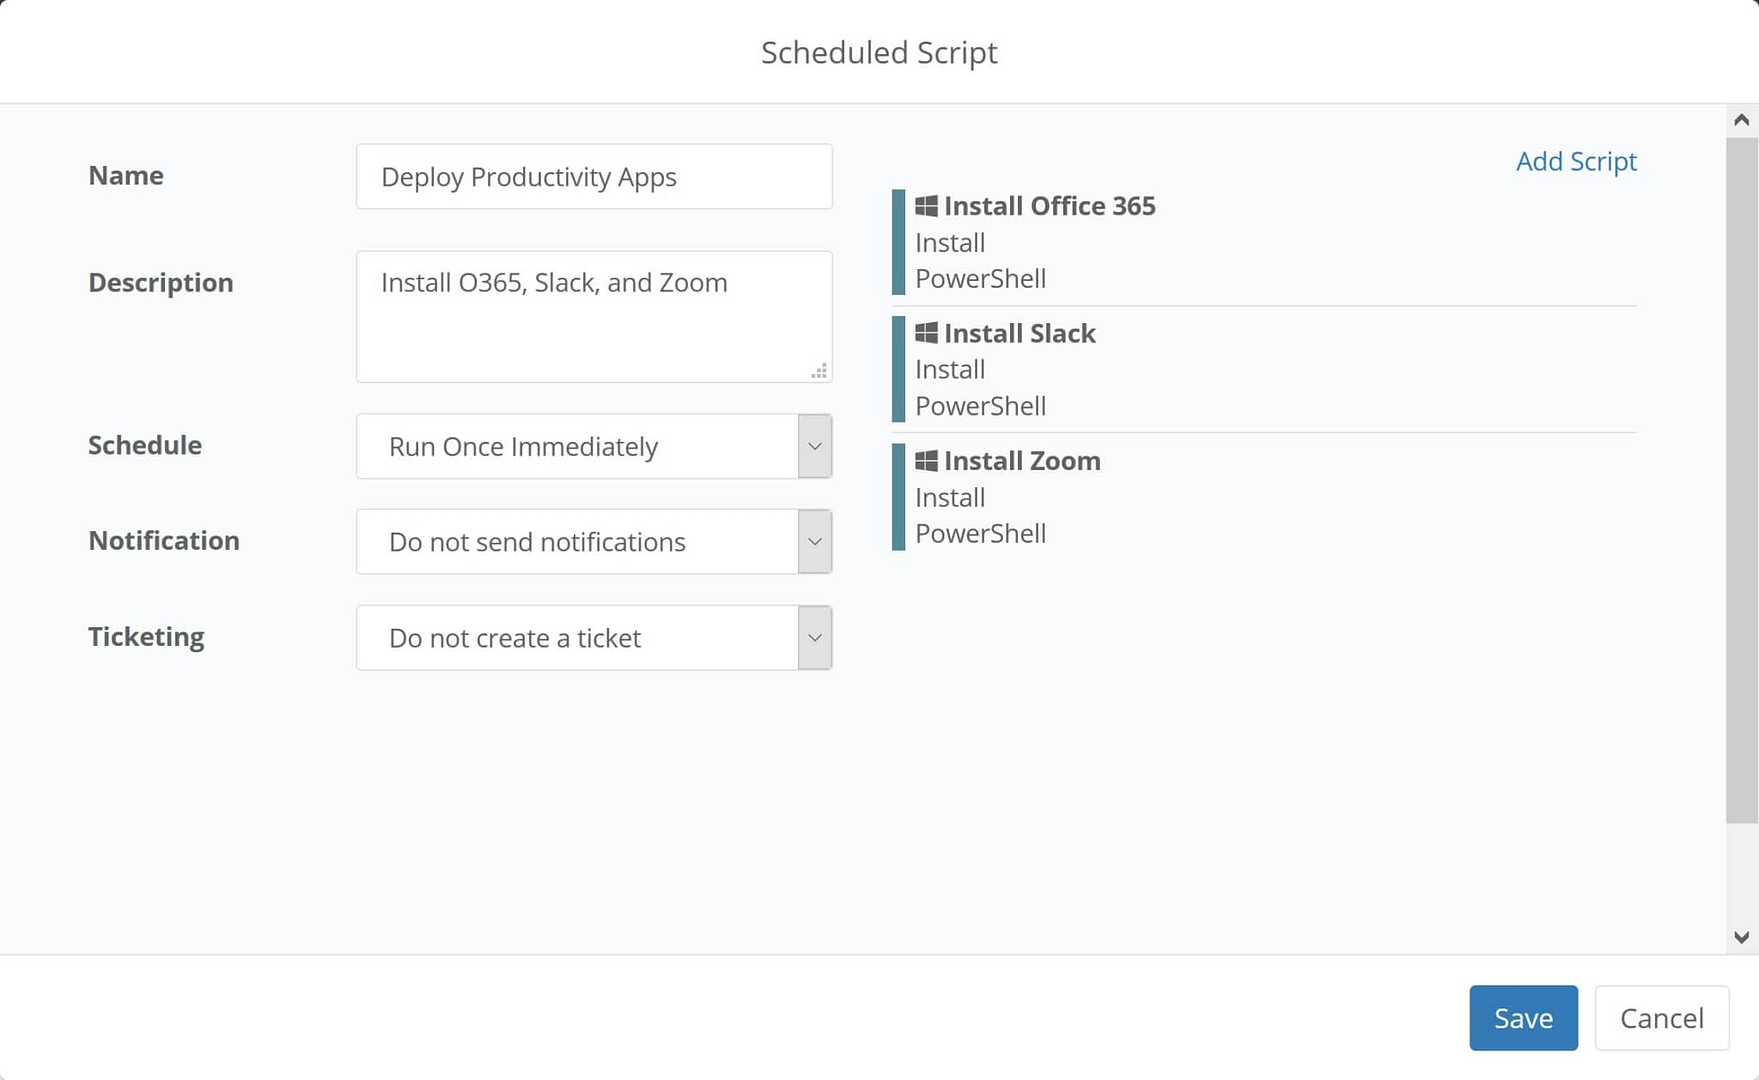
Installing a single piece of software on an end-users device is rarely difficult. But installing a whole suite of software for a new employee? Or deploying software to your entire business? Those are both time-intensive processes that can pose significant challenges. Ninja allows you to automate both to save your team time.
How:
Deploy a single piece of software to a single endpoint:
- Navigate to the device that requires the new application
- Mouse over the play button and select ‘Script Library’
- Select the ‘Install Application’ script
- Upload the MSI / EXE or enter a URL to download the executable from
- Add any appropriate parameters (such as /q for quiet install)
- Click ‘Apply’
Deploy a single piece of software to many endpoints:
- Navigate to the search section of Ninja
- Use filters to narrow the device list down to the appropriate, online device list and select all devices. Alternatively, you can just select the appropriate devices
- Repeat steps 3 – 6 above
Automatically deploy one or many pieces of software to endpoints:
- Navigate to an appropriate policy and select the ‘Scheduled Scripts’ tab
- Click ‘Add a Scheduled Script’
- Set the schedule to ‘Run One Immediately’
This will set the script to run as soon as the policy is saved. Whenever the policy is assigned to a new device – such as during onboarding – the new software will be deployed. - Click ‘Add Script’ and follow steps 3-6 above
- You can add multiple software installations in a row. Installations will run in order, one after the other, until complete.
8) Setting up new computers
Depending on the level of customization, provisioning new devices can take anywhere from 1 – 5 hours per device. Most of the steps taken in new device setup can be easily automated, saving high growth and large organizations significant time while also increasing standardization.
How:
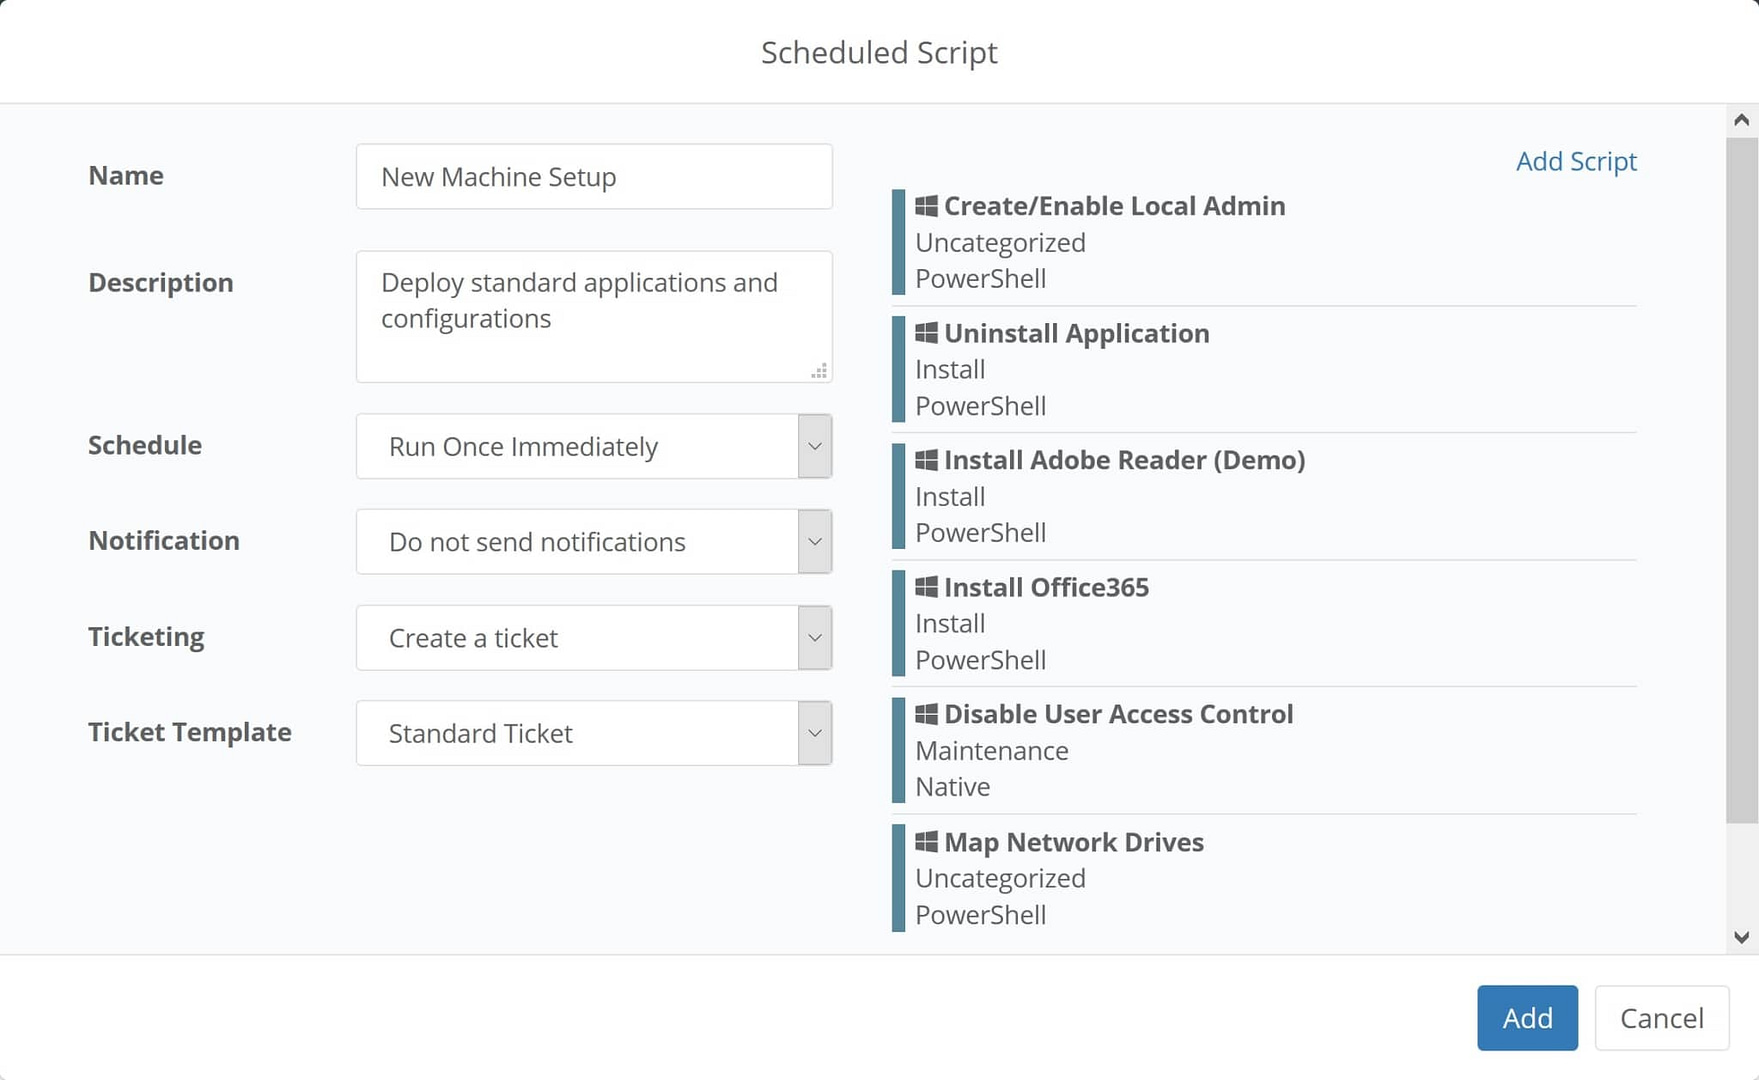
Automate new device setup by writing scripts to accomplish the following:
- Create a local admin or local user
- Uninstall bloatware (resource: Removing applications)
- Install productivity, security, and line of business applications (install these apps using the ‘Install Application’ script in Ninja)
- Map network drives (resource: Create a persistent mapped network drive)
- Add/remove user permissions (resource: Set file system rights)
- Patch everything (see the ‘Patching’ list in this post below)
- Setup backup (ex: Setup and deploy Ninja Data Protection to back up a new device)
- Create a new policy in NinjaRMM
- Add a scheduled script
- Set the schedule for the script to ‘Run once immediately’
- Add the scripts above to the scheduled scripts in order of priority and dependency
- Save the policy
- Apply the policy to the organization you want to onboard the new device to
- Download and install NinjaOne on the device
9) Patching
Patching is perhaps one of the most time-intensive processes an IT team deals with. Patching can regularly take between 30 minutes to an hour per device per month — for Windows patching only. This time commitment balloons quickly in more heterogeneous environments. Failing to keep updated carries significant security and compliance risks.
Ninja enables you to automatically patch Windows, Mac, and Linux devices along with third-party applications from a single pane of glass.
How:
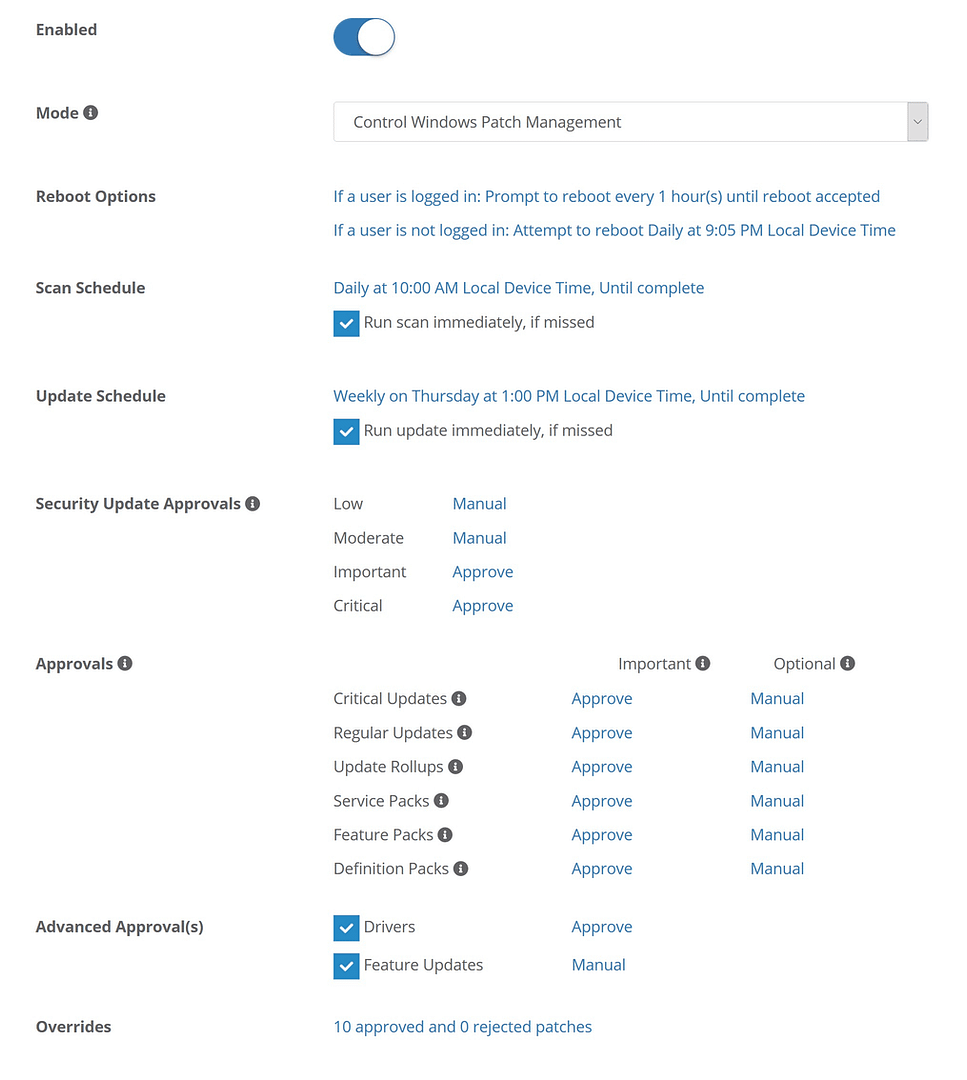
Automatically patch Windows devices:
- Navigate to an existing policy or create a new policy
- Click on the ‘Patch Management’ tab
- Enable patch management and set mode to ‘Control Windows Patch Management’
- Set your scan schedule, update schedule and reboot options
- Automate your approvals (resource: Patch management best practices)
- Save the policy
Automatically Patch Mac or Linux devices:
- Navigate to an existing policy or create a new policy
- Click on the ‘Scheduled Scripts’ tab
- Add one of the pre-built Mac / Linux patching scripts
- Set your patching schedule
- Save the policy
Automatically patch 3rd-party applications:
- Navigate to an existing policy or create a new policy
- Click on the ‘Software’ tab and enable 3rd party patch management
- Click on the ‘Products’ tab
- Click ‘Add Products’ and select all the products you want to install or patch for this policy
- Select a single or multiple software and click ‘Edit’
- Set ‘Critical Patches’ and ‘Recommended Patches’ to ‘Auto’ to keep that software up-to-date
- Set ‘Install’ to ‘Yes’ if you also want to install that software automatically
- Save the policy
10) Reporting
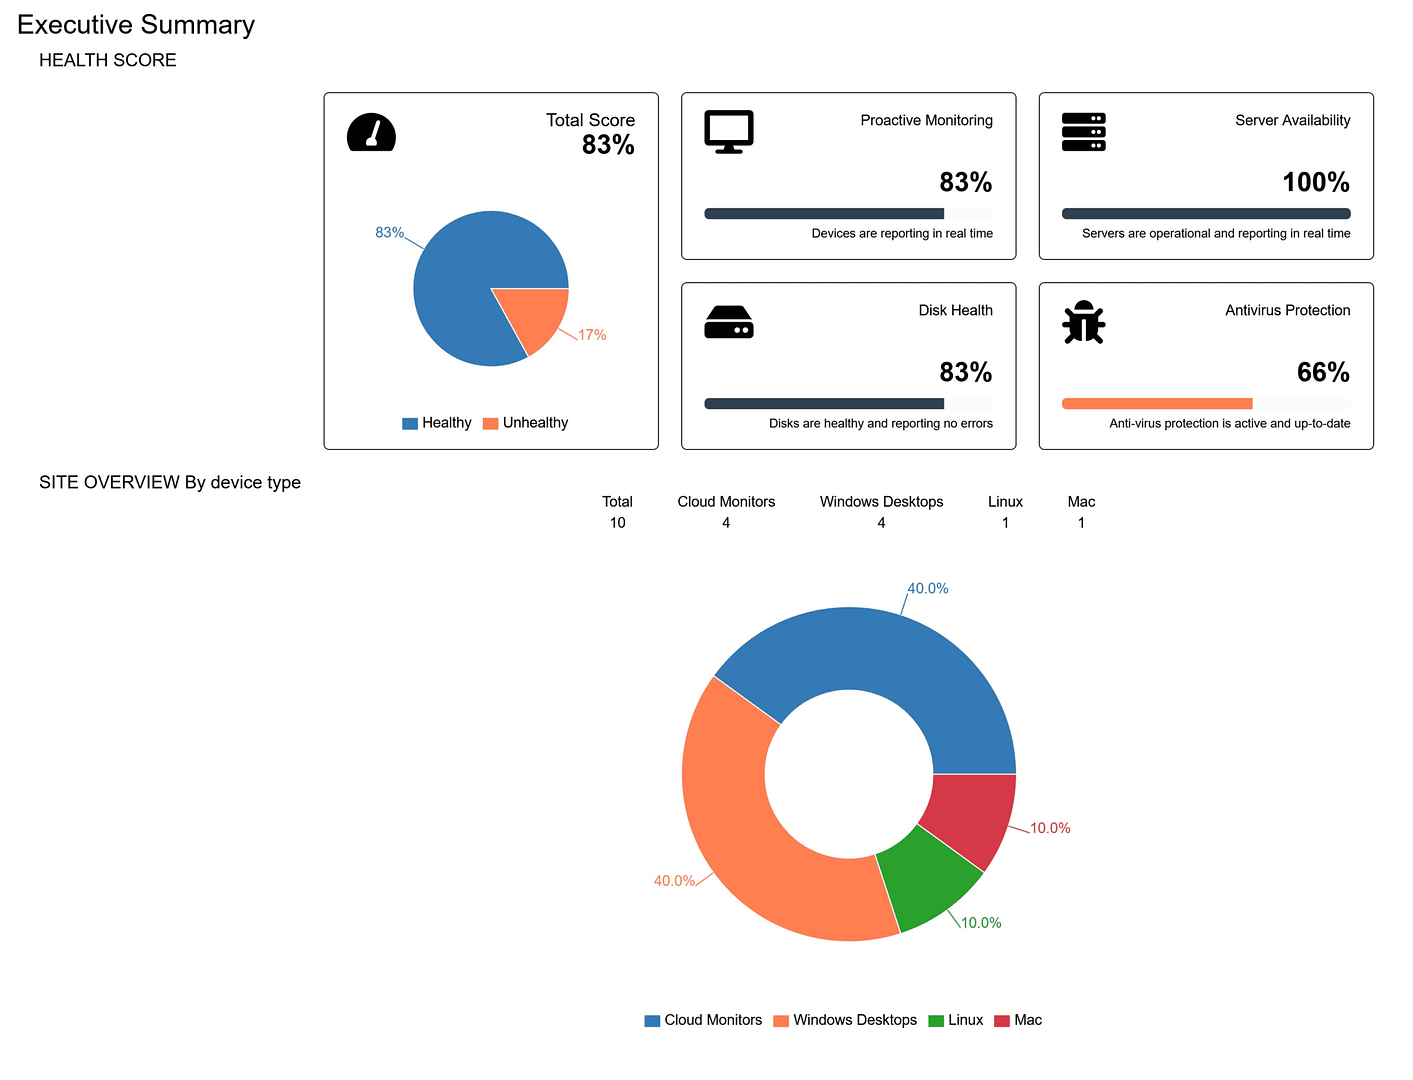
From software and hardware inventories to patch compliance and security, reporting can be an endless task. Ninja not only automates the collection of the critical data needed for reporting, it also automates the creation of presentation-ready reports.
How:
Automatically create and distribute a report:
- Navigate to ‘Configurations’ then ‘Reports’
- Click ‘Create new Report’
- Give the report a name
- Choose the organization, report recipients, time frame, and frequency
- Choose a report type and give it a name (hint: Custom reports let you select sections from any report type)
- Select the sections you want to be included in the report
- Save the report
Knockout repetitive tasks from your to-do list
Whether you use NinjaOne or another solution, it’s critical that you take advantage of scripting and automation to save yourself time and eliminate as much manual work from basic, repetitive tasks as possible.
That will free you and your team up to focus on higher-value work that really matters, like hitting the goals that can take your career and business to the next level.
Not using NinjaOne yet?
NinjaOne enables you to monitor the health and performance of all your endpoints — servers, laptops, workstations, SNMP devices, cloud infrastructure, and virtual machines — and manage them remotely from a single pane of glass.
Ninja also provides easy access to all your managed endpoints remotely, without the need to take control of the device. That means that, without interrupting the end-user, and often without the end-user knowing, you can perform regular maintenance, patch endpoints, run security scans, make registry changes, and more.
For more tips on improving your helpdesk efficiency, download our Helpdesk Efficiency Guide here.

