This guide will delve into git stash, starting with its basic concept, utility, and scenarios of use. We will then cover its basics, such as how to retrieve and manage stashes and explore advanced techniques. Best practices and their importance in software development will conclude our guide, ensuring a comprehensive understanding of git stash.
Git and the significance of git stash
Before diving into the specifics of git stash, it’s crucial to understand Git itself. Git, in a nutshell, is a distributed version control system that’s widely used in software development to track changes in source code during development. Its distributed nature allows multiple developers to work simultaneously on the same codebase without interfering with each other’s work.
Key features that make Git indispensable to developers include:
- Branching and merging: Git’s branching model allows developers to work in isolated environments called “branches”, and merge their changes back to the source code seamlessly.
- Speed and efficiency: Git is designed for performance. Its operations are fast, making it suitable for projects of any size.
- Data integrity: Git ensures the integrity of source code, maintaining a complete history and full version tracking capabilities.
Understanding these aspects of Git sets the stage for a deeper exploration into the git stash command, a tool that, while less frequently discussed than others like git commit or git merge, can nevertheless be an invaluable part of a developer’s toolkit.
What is git stash?
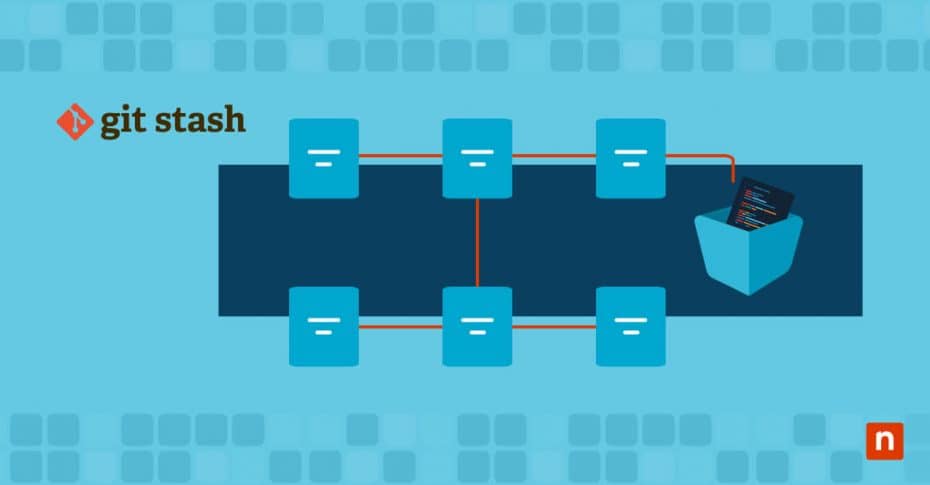
The git stash command is a powerful feature in Git. It is essentially a mechanism for saving the current state of your working directory and index without committing. It’s like a clipboard for uncommitted changes, offering a snapshot that can be reapplied later. This feature is integral in version control as it helps manage code changes more flexibly and efficiently. It temporarily shelves, or “stashes,” changes that you have made to the working directory, allowing you to work on something else and then come back to them later.
Its use cases include:
- Context switching: Quickly switch between branches or tasks without committing half-done work.
- Experimentation: Test new code or ideas without affecting the main project.
- Managing work in progress: Keep your working directory clean by stashing work-in-progress that’s not ready to be committed.
In multi-developer projects, git stash is invaluable
- Streamlined code inspection: Allows faster code inspection and bug tracking, permitting easier team code inspection practices, which is crucial in identifying and addressing issues quickly.
- Clean working directory: Helps in maintaining a clean working state, thereby reducing the risk of accidental commits of half-done work or wrong files.
- Safe experimentation zone: Facilitates experimental changes without affecting the main codebase, allowing developers to try out new ideas without disrupting the workflow.
- Aid in scalable environments: Can be of assistance in heavily containerized and/or otherwise horizontally scaled networks, eg. in phased-rollout scenarios, by managing code changes efficiently across different deployment stages.
Key scenarios for using git stash
- Urgent branch switching: Switching branches for urgent fixes, enabling developers to quickly change focus without losing progress on the current task.
- Pausing current work: Temporarily setting aside changes to work on something else, which helps to prioritize tasks without mixing up different code changes.
- Safe code trials: Experimenting with code without committing to the current branch, ideal for testing new features or fixes without altering the main codebase or current working branch.
Git stash basics
Stashing changes in Git is straightforward. Simply use git stash in your working directory. This command will stash any modified and staged changes, leaving you with a clean working directory.
How the git stash command is used
- Make changes in your working directory.
- Run git stash to stash the changes.
- The working directory returns to the state of the most recent commit.
How to stash changes with a message
Use git stash save message. This helps in organizing and identifying stashes, especially when working with multiple stashes.
How to view your stashes
Use git stash list. This command displays a list of all stashes, each with an identifier and the message (if provided).
Common git stash limitations
- It’s not a substitute for commits.
- Stashes are local, not shared across repositories.
- Untracked and ignored files are not stashed by default.
Git stash use cases
Git stash has significant functionalities that developers can use in various scenarios. Here are some of its use cases.
1. Saving work in progress
Scenario: When a developer needs to switch to another branch to focus on a critical issue but is in the middle of implementing a new bug fix.
Use case: Git stash saves current changes without committing them, enabling developers to switch to another branch or make changes before returning to the original branch and retrieving their stashed changes.
2. Cleaning the working directory
Scenario: When a developer has uncommitted changes in their working directory that they cannot lose, but they want to start working on a new feature from scratch.
Use case: Git stash temporarily removes uncommitted changes. It cleans a working directory, enabling developers to create a new feature from scratch and then reapply their previous changes.
3. Testing different approaches
Scenario: When a developer is working on a solution and wants to try a new approach but without losing their current work.
Use case: Git stash enables developers to stash their current changes and allows them to try different approaches. They can revert to their stashed changes if their new approach doesn’t work.
4. Resolving merge conflicts
Scenario: When a developer wants to temporarily stash some changes to deal with other urgent issues while coming up with a resolution for a complex merge conflict.
Use case: Git stash allows for temporarily saving changes, enabling developers to focus on other issues and then return to resolving merge conflicts.
5. Partial stashing
Scenario: When a developer wants to choose only some of the multiple changes that they want to stash from the changes in their working directory.
Use case: Git stash allows for stashing specific files or parts of them, giving developers more control over what gets stashed.
6. Working with multiple features
Scenario: When a developer needs to switch between multiple features they’re working on simultaneously.
Use case: Git stash enables developers to save the progress of the feature they are currently working on so they can switch to another feature without losing the changes they made. Developers can stash their work on a feature, switch to a branch for another, and then reapply the stashed changes once they initially switch back to the feature they’re working on.
7. Code reviews
Scenario: When a developer needs to leave uncommitted changes in their working directory to review a colleague’s code.
Use case: Git stash allows developers to stash their changes, review their colleagues’ code, and then reapply their stashed changes once they return to their working directory from looking at their colleague’s code.
8. Backing up uncommitted work
Scenario: When a developer wants to back up their uncommitted changes to another branch or a remote repository.
Use case: Git stash allows stashing changes, creating a new branch from the stash, pushing that branch to a remote repository, and providing a backup of a developer’s uncommitted work.
9. Collaborative work
Scenario: When a developer needs to pull the latest repository without losing their local changes but is working on a shared repository.
Use case: Gits stash enables developers to stash their changes and then pull the latest changes or updates from the remote repository. They can then reapply their stashed changes afterward.
10. Automating workflow
Scenario: When a developer uses scripts or hooks that require a clean working directory.
Use case: Git stash allows developers to stash the changes they made before running the scripts or hooks. They can then reapply them afterward to ensure a clean working directory for automation processes.
These are just the most common use cases of Git stash, demonstrating its flexibility in providing solutions and streamlining development workflows.
Retrieving stashed changes
To reapply the most recent stashed changes
Use git stash apply. This command re-applies the changes stashed most recently but doesn’t remove them from the stash list.
The difference between apply and pop
git stash pop differs from apply as it applies the stash and then removes it from the stash list. It’s used when you’re sure you no longer need the stashed changes.
Applying specific stashes from multiple stored stashes
- List stashes with git stash list.
- Apply the desired stash using its identifier: git stash apply stash@{n}.
For example: If git stash list shows two stashes, use git stash apply stash@{1} to apply the second one (enumerated from zero).
Managing and clearing stashes
How to safely drop or clear stashed changes
- To drop a specific stash: Use git stash drop stash@{n}
- To clear all stashes, git stash clear is the command.
Strategies for recovering accidentally dropped stashes
Stashes are, per definition, local and not committed or transmitted. Recovering dropped stashes is challenging as Git doesn’t provide a direct way. However, it’s sometimes possible to recover them using reflog if the stash was recently dropped; this tool only works locally, and might be able to help you find the location of temporary files with your not-yet-deleted temporary files.
Best practices in stash management
- Preventive maintenance: Regularly review and clear unnecessary stashes.
- Remember the comments: Use descriptive messages for easy identification.
- Use the right tool for the job: Avoid long-term reliance on stashes; prefer commits for long-term changes.
Integrating stash management in workflows
- Stashing changes before switching branches.
- Using stashes for temporary experiments.
- Regularly applying or dropping stashes to keep the stash list manageable.
Advanced git stash techniques
On stashing specific files or changes
To stash specific files, use git stash push [file1] [file2]. This targets only the specified files or changes, providing more control over what is stashed by enhancing the granularity of stash control.
Handling conflicts when applying stashed changes
When applying stashes, conflicts might arise. Handle them as you would with a merge conflict: edit the files to resolve conflicts, then add and commit them.
Git stash aids in branch switching
- Stashing changes in the current branch.
- Switching to the target branch.
- Applying the stash in the new branch.
Advanced git stash commands
Here are a few advanced git stash commands that cater to both common and more specialized use cases:
- Stashing untracked files: git stash –include-untracked or git stash -u
By default, git stash only stashes tracked files (those that have been added to the index). This command allows you to also stash untracked files (new files that haven’t been added to the index yet), making it useful when you have new files that you aren’t ready to commit.
- Stash specific files: git stash push -m “message” — path/to/file1 path/to/file2
This command stashes specific files or directories, rather than the entire working directory. It’s particularly useful when you want to separate changes in different files or directories and manage them independently.
- Creating a branch from a stash: git stash branch new_branch_name stash@{n}
If you have a stash (stash@{n}) and realize it should be on a separate branch, this command creates a new branch starting from the commit where the stash was created, applies the stashed changes to it, and then drops the stash. It’s a great way to manage stashed changes that have evolved into a more significant feature or bug fix. This is useful when a stash doesn’t apply cleanly to the current branch.
- Applying a stash without index: git stash apply –index
Normally, when you apply a stash, the changes that were staged when the stash was created are no longer staged. Using –index reapplies the stash and also stages the changes that were staged at the time of stashing. This is useful when you want to preserve the index state of your stashed changes.
- Interactive stash: git stash -p or git stash –patch
This command allows you to interactively select hunks of changes to stash. Git will prompt you for each change in your working directory, and you can choose whether to stash it or not. It’s particularly useful when you want fine-grained control over what gets stashed.
Git stash best practices
Like many other processes in development, git stash also encompasses strategies that help developers utilize its powerful functionalities. Here are some git stash best practices:
Use stash sparingly: In other words, do not overuse git stash. Instead of stashing, prefer utilizing dedicated branches for long-term work-in-progress. Remember to use the command moderately, especially when it’s only needed to work on another task because it will affect the changes that must be made in committing.
Use clear and descriptive stash messages: Developers can add a descriptive message that describes the changes they are stashing. With this in mind, they should always be clear with their stash messages and avoid unnecessary ones. Making the stash meaningful and informative allows developers to remember what exactly is in their stash when they return to it later. Clear messages also make it easier to identify and apply the correct stash later for easier retrieval.
Leverage branches: Always ensure that a new branch is created before stashing changes. This allows you to switch to different tasks or branches without affecting your current changes. You can then revert to the branch and apply the stash when you decide to work on the modifications again.
Stash untracked files: One of the best practices developers should always follow is to use commands that include untracked files in stashing. This reduces the risk of data loss or any important changes that were previously made.
Manage multiple stashes: There are commands that enable developers to manage multiple stashes effectively. These includes git stash list for viewing all existing stashes, git stash apply stash@{<n>} (where <n> represents the stash’s index) for applying a specific stash, and git stash drop stash@{<n>} (where <n> represents the stash’s index) to remove a stash if you no longer need it.
Consider stash pop carefully: Much like the first best practice, stash pop command (git stash pop) should be used with good discernment. While this command offers a quick way to apply and remove a stash, the operation can cause merging of conflicts if the stashed changes conflict with the current working tree. Alternatively, you can utilize the git stash apply command to apply the stash without deleting it. This enables you to resolve any conflicts manually before removing the stash with git stash drop.
Make the changes as quickly as feasible: Storing should only be used as a temporary solution. Once you have finished making a set of changes, you should commit them to the repository to preserve a record of the changes.
Other useful Git stash strategies
How to maintain a clean Git history
- Commit for permanence: Prefer commits over stashes for permanent changes.
- git commit -m “Commit message”
- Stash housekeeping: Regularly clean up stashes.
- git stash list followed by git stash drop stash@{n}
- Temporary haven: Use stashes for temporary, not long-term changes.
Common git stash pitfalls to avoid
- Avoid excessive stashing: Over-relying on stash for important changes.
- Remember to unstash: Forgetting to apply or drop stashes.
- git stash apply or git stash pop
- Stash awareness: Losing track of what each stash contains.
- git stash list to review stashes
- Clarify with comments: Confusing stashes due to insufficient stash comments.
- git stash save “Descriptive message”
When incorporating git stash in team-based projects
- Communicate your stashes: Communicate stashed changes if they impact others.
- Workflow enhancement: Use stashes for personal workflow improvements.
- Keep stashes local: Avoid pushing stashes to shared repositories, unless a new branch needs to be created from a stash in order to commit local changes to the repository as gracefully as possible.
Troubleshooting common git stash issues
Resolving stash application conflicts
- Problem: Conflicts when applying a stash due to overlapping changes.
- Solution: Manually resolve conflicts in affected files, then git add and commit them.
Recovering lost stashes
- Problem: Accidentally dropped or missing stashes.
- Solution: Use git reflog to find the lost stash’s commit hash, then reapply it with `git stash apply <commit-hash>`.
Handling stashes in detached HEAD state
- Problem: Applying stashes after working in a detached HEAD state.
- Solution: Checkout to the desired branch, then apply the stash using git stash apply or git stash pop.
Avoiding stash duplication
- Problem: Duplicate stashes after applying without dropping.
- Solution: After applying a stash, use git stash drop to remove it if it’s no longer needed.
Stashing untracked files
Problem: git stash doesn’t include untracked files by default.
Solution: Use git stash –include-untracked or git stash -u to stash untracked files.
Git stash, git commit, git reset, and git stage: What are the differences?
Since we have already discussed a git stash, let’s see how it differs from other Git commands, such as committing, resetting, and staging changes.
Git commit
Git commit pertains to a command that enables developers to save the changes made into the source code, storing it in the local repository. They do this to keep a snapshot of a project at a specific point in time so they would have a reference that represents the current state of the project, including staged changes, from the time they were working on it. To put it in context, here’s a table of their distinctions below:
| Feature | Git Stash | Git Commit |
| Purpose | Temporarily saves uncommitted changes | Permanently saves changes to the project history |
| Reversibility | Can be applied or dropped later | Requires git revert or git reset to undo |
| Branching | Can switch branches without committing | Does not affect branching |
| Stackable | Multiple stashes can be created | Commits are linear |
Git reset
Git reset is a complementary command for git stash that allows for managing changes to a Git repository. With these two commands combined, developers can retrieve backed-up and previously deleted files and send them back to the repository. But git stash and Git commit also have differences, which you can see in the table below:
| Feature | Git Stash | Git Reset |
| Purpose | Temporarily saves uncommitted changes | Resets the current HEAD to a specific state |
| Reversibility | Can be applied or dropped later | Can be undone with git reflog but can be destructive |
| Data Loss | Preserves uncommitted changes | Can lose uncommitted changes (depending on options) |
| Branching | Can switch branches without committing | Can change the branch or create a new one |
Git stage
The Git stage is used to get the changes ready to be committed. The process involves adding the changes to the staging area or “index,” allowing developers to review the changes made before they make a commit. The table below shows the key differences between git stash and Git stage:
| Feature | Git Stash | Git Stage |
| Purpose | Temporarily saves uncommitted changes | Prepares changes for commit |
| Location | Stash area | Staging area |
| Committing | Requires git stash pop or git stash apply to commit | Requires git commit to commit |
| Reversibility | Can be applied or dropped later | Changes can be unstaged with git reset HEAD <file> |
| Branching | Can switch branches without committing | Does not affect branching |
The practice of stashing cultivates good development habits
Regularly stashing uncommitted changes encourages developers to maintain a clean and organized codebase, which in turn reduces the likelihood of conflicts and errors. It’s a practice that, when used judiciously, can significantly enhance the overall efficiency and effectiveness of version control management.
This feature is not just a mere command in the vast array of Git functionalities; it’s a critical tool for efficient and flexible coding workflows. Its ability to temporarily sideline work in progress allows developers to maintain a clean working directory, which is essential in complex software development environments where focus and organization are key.
The versatility of git stash lies in its simplicity and the broad range of scenarios it caters to – from quick context switches to experimenting with new features without disrupting the main codebase. This functionality is especially beneficial in collaborative settings where multiple developers are contributing to the same project.
Stashes help in ensuring that each developer’s work remains intact and unaffected by the changes of others, thereby fostering a more seamless and productive collaboration.
Whether you’re a novice programmer just starting out with Git or an experienced developer, the ability to adeptly use git stash is an invaluable skill in your software development toolkit. It offers a strategic way to handle code changes, aligns well with effective development practices, and ultimately contributes to more streamlined and agile project management.

