Advanced automations are essential for IT administrators to streamline endpoint management, improve operational efficiency, and maintain security across all devices.
By leveraging advanced automation features in NinjaOne, IT teams can reduce manual workloads and ensure consistent compliance with security policies. With the ability to create custom scripts, set conditions, and configure custom fields, NinjaOne allows for highly flexible and tailored automation workflows.
This empowers IT administrators to automate a wide range of tasks, from software deployments and patch management to system configurations and reporting. The intuitive interface and powerful automation tools in NinjaOne ensure that even complex processes can be automated with precision, enhancing productivity and providing real-time visibility into device status and performance.
How to setup Advanced Automations in NinjaOne
This section will guide you through how to leverage conditions, custom fields, and scripts to design advanced automations, enabling you to create highly dynamic and efficient workflows tailored to your unique requirements.
Conditions Configuration:
Conditions are configured at the policy level, allowing IT administrators to monitor systems proactively with minimal setup. When a specified condition—such as missing software or a memory threshold breach—meets the defined criteria, NinjaOne can automatically assign severity and priority, send notifications to designated recipients, trigger automations, and/or create tickets.
NinjaOne provides a variety of pre-configured conditions for operating systems, virtual machines, and network management systems. Additionally, templates are available to quickly apply multiple condition types to your policies, streamlining the setup process.
Setting Up Conditions:
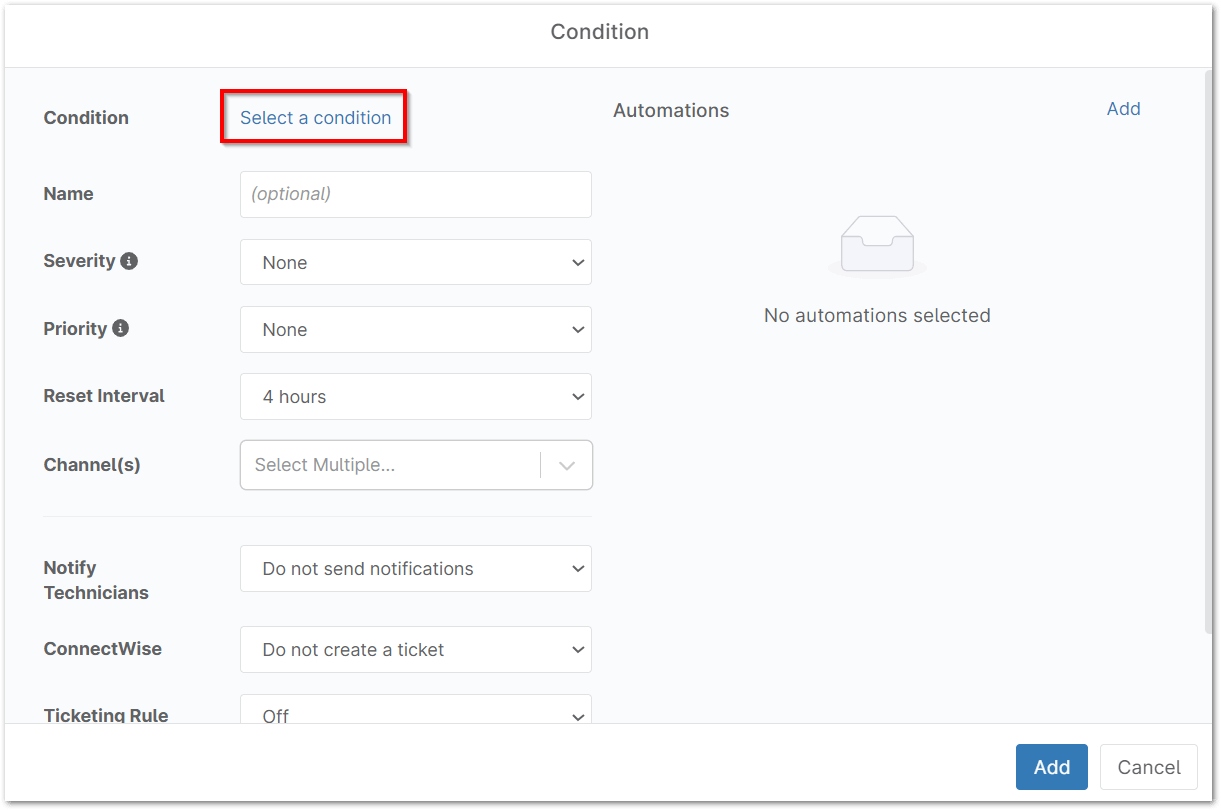
1. Navigate to the editor for one of your policies (Administration > Policies). The Conditions tab should be open by default. Click on an existing condition to edit it or click Add a condition at the top of the conditions list to create a new one.

2. Select a condition to monitor.

Sample Conditions and Configurations
Use the following examples to automate responses based on system state changes:
CPU Usage:
Configure an action or script to trigger automatically when:
- CPU usage remains above a defined threshold (e.g., 80%)
- For a sustained period (e.g., 5 minutes)
- This may indicate high system resource consumption across all CPU cores.
Memory Usage:
Configure an alert to trigger automatically when:
- Memory usage remains above a defined threshold (e.g., 80%)
- For a sustained period (e.g., 5 minutes)
- This condition may suggest potential memory pressure or a memory leak.
Process Monitoring:
Monitor the health of critical system processes or multiple process and alert when:
- A critical process (e.g., ‘explorer.exe’ or ‘lsass.exe’) is not running
- For a sustained period (e.g., 3 minutes)
- This helps avoid false positives caused by brief restarts or updates.
Script Result Monitoring:
Configure a check to run when:
- A script (e.g., ‘Run Enable CD-ROM drives’) is executed at a regular interval (e.g., every 5 minutes)
- And returns a non-zero result code (≠ 0) with no output (”)
- This combination indicates the script failed or did not return the expected result.
3. Give the condition a name, severity, and priority (this step is optional). Certain conditions, like the Windows Event condition, require a source/provider name—these fields can support wildcards (*) if needed.
4. Configure your reset interval. The condition automatically resets (i.e., the alert will be cleared from the device) after this amount of time.
Important Note: Some conditions may also provide the option to automatically reset the condition when no longer met. (For example, if you select this option for the Device Down condition, this option automatically resets the condition when the device comes back online.)
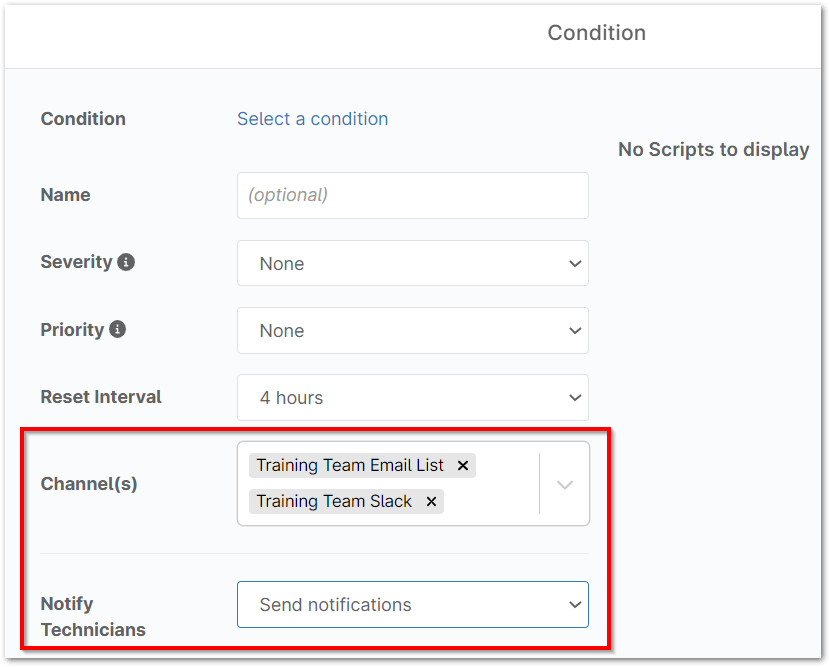
5. Select whether you would like to Notify Technicians and the channels through which they can receive notifications. For more information about notification channels.
Important Note: Some conditions, such as the Device Down condition, may also provide the option to notify on reset. If selected, you receive an additional notification when the condition is reset.
6. If you have a PSA integration or NinjaOne Ticketing configured, you may also opt to have the condition create a ticket if it triggers. The NinjaOne ticketing rule uses the forms you added under Administration > Apps > Ticketing > Forms.
Important Note: If there are currently 10 tickets open for the same condition and device, the system will not create more tickets. The most recent ticket will be updated with a private message outlining the issue; at least one ticket must be deleted to resume creation.
7. Finally, you may add a script or install/run application that can be used to remediate if the condition triggers. Just click Add Automation in the top right corner of the window, which opens a modal containing a list of all native scripts or scripts you added through the NinjaOne Automation Library.
When a condition is saved, it displays on the policy’s Conditions tab with ticketing and notification details visible.
Here’s a helpful example of how to use conditions in NinjaOne: Fixing a Down Windows Service with Automation.
Compound Conditions:
Compound Conditions enable administrators to combine multiple criteria for more precise device targeting and monitoring. This feature allows for the ‘stacking’ of conditions, providing a more granular approach to defining the circumstances under which alerts are triggered, or actions are executed.
Conditions are configured at the policy level, allowing IT administrators to monitor systems proactively with minimal configuration. When the specified compound conditions are met—such as a combination of a custom field and a script result—NinjaOne can assign severity and priority levels, send notifications to designated recipients, trigger automations, and/or create tickets.
Setting Up a Compound Condition:
1. In the NinjaOne console, navigate to the editor for one of your policies (Administration > Policies), and then click the Compound Conditions tab.
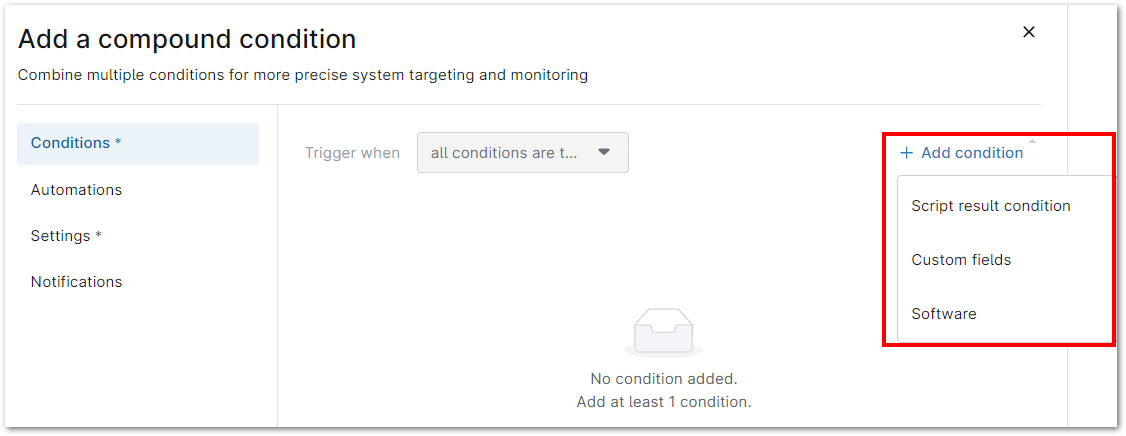
2. Click an existing condition to edit it or click Add at the top of the Compound Conditions list to create a new one. When adding a compound condition, you can choose to add a script result condition, a condition based on custom fields (contains/does not contain any/all), or software (triggers when exists/doesn’t exist).
For each compound condition added, you can add an automation or configure notifications for it. Settings allow you to configure auto-reset, run schedule, and trigger uptime. You can also search by condition name and filter between the “enabled” or “disabled” statuses.
You can also adjust the table settings to display specific columns by clicking the gear icon in the upper-right side of the conditions list. Additionally, you can select check boxes for one or more conditions to edit, enable/disable, or apply a specific action. If a condition displays as Inherited in the Overrides column, it cannot be deleted as belongs to the parent condition.
3. Adjust the compound condition criteria through the following tabs:
- Conditions
- Automations
- Settings
- Notifications
4. On the upper-right side of the Conditions tab, click Add condition, and then select Script result condition, Custom fields, or Software.
Configure Custom Fields:
There are two types of custom fields: role and global.
- Role custom fields are configured for specific device roles and are only available to devices within those roles. These fields must be manually mapped to the devices.
- Global custom fields are available for all devices, regardless of their type, and will display on every device.
To use role custom fields, ensure they are added to the appropriate roles in the Administration > Devices > Roles section.
Create Custom Fields
1. Click Administration in the left navigation pane, then select Devices. From there, choose either Role Custom Fields or Global Custom Fields.
2. Click Add on the right side, then select Field.
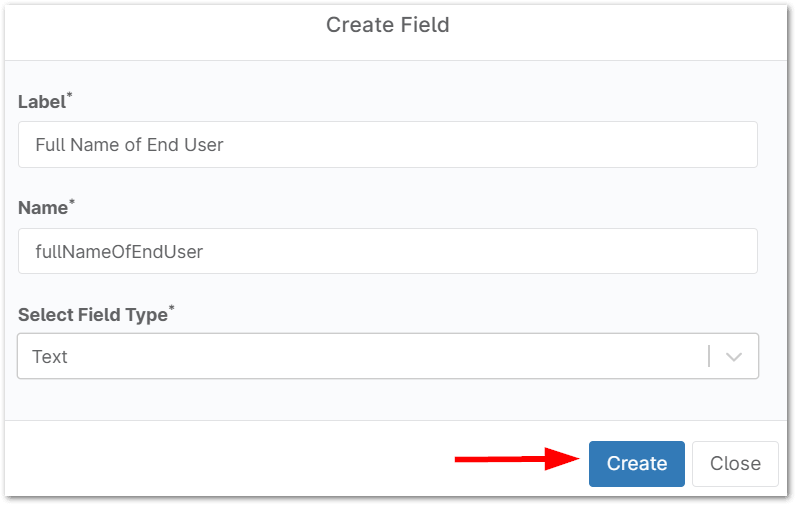
3. In the Create Field modal, type the Label you would like to use for this custom field. The label is the name or title of the custom field and will be displayed when viewing the field on the NinjaOne dashboard. The Name is for internal use.
4. Next, choose a field type from the drop-down menu and then click Create. For a list of all custom fields and how they can be used, please see Custom Fields by Type and Functionality.
5. Next, configure permissions for technicians, scripts, and the API.
| Field | Description |
| Technician | Make this field editable (technicians can update or insert data if they have access permitted for Device Administration in their account or role) or read-only. |
| Automations | Choose from none, read-only, write-only, or read/write. Responsible for defining access to this field through scripts. Please note that scripts cannot update fields that don’t have the definition scope set to “device”. |
| API Permissions | Choose from none, read-only, write-only, or read/write. |
| Definition Scope | Global fields only. This field determines which dashboard the custom field will display on. |
| Label | Change the name of the custom field, if necessary. |
| Description | Use to clarify the purpose. Currently, this field is only visible when editing the custom field in Administration. |
| Tooltip Text | Add text to assist those who are updating the custom field on the dashboard. This adds a small (i) icon next to the field name that technicians must hover their cursor over to see the text. |
| Footer | Add text to assist those who are using the custom field on the dashboard. This adds small font text under the data field. |
| Required | Activate this checkbox to make the custom field mandatory. This means that if a technician edits the custom fields on the dashboard view, they must make sure this field has data before they can save other changes. |
| Advanced Settings | Some custom fields may have an Advanced Settings hyperlink at the bottom of the modal. |
6. Click Save when ready.
After clicking Save, a summary of your custom fields is displayed in NinjaOne.
The summary provides the field name, label, the type of field, when it was created, and when it was last updated. Custom fields can be updated and deleted.
Here are some excellent references on using custom fields for your advanced automations: Advanced Automation in NinjaOne: Auto-Install Applications and Systray Automations.
Advanced Automations with Scripts
NinjaOne’s Advanced Automations framework provides an extensive toolset for automating complex workflows through custom scripts. You can create, edit, and execute scripts that integrate seamlessly with conditions, custom fields, and triggers.
NinjaOne gives you flexibility in script execution, allowing you to define optional parameters and choose whether to run them as System, Current User, or using credentials from your credential store. These automations ensure streamlined, efficient management of devices and environments.
For a comprehensive guide on writing scripts in NinjaOne, refer to the Script Library Documentation.
Benefits of using NinjaOne API for Advanced Automations
- Streamlined Device Management: Automate tasks such as software deployment, configuration, and patch management, reducing the need for manual intervention and increasing efficiency across all managed endpoints.
- Scalability: Automate processes at scale, making it easy to manage large numbers of devices, even across multiple locations, without adding complexity to your workflow.
- Improved Efficiency: Save time and resources by reducing repetitive tasks and manual interventions, allowing IT teams to focus on more strategic initiatives.
Best Practices for Advanced Automations
- Plan your workflows: Before automating tasks, clearly define the desired outcomes and specific use cases, such as software deployments, patch management, or device monitoring.
- Continuous monitoring: Regularly monitor automation performance and endpoint compliance through NinjaOne’s reporting tools. Identify areas for optimization and fine-tune workflows to improve efficiency and reliability.


