
Hyper-V monitoring in NinjaOne refers to the specific guidelines and configurations applied to Hyper-V hosts and virtual machines. These settings are crucial for ensuring that your Hyper-V environment is managed and secured according to Microsoft’s standards, while also meeting your organization’s specific requirements.
Hyper-V monitoring in NinjaOne lets you control your Hyper-V environment. You can centralize control, implement proactive monitoring, and manage security settings. This helps keep your virtual machines running smoothly and efficiently, while also protecting your data.
You can also automate tasks and monitor your Hyper-V environment easily. This makes it easier for your IT team to manage your virtual infrastructure and keeps your business operations running smoothly.
How to enable Hyper-V Monitoring in NinjaOne?
Setting up Hyper-V Monitoring:
Important Note: Only system administrator users in NinjaOne have the ability to set up Hyper-V Monitoring. Custom users will not be able to see the option for Virtualization in the organization editor.
Option 1
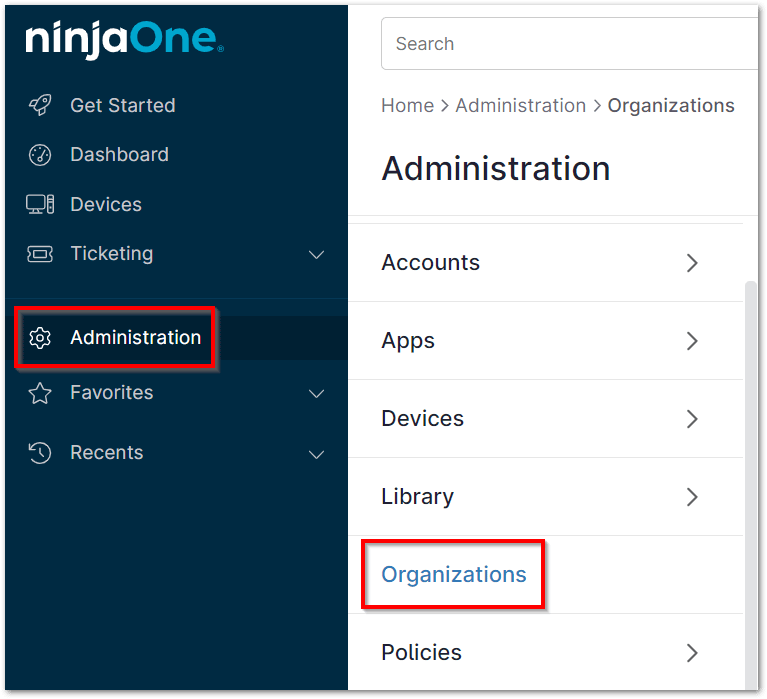
1. From Administration, click Organizations and select the organization that houses the device you’d like to use to set up Hyper-V monitoring.
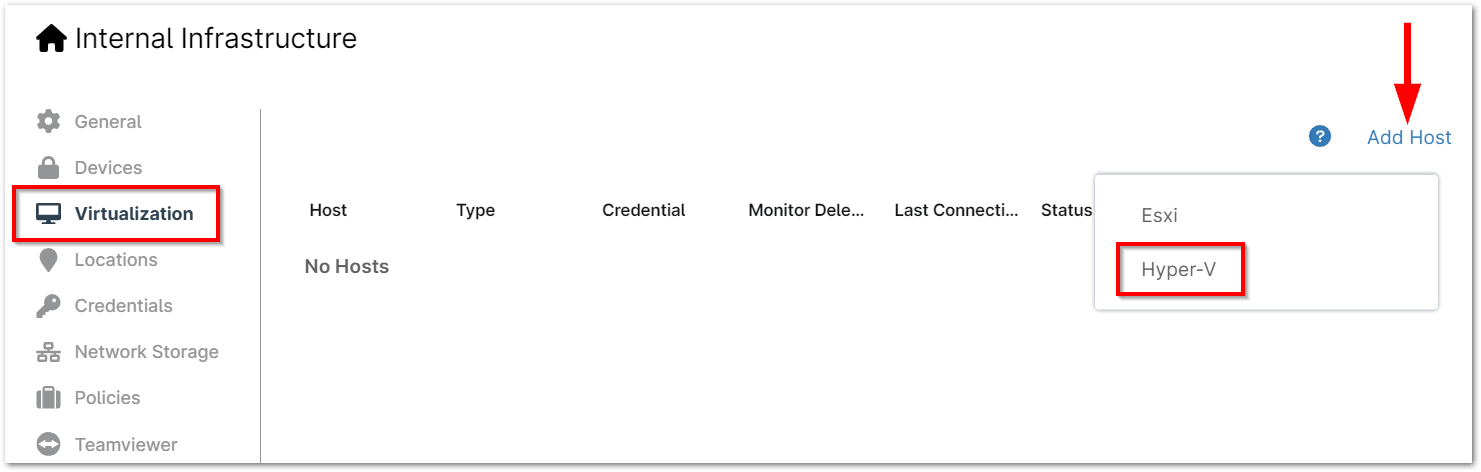
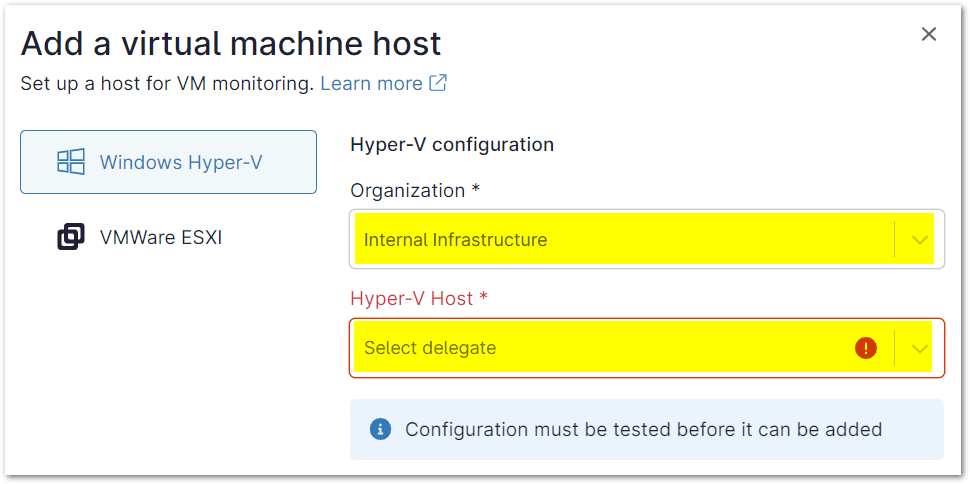
2. Open the Virtualization section; click Add Host and select Hyper-V.
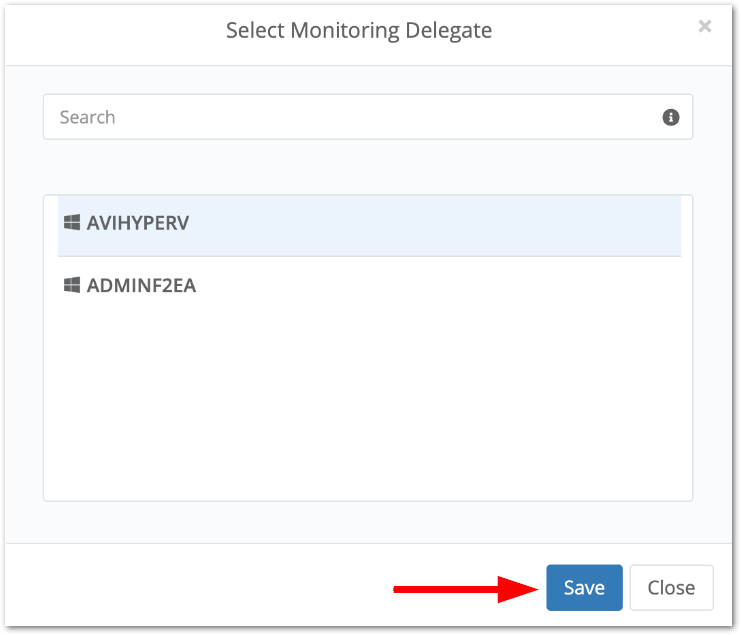
3. Next to the Monitor Delegate section, click select.

A list of the currently connected Windows machines under the organization populates.
4. Select the monitoring delegate you’d like to use from this list, and then click Save.
Option 2
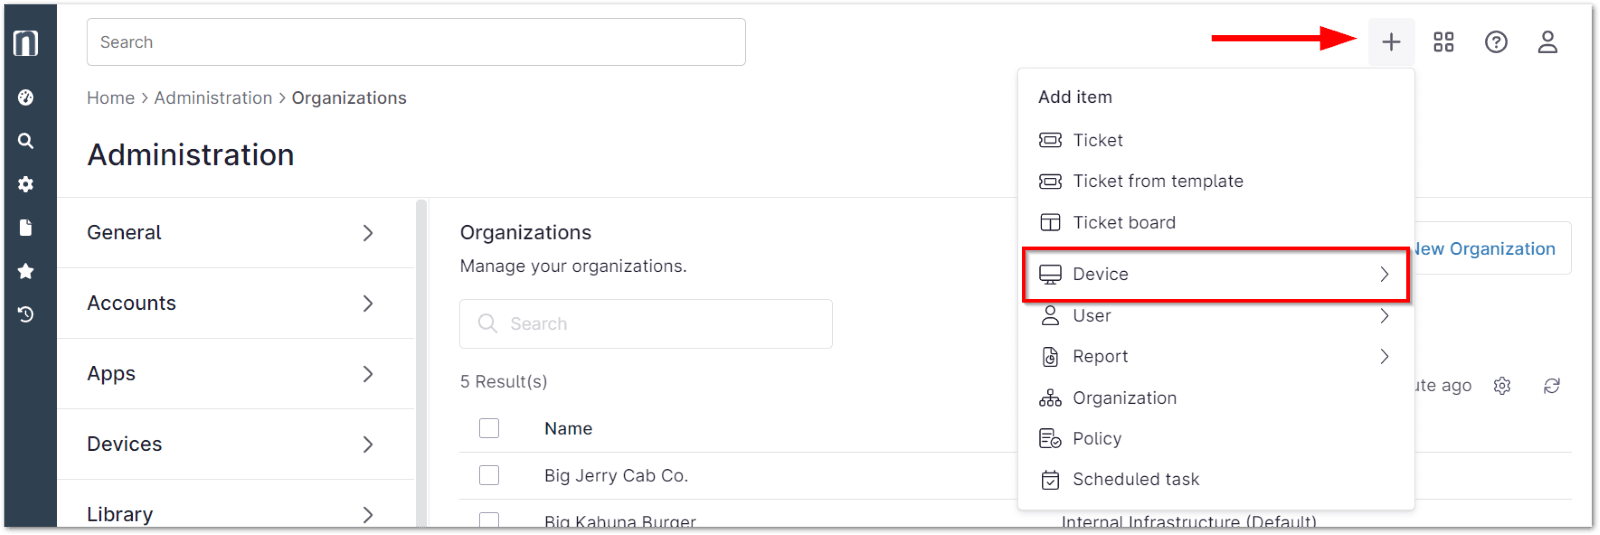
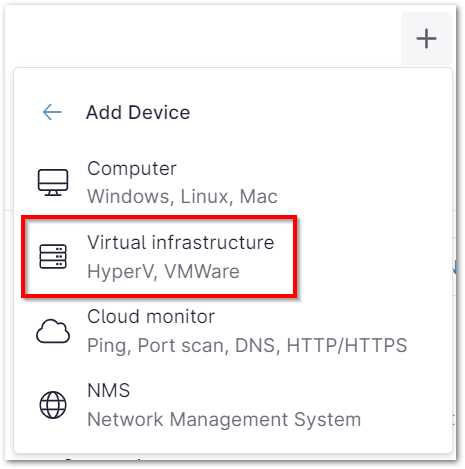
1. Click the plus sign icon at the top of the Ninja console and select Device from the drop-down menu, then select Virtual Infrastructure to set up Hyper-V.
2. Select desired Organization and Hyper-V Host.
Important Notes:
- In order to be available for selection as a delegated monitor, a device must have the Ninja Agent installed, be online and connected to the Ninja console, belong to the organization you are attempting to add a host to, and have Hyper-V installed.
- Only one host can be added per monitoring delegate.
Testing the Monitor Delegate
1. Click Test to confirm your configuration is correct. If the test succeeds, a message in green that states ‘Test succeeded’ will appear in the bottom left corner of the window. If the test fails, a reason for the failure in red in the same area will appear.
2. If the test was successful, click Add in the bottom right corner of the window.

Important Note: You will only be able to click ‘Add‘ if the test is successful.
3. Once the host has been successfully added, click Save in the top right corner of the page.
Creating Hyper-V Monitoring Policies:
4. Go to Policies: Click “Administration” on the left, then “Policies,” and finally “VM Policies.”
5. Create a New Policy: Click “Create New Policy” and give it a name and description. Choose if it’s for a Hyper-V Host or Guest VM.
6. Assign a Parent Policy (Optional): Decide if you want to inherit settings from another policy.
7. Save: Click “Save” to confirm your settings.
Customize Your Policy:
- Add Conditions: Click “Add a condition” to include more specific rules for your policy.
- Save: Click “Save” again to finalize your changes.
Editing, Copying, and Deleting Hyper-V Policies:
8. Go to Policies: Click “Administration” on the left, then “Policies,” and finally “VM Policies.”
9. Select a Policy: Hover over the policy you want to change and click on the ellipses icon.
10. Choose Action: Select “Edit,” “Copy,” or “Delete” from the menu.
Important: Copying a policy creates a new, independent policy with the same conditions.
Benefits, Strategies and Best Practices for Hyper-V Monitoring with NinjaOne
Centralized Management: NinjaOne provides a unified platform to monitor and manage your entire Hyper-V environment, reducing complexity and improving efficiency.
Proactive Problem Resolution: Real-time monitoring allows you to identify and address potential issues before they escalate, minimizing downtime and disruptions.
Leverage Automation: Automate routine tasks like patching, backup, and get alerts for critical health criteria to improve efficiency and reduce human error.
Reporting and Analytics: Generate reports to analyze trends, identify bottlenecks, and make data-driven decisions.
Custom Dashboards: Create customized dashboards to visualize key performance indicators and quickly identify anomalies.
Update and Patch: Keep your Hyper-V environment up to date with the latest patches and updates to address security vulnerabilities and improve performance.