Autotask is a cloud-based business management platform primarily used by Managed Service Providers (MSPs) to streamline their operations. It’s designed to help businesses of all sizes, from small IT firms to large enterprises, improve efficiency and profitability.
Can NinjaOne integrate with Autotask?
Yes. The integration of NinjaOne with Autotask allows seamless communication. It enhances efficiency and streamlines workflows, designed to automate ticket creation, creates a two-way ticket and device syncing. Together, they form a powerful combination that helps MSPs and Internal IT teams streamline operations.
How to Connect Autotask in NinjaOne?
In order to utilize this integration, you need to have an active Autotask account. Discuss the NinjaOne + Autotask combination with your sales representative.
Follow the instructions on how to create Autotask User for NinjaOne.
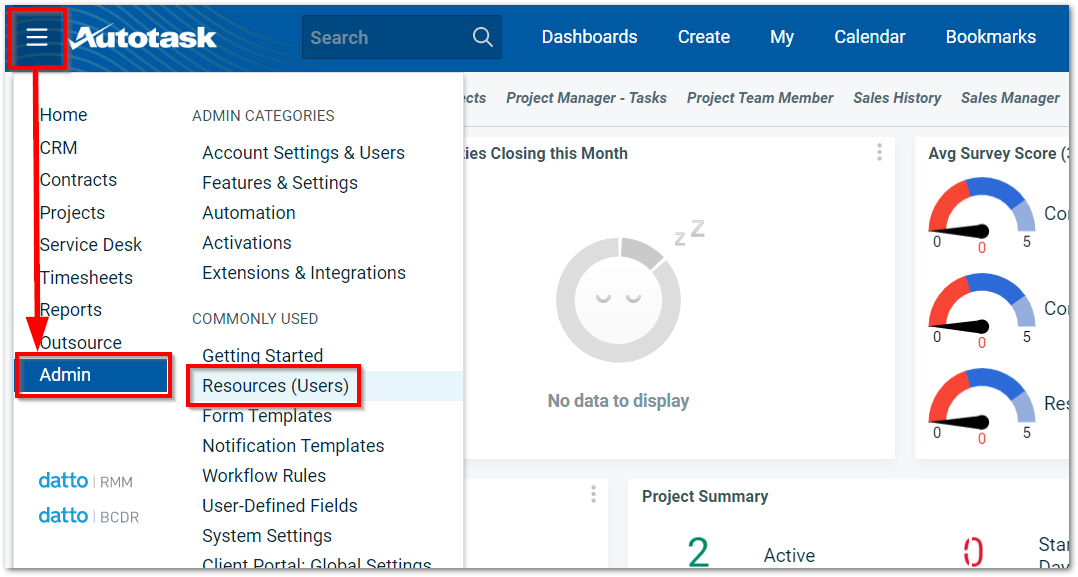
1. To create an API user account with the appropriate Security Level and API Tracking Identifiers, go to Autotask. Open the drop-down menu in the top left corner and select Admin, and then click Resources (Users). (See the following screenshot for reference)
2. Hover over the New button and select New API User. (See the following screenshot for reference)
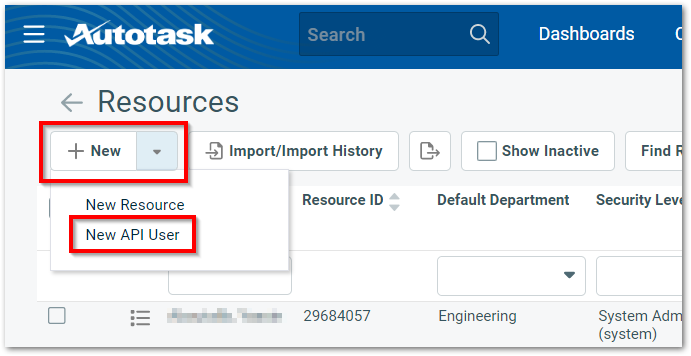
The user editor displays in a popup window.
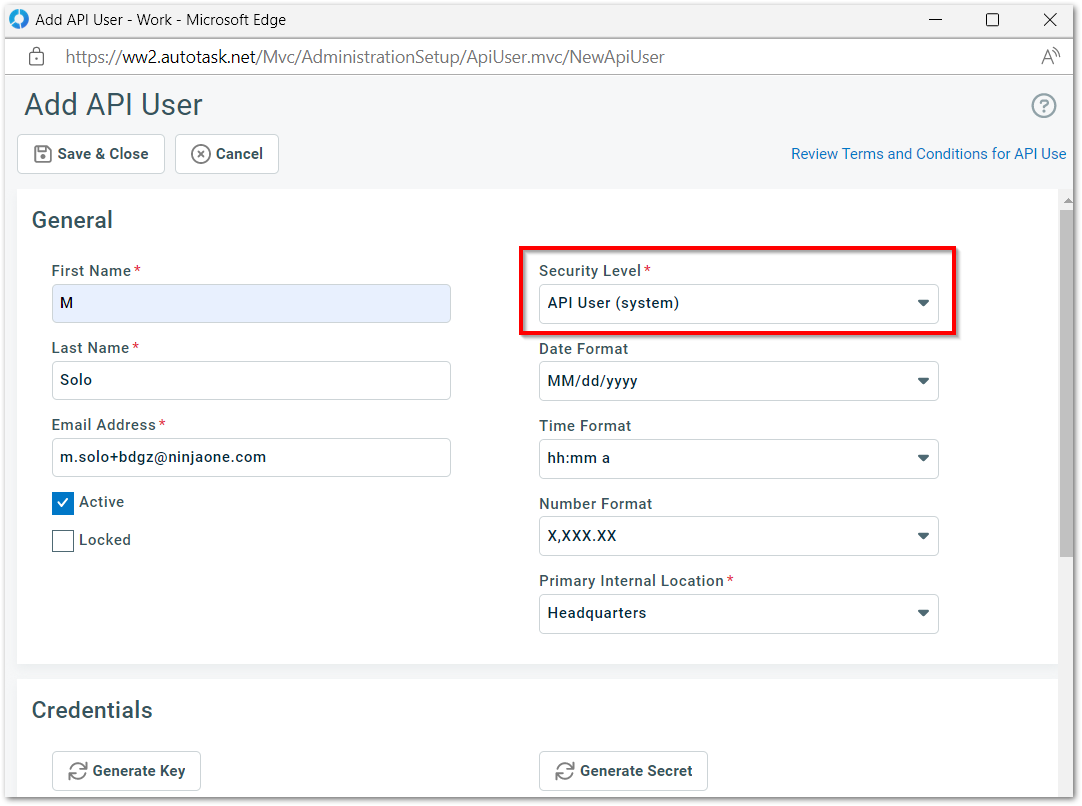
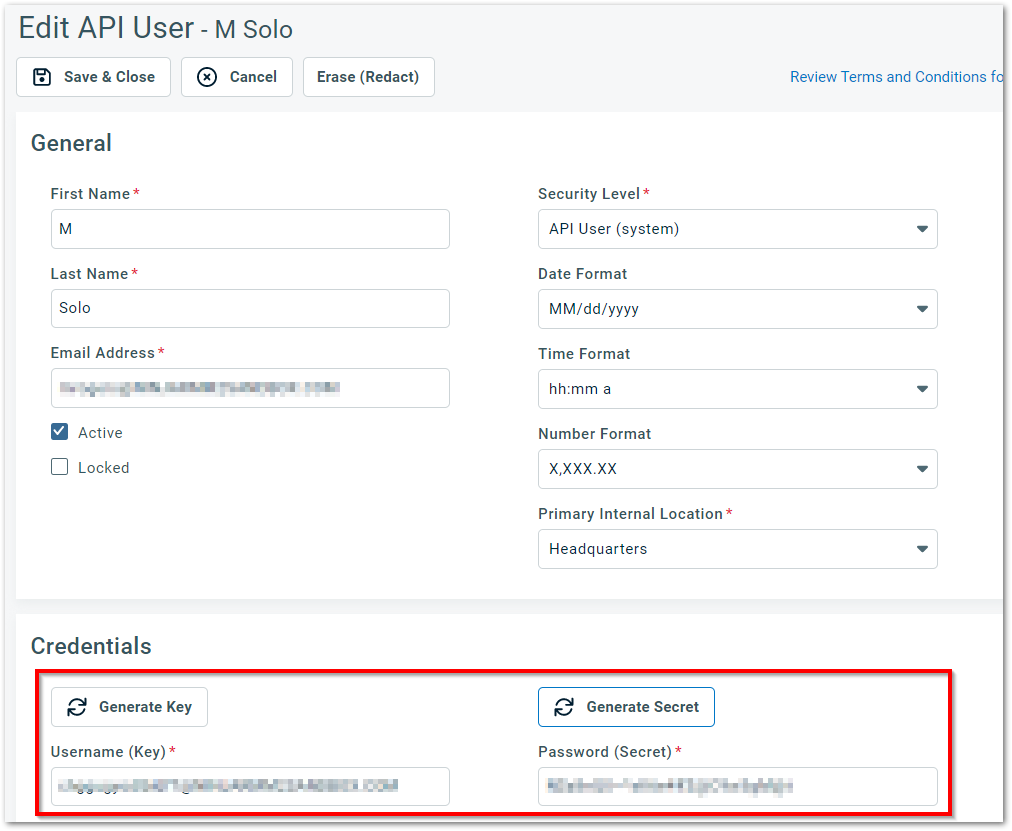
3. Select “API User (system) for Security Level and fill out all required fields as applicable. (See the following screenshot for reference)
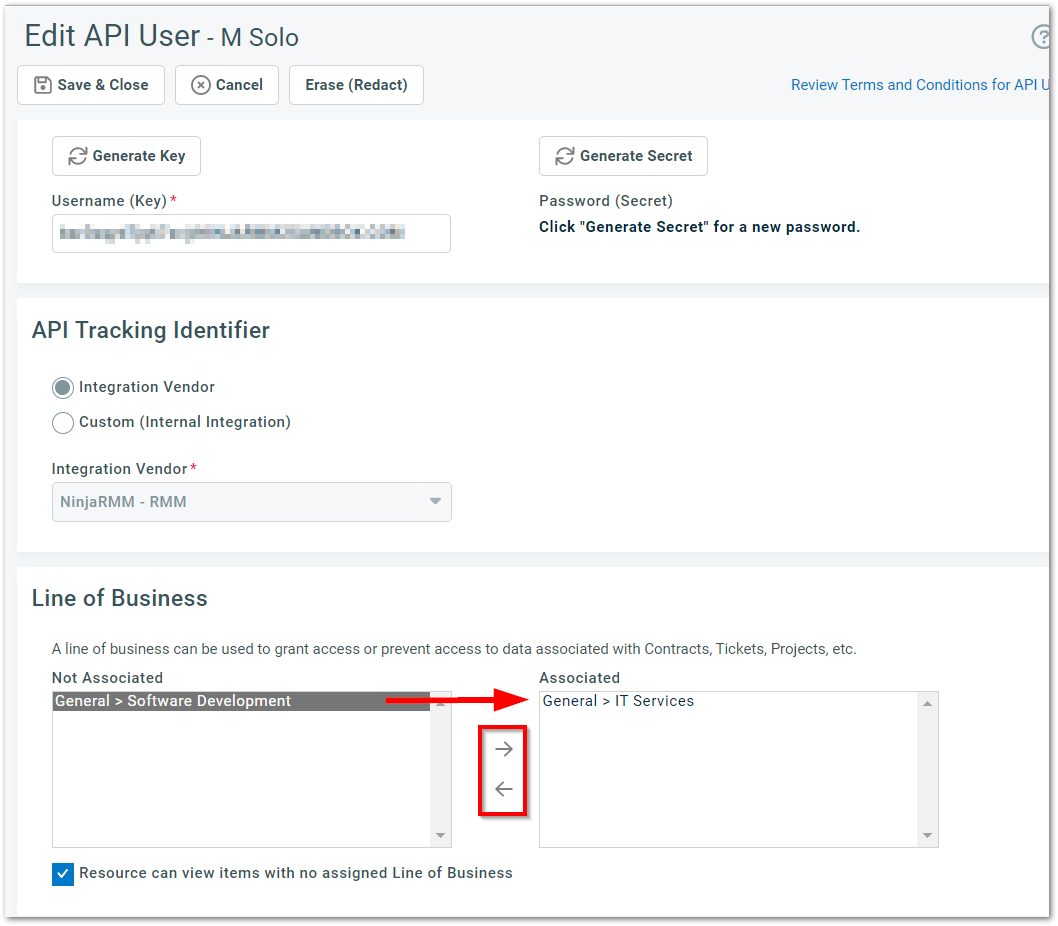
4. Scroll down to the API Tracking Identifier section. The Integration Vendor radio button should be selected by default—if not, activate this button and then select “NinjaRMM – RMM” from the Integration Vendor drop-list. (See the following screenshot for reference)

5. In the Line of Business section at the bottom, grant the user access to data by moving the applicable line of business from the Not Associated box to the Associated box. Select the line item and then use the arrows to move it from one box to another. (See the following screenshot for reference)
6. Use the generate key option in Autotask user editor. Save these credentials so you can enter them into the NinjaOne console—you must click Save & Close for the credentials to work. (See the following screenshot for reference)
7. Click Save & Close. (See the following screenshot for reference)

8. Click the “back” button next to the Resources page title to return to the Admin page. (See the following screenshot for reference)

9. Open the Account Settings & Users tab and expand the Resources/Users (HR) section. (See the following screenshot for reference)

10. Click Protected Data Permission under Security. (See the following screenshot for reference)

11. Grant the user full permissions and then click Save. (See the following screenshot for reference)

Follow the instructions below to enable the integration.
1. Go to Administration, then Apps and click add Apps.
2. Select Autotask PSA from the list. The app is added to the administration dashboard as “Not connected”
3. Click Continue then click Enable at the top right corner of the page.
4. At this point, you need to enter username and password for your Autotask API user account (Follow the tutorial on how to create Autotask User for NinjaOne), and then click Test to ensure that the credentials are properly resolved. (See the following screenshot for reference)

You should receive a confirmation message ”Status: Connection succeeded with provided credentials”. On the App page, the Status should reflect ”Healthy.”
Important Note: If you generated a secret and did not click Save & Close, the credentials may not work.
5. Lastly, click Save.