Managing store apps on mobile devices through Mobile Device Management (MDM) is crucial for ensuring security and protecting corporate data. Unregulated app installations can expose organizations to vulnerabilities, making it essential for IT administrators to control which apps are installed and enforce security policies like app permissions and encryption. MDM helps prevent unauthorized apps from accessing sensitive information and allows for remote wiping in case of lost or compromised devices.
In addition to security, MDM ensures compliance with regulatory standards and app licensing agreements. Administrators can enforce data handling rules to meet regulations like GDPR or HIPAA, while also tracking app usage to prevent licensing violations. Managing apps also increases productivity by restricting non-work-related apps and remotely deploying business-critical applications, ensuring employees have the necessary tools for work.
Finally, MDM streamlines app deployment and updates, reducing the burden on users to manually install or update software. IT teams can push updates remotely, ensuring that all devices run the latest, most secure versions. This control also extends to managing app permissions, helping to mitigate security risks while maintaining an optimized and secure mobile environment.
How Can I Manage Store Applications on Android Devices with NinjaOne?
Whether it´s a BYOD or a company-owned device, the policies have an Application section where you can make applications available for installation. Follow the next instructions to automatically install Android applications using policies in NinjaOne.
1. Go to Administration, then Policies, then MDM Policies.
2. Click Create New Policy.
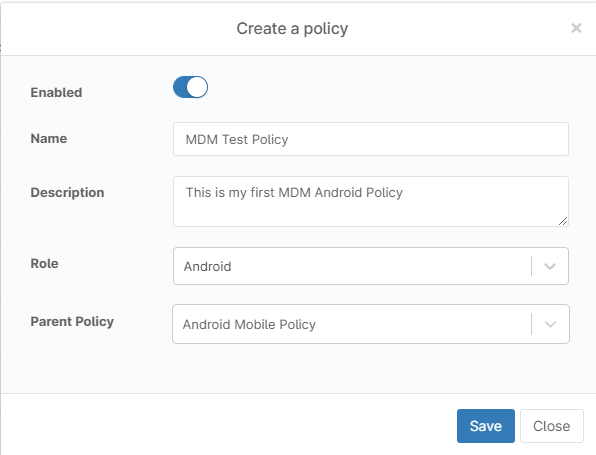
3. In the Name field, enter a name for your policy, for example, MDM Test Policy.
4. In description, enter a description of your preference, for example, “this is my first MDM Android Policy.”
5. Under Role, select Android.
6. Optionally, under Parent Policy select the policy you want to inherit from.
7. Click Save (see below screenshot for reference).
8. The policy editor appears.
9. On the left side, select the Applications tab.
10. Fill out the General Application Settings per the table below.
(See below screenshot for reference)
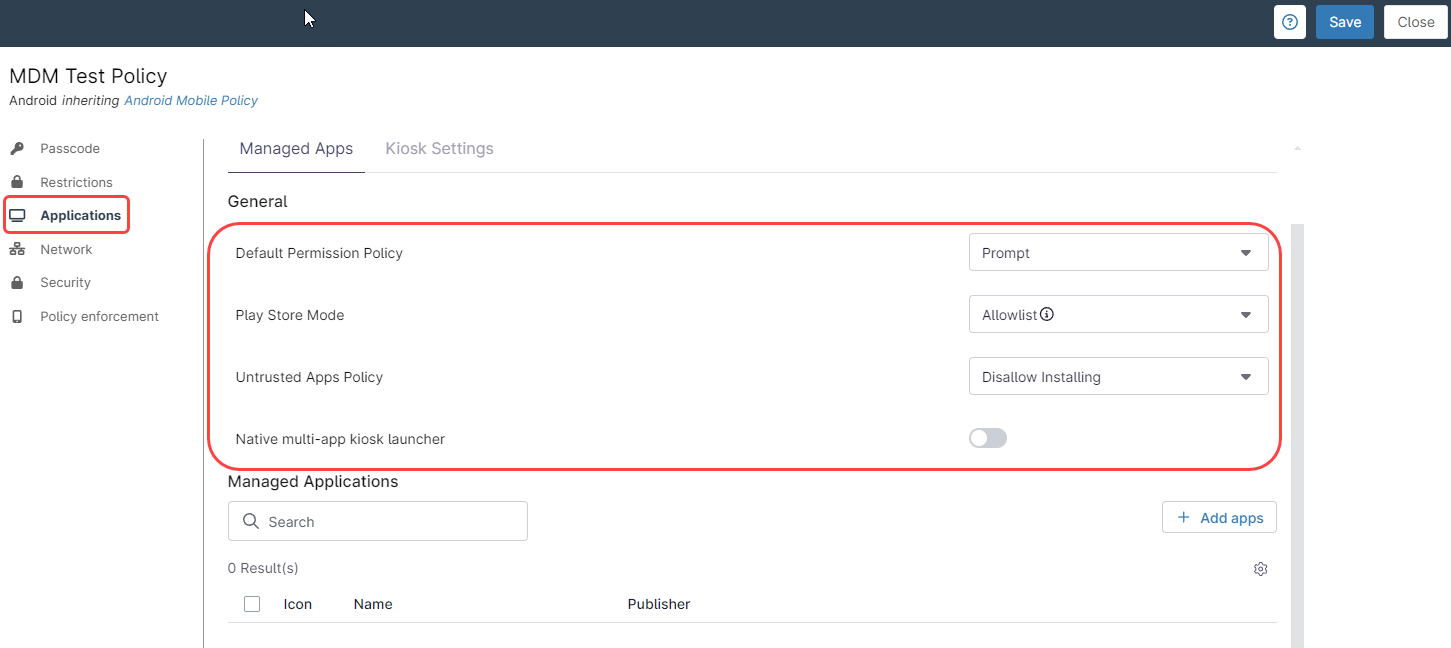
| Application Setting | Description |
| Default Permission Policy | When a new application is installed, certain permissions may be required to be set; this policy assigns a default response for permission requests. |
| Play Store Mode | When set to “Allowlist”, only the apps that have been approved will show in the Play Store—no other apps will display or be searchable. When set to “Blocklist”, the Play Store shows all apps available to the Play Store with the exception of apps that have been explicitly blocked through the policy. |
| Untrusted Apps Policy | If Play Store Mode is allowed, this policy controls which apps can be installed. |
| Native mule-app kiosk launcher | Toggle this switch to enable or disable the Kiosk Settings tab. |
11. Click add apps and select Play Store. The Play store screen appears.
12. Click on the desired application, then click Select. The Play store screen disappears.
13. To edit the individual application settings, check the newly added app and click the blue Edit button. You can also click the dots on the right of the application and select edit.
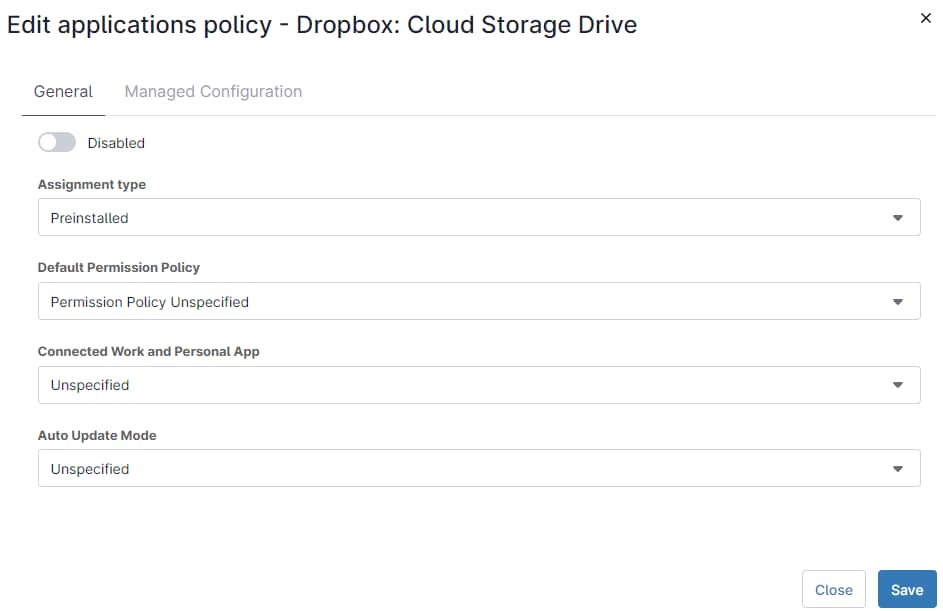
14. Fill out the Application Assignment type, per the table below.
The Disabled button is for temporarily disabling the application when needed and keeping the settings intact.
| Assignment Type | Description |
| Unspecified | Defaults to Available. Not available for system apps. |
| Preinstalled | The application is automatically installed and can be removed by the device’s user. |
| Force Installed | The application is automatically installed and cannot be removed by the device’s user. |
| Blocked | Restricts the device’s user from using or installing the selected app. |
| If the app is already installed, this setting will uninstall it. | |
| Available | The application is available for the device’s user to install it. Not available for system apps. |
| Required for Setup | The application is automatically installed and cannot be removed by the user. Device setup cannot be completed until the application is installed. Not available for system apps. |
| Single app Kiosk | The app is automatically installed in kiosk mode. It is set as preferred and allowlisted for lock task mode. Device setup cannot be completed until the application is installed. After installation, users cannot remove the app. This assignment type can be selected for only one application per policy. When this is present in the policy, the status bar will be automatically disabled. |
15. Click Save.
16. At this point, you can continue adding applications, once you´re done, click Save on the upper right side of the screen. Enter your MFA response method and close.
How Can I Manage Store Applications on IOS Devices with NinjaOne?
Installing store applications on IOS devices is similar to installing applications on Android devices, meaning that the installation is managed through policies.
Follow the next instructions to automatically install store applications on IOS devices.
1. Go to Administration, then Policies, then MDM Policies.
2. Click Create New Policy.
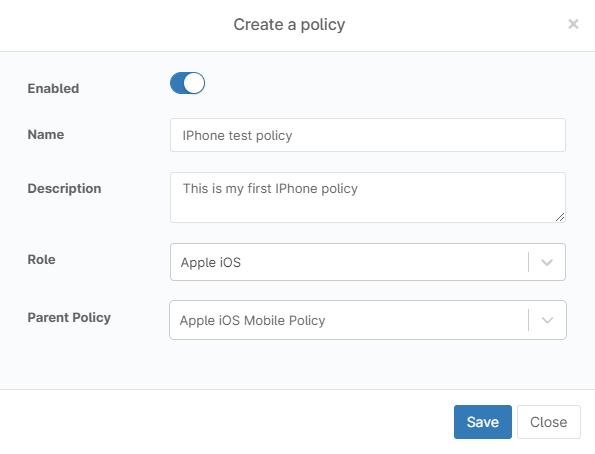
3. In the Name fields, enter the policy name, for example, iPhone Test Policy
4. In the description field, enter the description of your choice, for example, “this is my first iPhone Policy.”
5. Under Role, select Apple IOS.
6. Optionally under Parent Policy, select the policy you want to inherit from.
7. Click Save (see below screenshot for reference).
8. The policy editor appears.
9. On the left side, select the Applications tab.
10. Click add apps and select the Public App Store tab.
11. Search for the desired app, also select the app country. A list of matching applications will appear.
12. Click the desired application, A dialog box will appear.
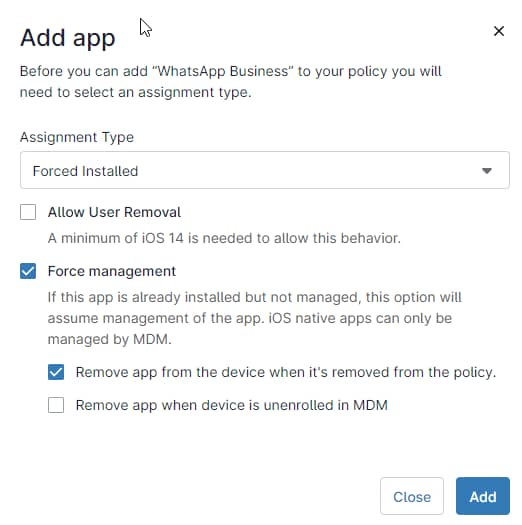
13. Select the assignment type from the drop-down (force installed or blocked).
14. If the selection was blocked, go to step 13.
15. If the selection was Force Installed, fill out the remaining fields. (See below screenshot for reference).
16. Click Add.
17. You can continue adding applications, once you´re done, click Save on the upper right side of the screen. Enter your MFA response method and close.


