
Apple mobile devices can be enrolled in either BYOD mode or company-owned mode. The enrollment methods differ significantly: while BYOD devices can be enrolled by scanning a QR code, company-owned devices require a more sophisticated process, involving a second device (typically a Mac computer). Brand-new company-owned devices can also be enrolled through an Apple dealer using the Zero-Touch configuration. Details for each enrollment method are provided below.
5.2.1 Instructions for enrolling Apple BYOD devices
Follow the instructions below for enrolling a BYOD Apple mobile device in NinjaOne.
- From any dashboard in the NinjaOne console, click on the + sign at the top right of the screen.
- Select Device and then Mobile Device. The “Add a mobile device” dialog box appears.
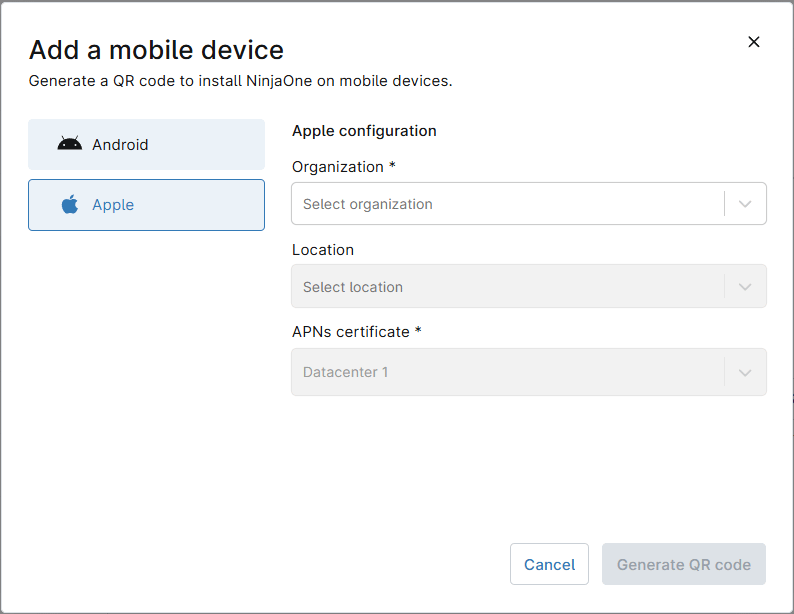
Figure 29. Add an Apple mobile device dialog box. - On the left side, click on Apple.
- Select the Organization name and Location.
- On APNs certificate, select the Apple Push Notification service corresponding to this company.
- Click Generate QR code.
- A screen with the QR code appears, along with instructions to follow from the Apple mobile device. Additionally, there is an option to download the Apple Enrollment File.
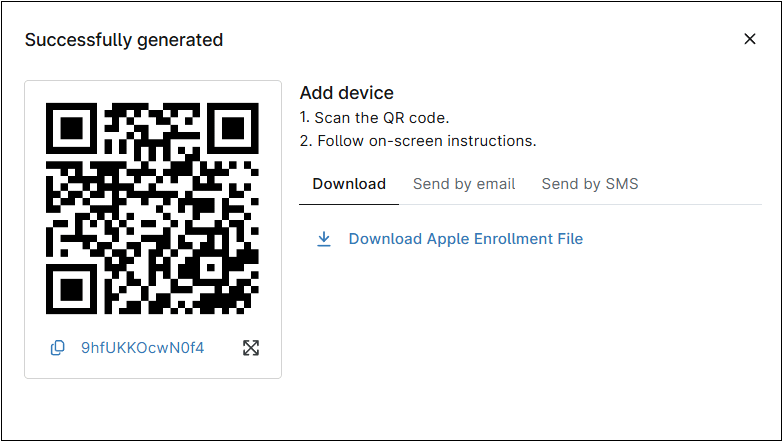
Figure 30. Apple QR enrolling code. The remaining steps must be followed from the Apple mobile device.
- Using your Apple device’s camera, scan the QR code.
- A prompt to download an Apple Enrollment File will appear. Accept it.
- Locate and open the Apple Enrollment File. This action will start the enrollment process. Follow the on-screen instructions.
5.2.2 Instructions for manually enrolling Apple mobile devices in Company-owned or Supervised mode
The easiest way to enroll a brand-new mobile device as company-owned in supervised mode is through Zero-Touch deployment. With this method, the enrollment process occurs automatically, and the IT administrator does not need to perform any manual steps. If instead there is the need to enroll a non-brand-new mobile device and you have it in hand, there is a method, but keep in mind that there are several pre-requisites, which are listed below:
- A Mac, iPad, or iPhone* (different from the one being enrolled) with the Apple Configurator app installed.
- A USB cable to connect the iPhone being enrolled to the Mac or iPad.
- A Wi-Fi network with Internet access.
- The company enrolling the mobile device must first be enrolled in ADE.
This method completely erases the iPhone device, which is irreversible. Then, import the Apple device to ABM/ASM using the Mac, where it will appear in “Apple Configurator” in the ABM/ASM portal. The device is then manually moved from “Apple Configurator” to the MDM server.
* If instead of a Mac you are using an iPad or an iPhone, the only difference is the way the two devices connect. A Mac computer uses a USB cable, while the mobile devices use NFC or the barcode reader.
Once the pre-requisites are met, follow the steps below for the enrollment process:
Import the iPhone device into Apple Business Manager
- On the Mac computer, open the Apple Configurator app.
- If this is the first time you are enrolling an iPhone device, you must create a new Wi-Fi profile, this profile is used by the iPhone to connect to the Internet and communicate with ABM/ASM. Follow the steps below to create the Wi-Fi profile. If it´s already created, you can skip this step.
- On Apple Configurator, select File and then New Profile.
- Under General, give the profile a name.
- Under Wi-Fi, configure Wi-Fi settings for the Wi-Fi used in the location you are working in.

Figure 31. Create Wi-Fi profile in Apple Configurator. - Select File and then Save. Give a name for the profile file, choose a location and click Save.
For this example, we named it ABM Wi-Fi initial config.
- Connect the iPhone to the Mac computer using a USB cable. After Apple Configurator connects to the iPhone, the iPhone device appears on the screen (you may need to approve the accessory to connect on both sides).
Figure 32. Apple Configurator, iPhone connection screen. - Click the iPhone device image to ensure it’s highlighted.
- Click Prepare on the top menu.
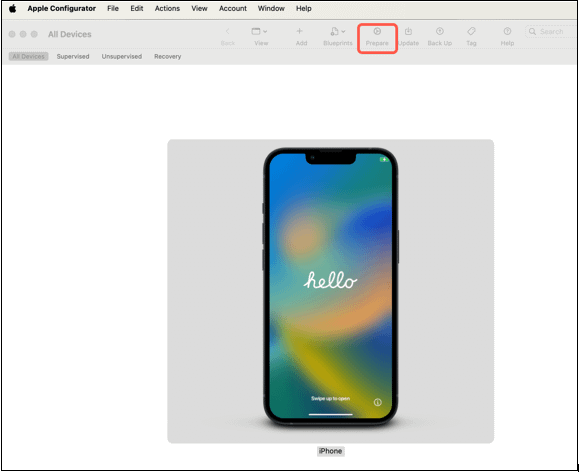
Figure 33. Apple Configurator, Prepare menu. - The Prepare Devices dialog box appears. Under Prepare with, choose Manual configuration and select Add to Apple School Manager or Apple Business Manager. Allow devices to pair with other computers, as indicated in the screenshot below, then click Next.
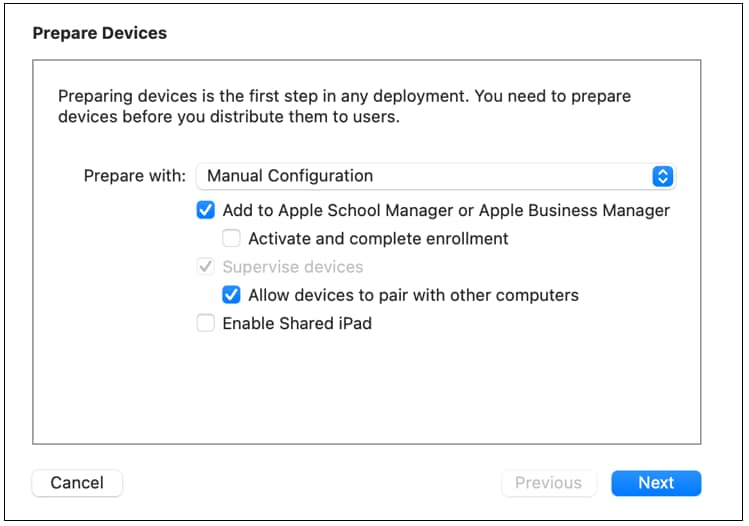
Figure 34. Prepare devices dialog box. - Select New Server on the next screen as indicated in the screenshot below:

Figure 35. Enroll in MDM server. - In the next screen, in the name, type NinjaOne. We are not directly enrolling in NinjaOne, but something needs to be entered, otherwise Apple Configurator will not allow us to continue. Don’t change anything in the host name or URL and click Next.
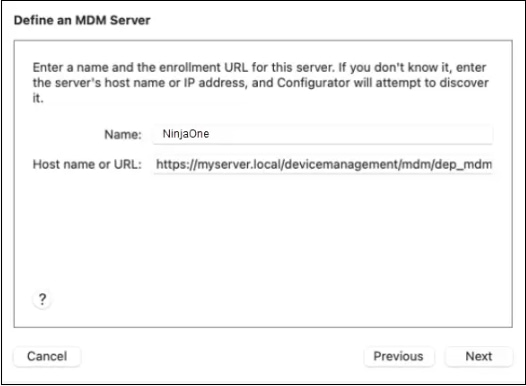
Figure 36. Define MDM server. - An expected error will show in the screen, ignore it and click Next.
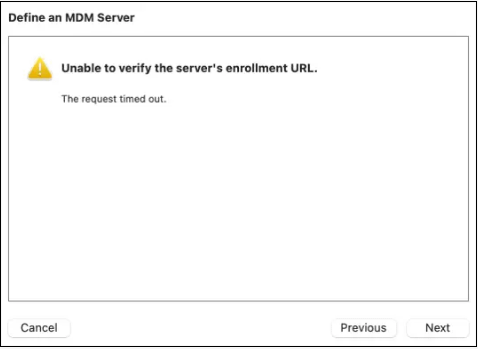
Figure 37. Expected error. - You will be asked to add a trust anchor certificate for the MDM server, click Next. Even if some options are shown, just click Next.
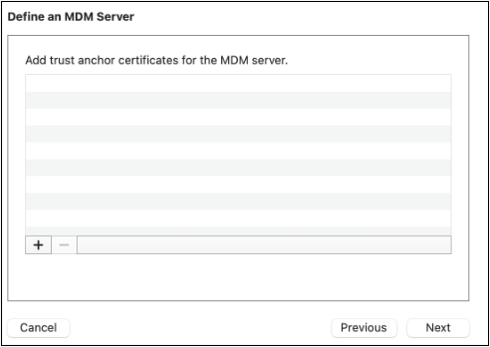
Figure 38. Add trust anchor certificates. - If this is the first device added to a company, select New Organization, and click Next. If not, your organization’s name will appear, click Next and go to step 13.
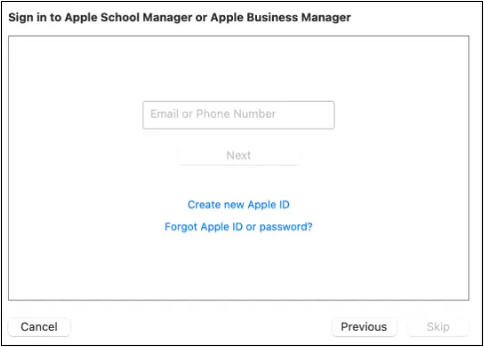
Figure 39. Sign in to ABM/ASM. - Upon a successful sign in, you will be asked if a new supervision identity will be generated or choose an existing one. Select Generate a new supervision identity and click Next.
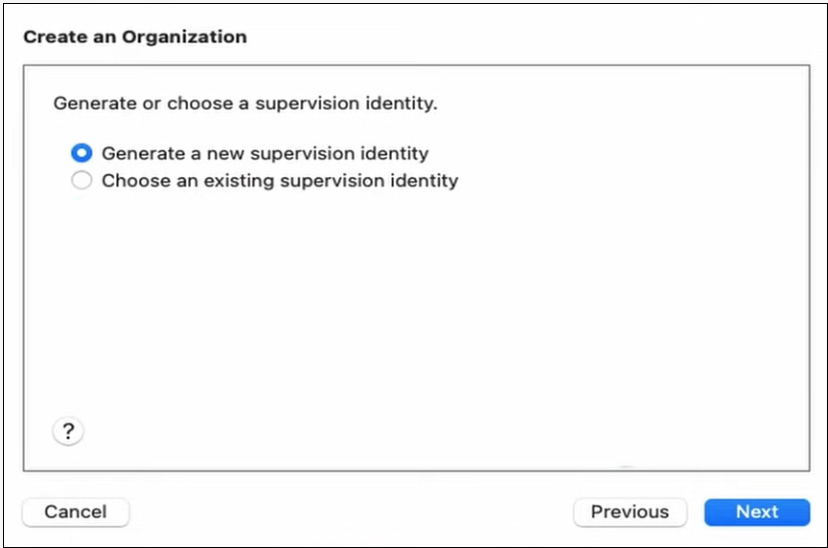
Figure 40. Generate or choose a supervision entity. - You now will be asked to select the steps that will be presented to the user in Setup Assistant. Here you can just click Next.
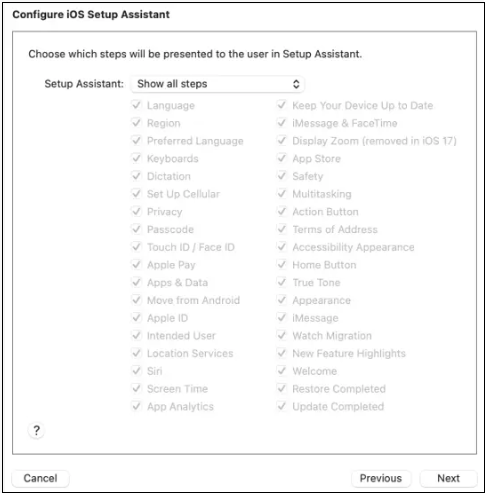
Figure 41. Configure iOS Setup Assistant. - Choose the network Profile. In the step, choose the profile you created on step 2.

Figure 42. Choose Network Profile. - Click Prepare.
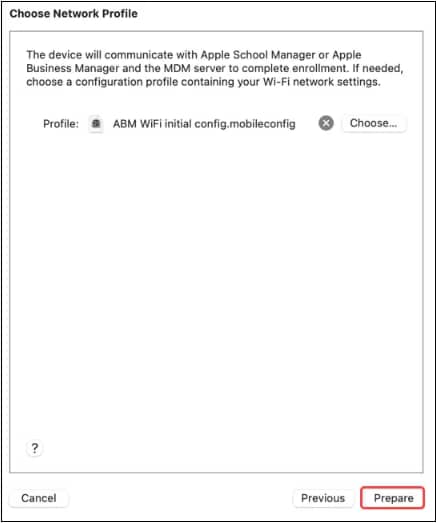
Figure 43. Prepare iPhone device. - Now, Apple Configurator will prepare the iPhone device and import it into ABM (or ASM). This process may take a few minutes.
Figure 44. Preparing iPhone screen. - Note: You may receive a notification stating that the device is already prepared and needs to be erased. In this case, click Erase.
If you see a message saying, “Unable to activate ‘xxxxx’s iPhone“ check the phone screen and follow the instructions displayed to approve the activation.
Figure 45. Device locked. Once unlocked, go back to Apple Configurator and click “Try Again“.
- After the process completes, one new device will appear in ABM/ASM under “Devices Added by Apple Configurator”, at this point, you can click Show Devices to see the device list.
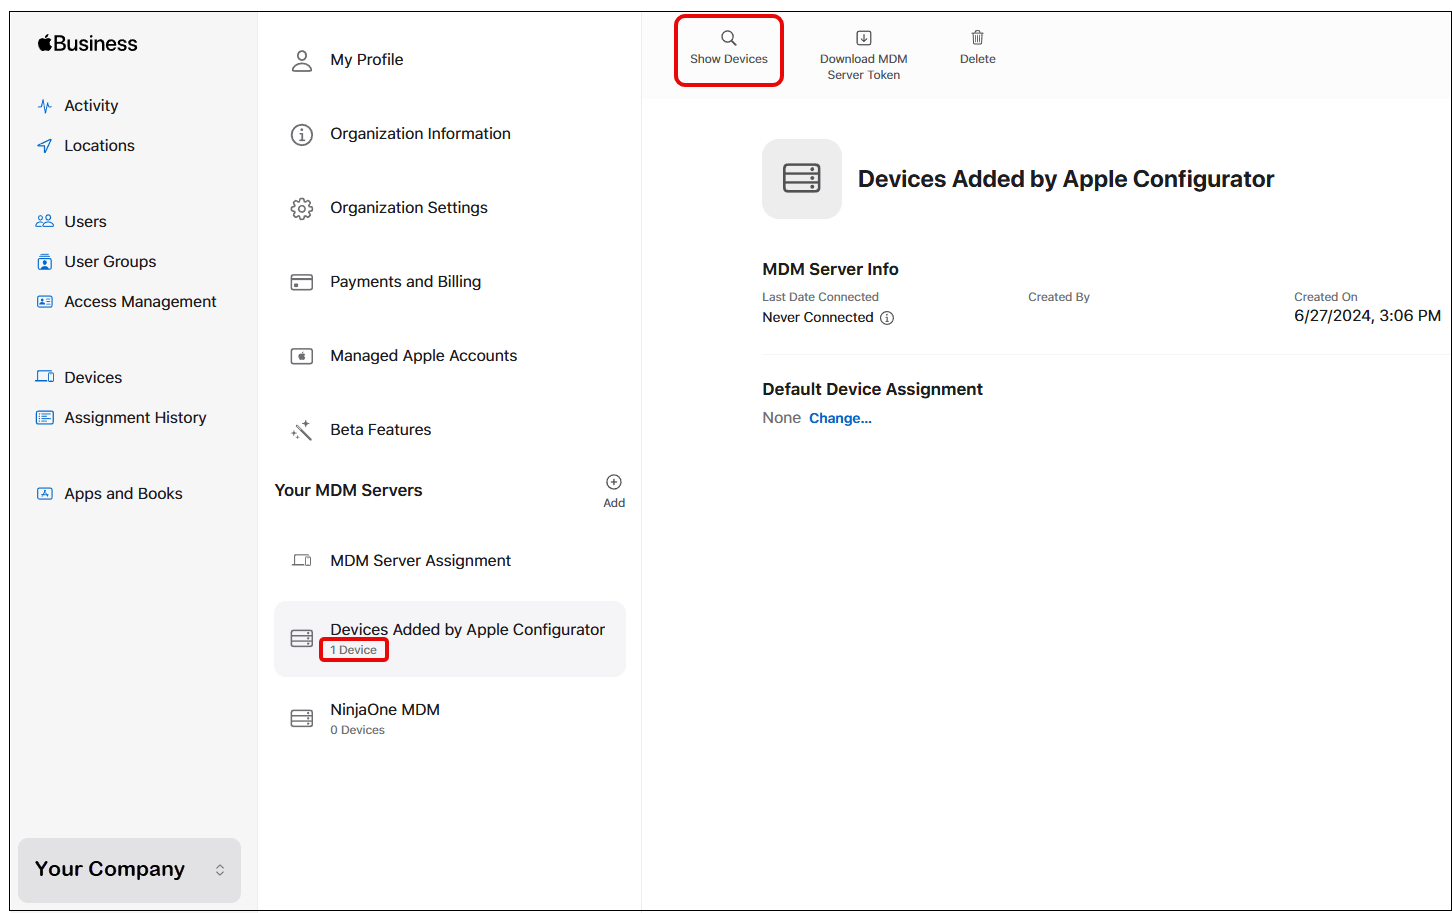
Figure 46. Show devices added by Apple Configurator.
Move the device(s) from Apple Configurator to your MDM server In ABM (or ASM)
- Sign in to ABM using administrator credentials.
- Click your organization name on the bottom left of the screen and select Preferences.
- Click Devices Added by Apple Configurator.

Figure 47. Select devices added by Apple Configurator. - Click Show Devices.
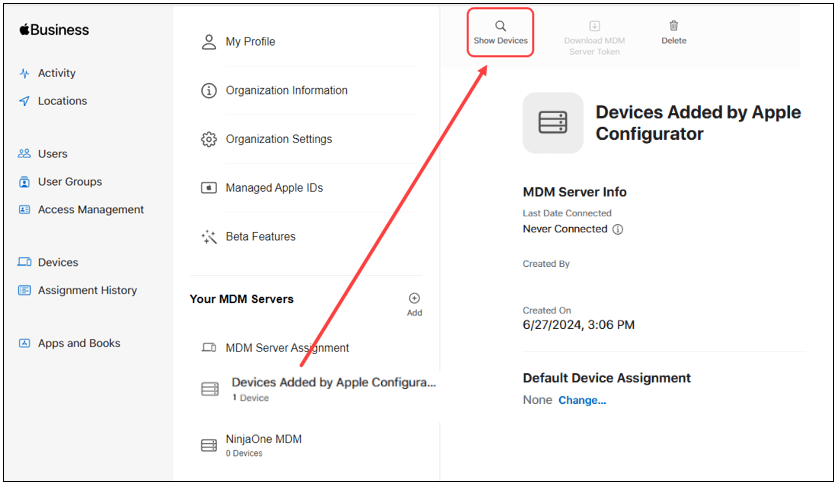
Figure 48. Show devices under Apple Configurator. - The device list appears under Your Devices. Click on the desired device.
- The device’s properties appear. Click the three dots on the right of the screen.
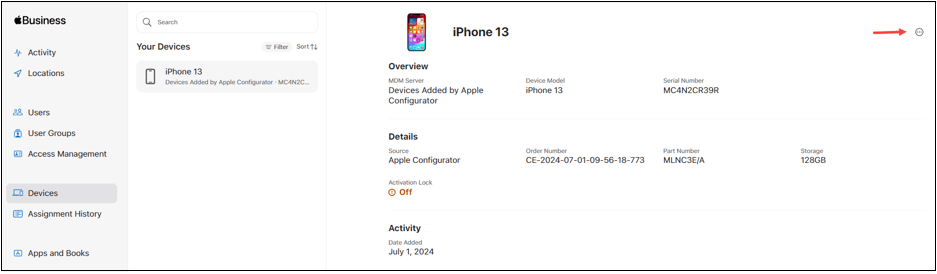
Figure 49. Select device(s) to move from ABM to NinjaOne. - Select Edit MDM Server.
- Choose Assign to the following MDM and make sure your MDM server is selected, then click Continue.
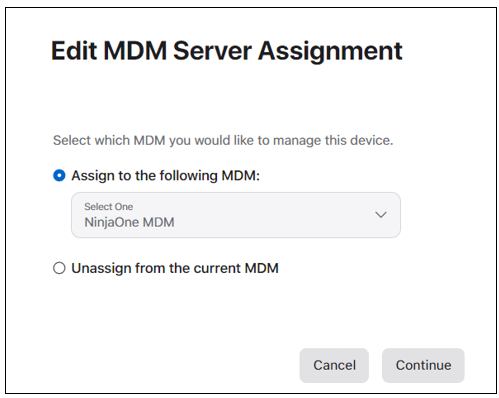
Figure 50.Edit MDM Server Assignment. - A warning message appears, click confirm.
- After some seconds, a confirmation message appears. Click Done.
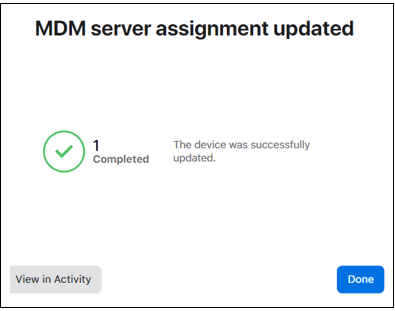
Figure 51. MDM server assignment updated. - Click your organization name on the bottom left of the screen and select Preferences.
- You can see that the device that was showing under Apple Configurator, has now moved under your MDM server.
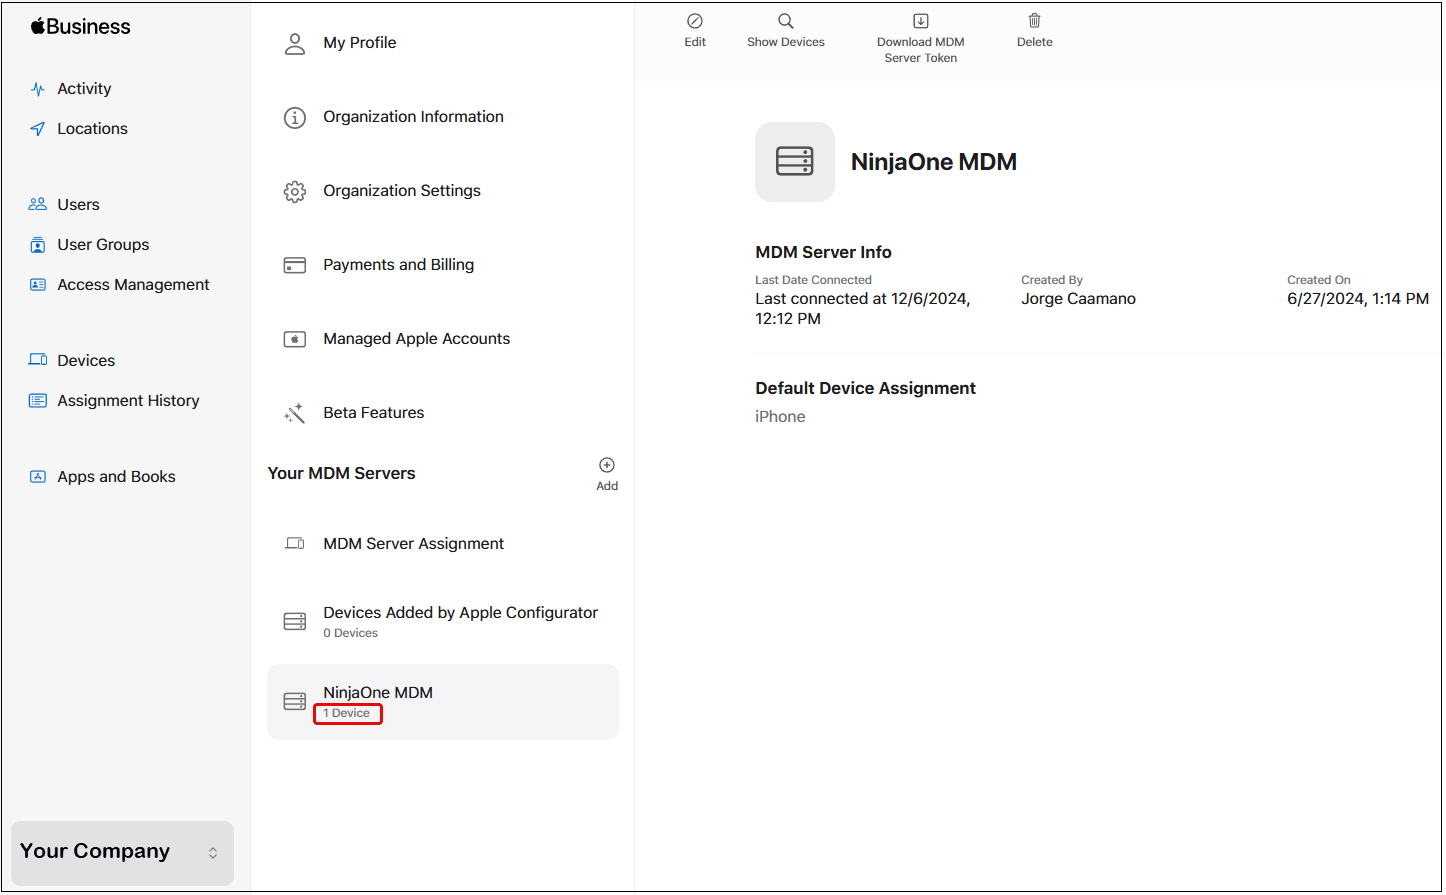
Figure 52. iOS device moved to NinjaOne. - Go to NinjaOne and navigate to Administration > Apps > NinjaOne MDM Apple.
- Go to the Automated Device Enrollment tab.
- Select the enrolling company using a checkmark to the left of the name. A ribbon will appear at the top of the companies.
- Click Edit.
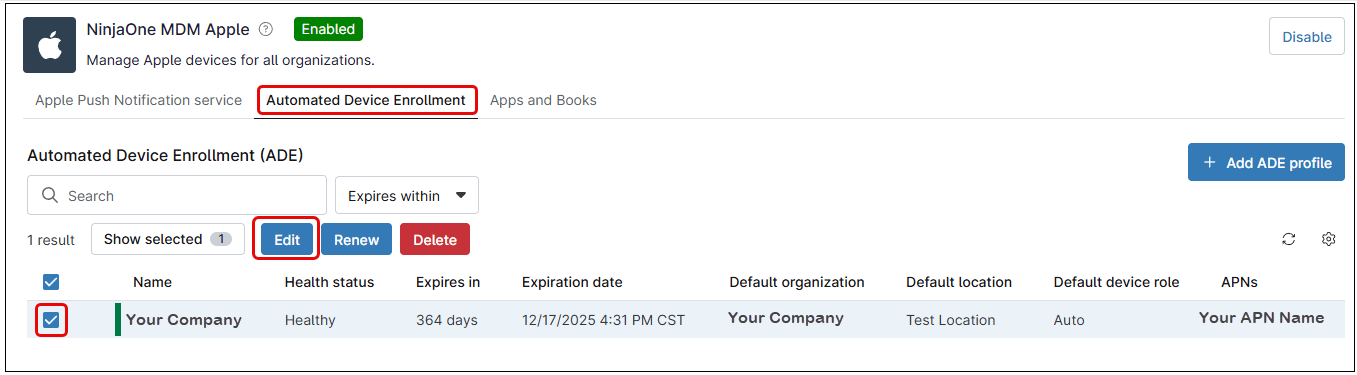
Figure 53. Open the ADE profile editor. - Once the ADE profile editor appears, click Devices on the left side.
- Click Sync with ABM.
- After a few seconds, the newly enrolled iPhone should appear listed.

Figure 54. Synchronize NinjaOne with ABM. At this point, go to the iPhone and complete the initial setup by following the on-screen instructions. After finishing the setup, open the NinjaOne Assist app and approve the installation of applications and location tracking (if enabled). Note that an Apple ID is required to download and install apps from the Apple Store.
5.2.3 Instructions for enrolling Apple mobile devices in company-owned or supervised mode using Zero Touch deployment
This is the easiest way to enroll a brand-new mobile device as company-owned in supervised mode from the IT administrator’s standing point. Follow the steps below to complete this process:
- Purchase iOS devices from an authorized reseller or directly from Apple and provide the ABM or ASM account information and provide the organization’s ABM/ASM account details. The reseller or Apple will automatically associates these devices with the organization’s ABM or ASM account.
- Once the devices appear in ABM/ASM, you can move them to NinjaOne. Follow the instructions on section above to achieve this.
- After the devices are moved to NinjaOne, they will appear under the organization and location defined in the company’s ADE profile.