
To manage Apple devices, NinjaOne leverages the Apple Push Notification Service (APNs) and the Automated Device Enrollment (ADE) feature. Once NinjaOne MDM for Apple is enabled, APNs certificates and/or ADE profiles must be configured to enable the management of Apple mobile devices.
- APNs: Primarily used for enrolling BYOD devices.
- ADE: Designed for enrolling company-owned devices in Supervised Mode, which provides organizations with enhanced control and stricter security management over iOS devices.
Since NinjaOne supports managing multiple organizations or companies within a single tenant, each organization typically requires its own APNs certificate and ADE profile to ensure proper configuration and separation of management.
To enable NinjaOne MDM Apple, Navigate to Administration > Apps > NinjaOne MDM Apple and click Enable. Then proceed with adding APNs certificates or ADE profiles.
Additionally, NinjaOne MDM Apple allows the use of Apps and Books, which is a feature within ABM and ASM that allows organizations to purchase, manage, and distribute apps and books in bulk for employees, students, or devices. It provides a streamlined way to acquire content from the App Store and Apple Books and deploy it across devices efficiently.
4.2.1 Apple Push Notification Service
To enroll companies in the Apple Push Notification Service (APNs), an Apple-generated certificate must be uploaded to NinjaOne. Each company or organization requires its own unique APNs certificate. An Apple ID is needed to create each certificate..
Follow the next steps to obtain and upload an APNs for a company.
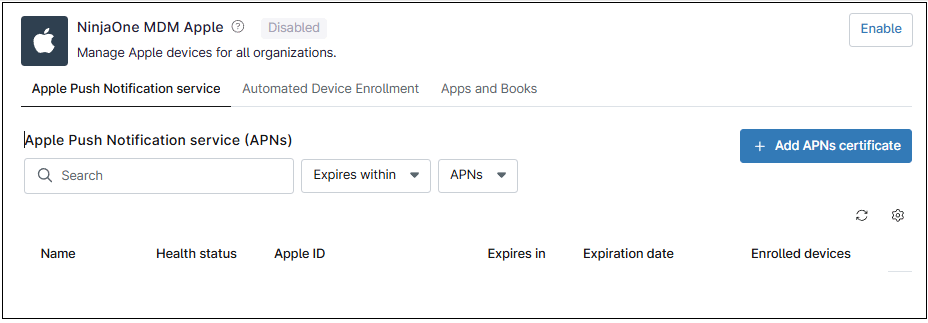
- Navigate to Administration > Apps > NinjaOne MDM Apple. The NinjaOne MDM Apple configuration screen appears.
- Go to the Apple Push Notification Service tab.
- Click + Add APNs certificate. The Add Apple Push Notification service certificate dialog box appears.

Figure 8. Add Apple Push Notification service certificate dialog box. - Execute step 1 in the dialog box: Download the CSR file, this will be needed in the next step.
- Execute step 2 in the dialog box: Click on Apple Push Certificates Portal. This will take you to the Apple site. Sign in using your Apple ID.
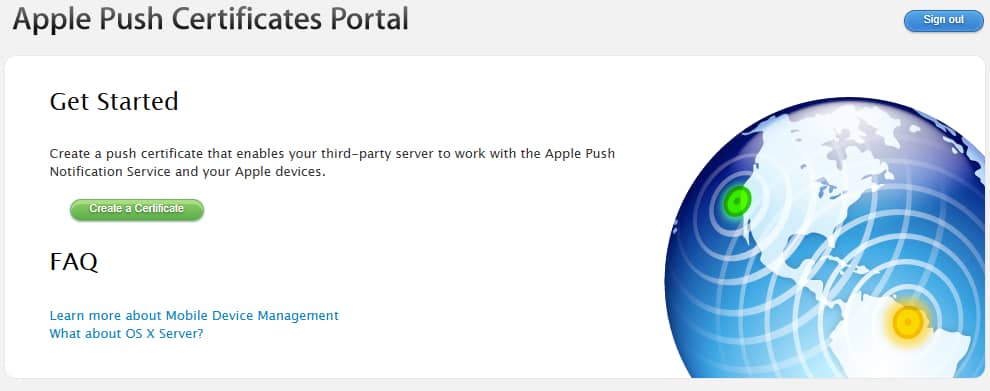
Figure 9. Apple Push Certificate Portal. - Click Create a Certificate. Accept the terms of use.
- Upload the CSR file downloaded on step 1.
- Once uploaded, you will see a confirmation notice. At this point, download the certificate file (.pem file).

Figure 10. Apple Push certificate download. - Logout from the Apple Push Certificates Portal and go back to NinjaOne.
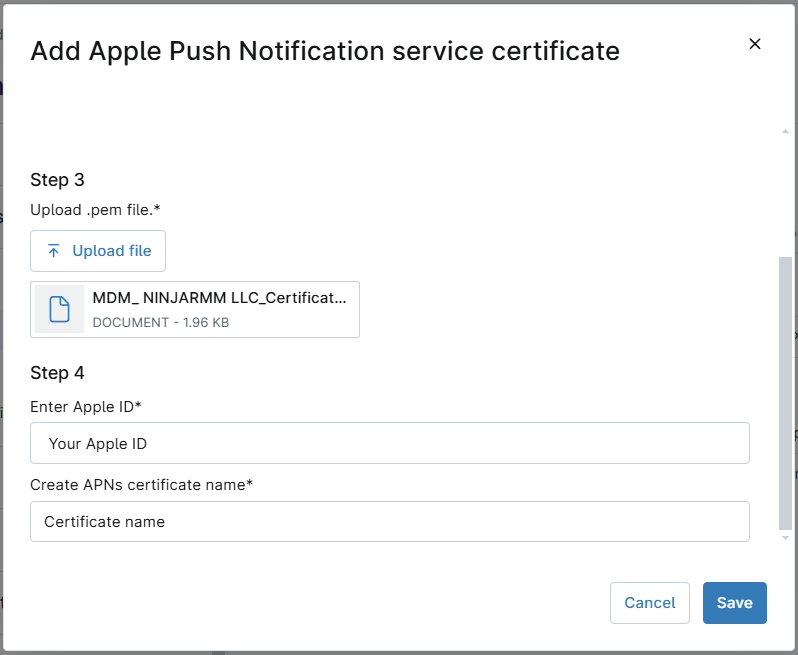
Figure 11. Add Apple Push Notification service certificate dialog box (after certificate download). - Once you´re back to NinjaOne, upload the certificate file (step 3 in the dialog box).
- Enter your Apple ID and provide a name for this certificate (step 4 in the dialog box).
- Click Save
The new certificate appears listed in APNs, along with the health status, expiration days left and expiration date.
Figure 12 APNs certificate list.
4.2.2 Automatic Device Enrollment
To enable a company to use ADE, an ADE profile must be created. This profile contains the necessary settings to facilitate the enrollment of company-owned Apple devices into NinjaOne through ADE. It links the company’s ABM or ASM account with the corresponding organization within NinjaOne.
The ADE profile includes:
- A token file: This establishes a secure connection between ABM and NinjaOne, enabling communication and device management.
- Configuration settings: These define how devices are enrolled, including settings for Supervised Mode, enrolling company and location, core management configurations, etc.
To add an ADE profile, an Apple Business Manager (ABM) or Apple School Manager (ASM) account is required. These accounts must be verified and functional. During the process, a NinjaOne-generated public key and an Apple-issued token file must be manually exchanged. After the profile is added, the ADE configuration must be completed.
Follow the next steps to add an ADE profile.
- Navigate to Administration > Apps > NinjaOne MDM Apple. The NinjaOne MDM Apple configuration screen appears.
- Go to the Automated Device Enrollment tab.
- Click + Add ADE Profile. The “Add Automated Device Enrollment profile” dialog box appears.
- Execute step 1 in the dialog box (Download public key file). This file will be uploaded to the Apple portal later on.
- Execute step 2 in the dialog box (Log in the ABM portal or ASM portal to generate a token.)
Note: the following instructions and images refer to the ABM portal, if instead you are using an ASM account, you can still continue using the instructions, since both portals are very similar. - Log in to the ABM portal using the corresponding Apple ID.
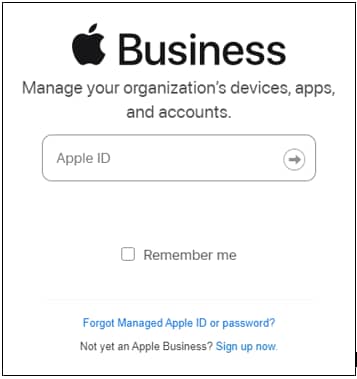
Figure 13. ABM portal login screen. - On the ABM portal, click on the account name at the bottom left of the page and then select Preferences.
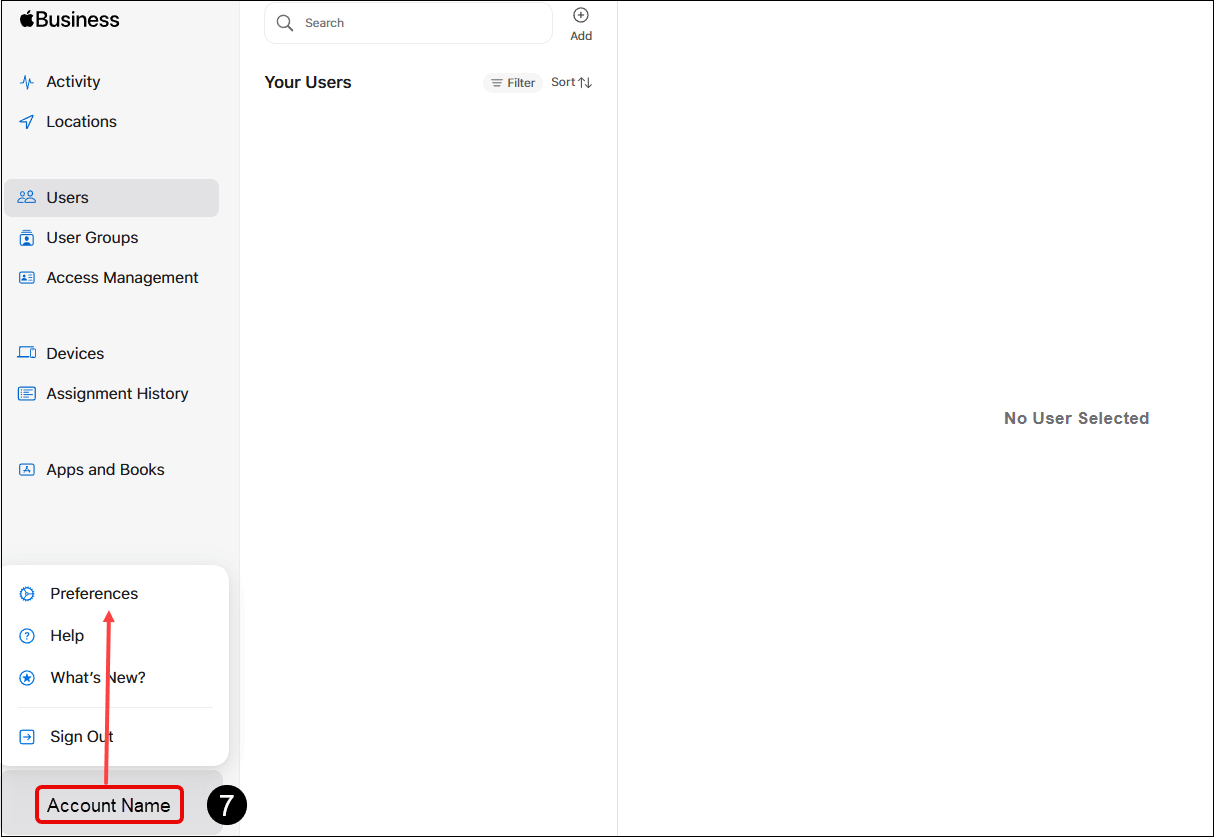
Figure 14. ABM portal, Preferences menu selection. - Select Add, to the right of Your MDM Servers.
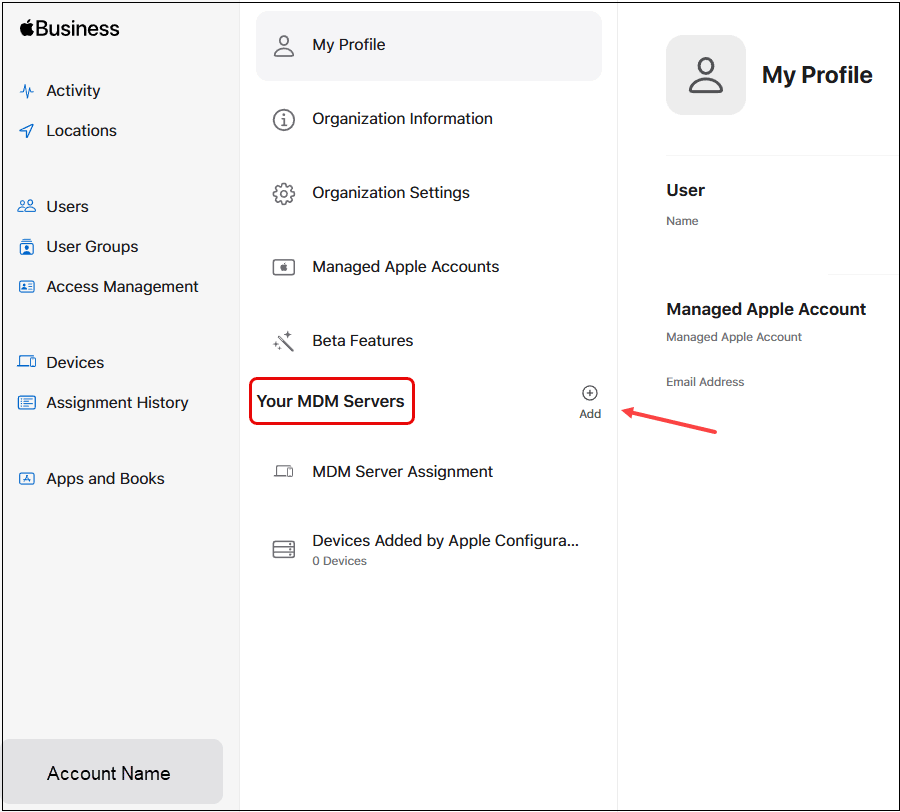
Figure 15. ABM portal, Add MDM server. - Give the MDM server a name (This is the NinjaOne server, you can use, for instance, NinjaOne MDM.)
- Select whether to allow this new server to release devices. If selected, devices deleted from NinjaOne will be deleted from ABM as well.
- Upload the public key file by clicking Upload Certificate and selecting the .PEM file you downloaded from NinjaOne earlier.
- Click Save. The new server name appears on the left, below MDM Server Assignment.

Figure 16. AMB portal, Fill in new MDM server information. - Click on the server name that you just added.
- Click Download server token at the top of the page.
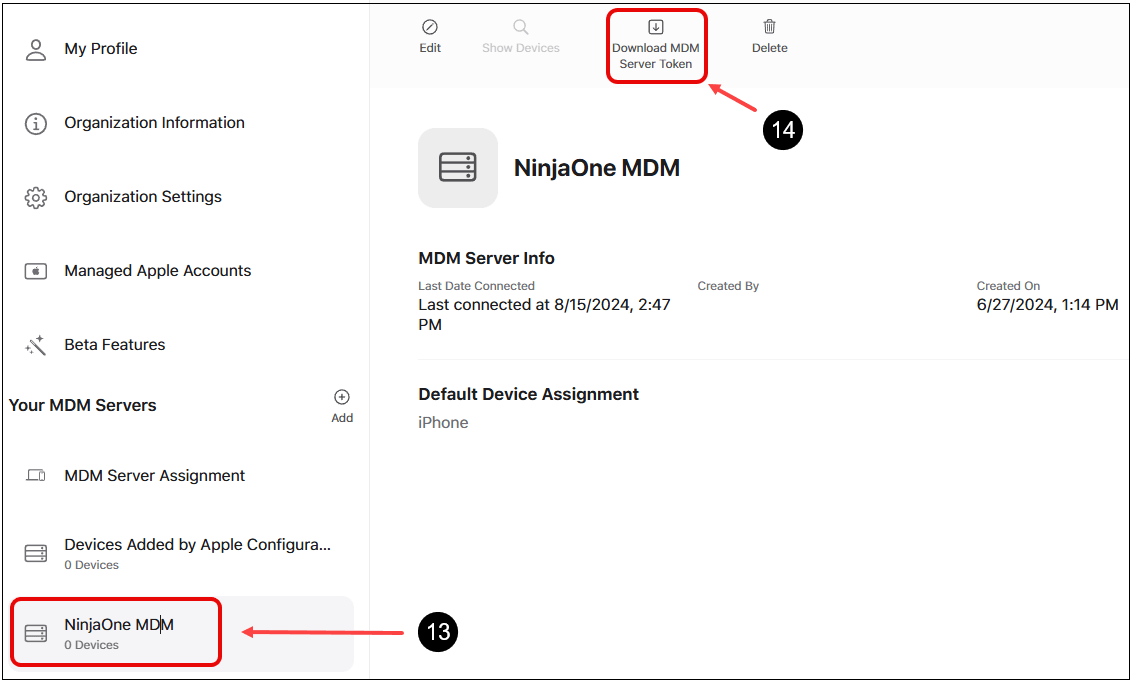
Figure 17. ABM portal, download server token. - A warning message appears saying that downloading a new server token will reset your existing one. Click Download MDM Server Token.
- After downloading the token file (.p7m file), go back to NinjaOne.
- Once you’re back in NinjaOne, upload the token file to NinjaOne (Step 3 in the dialog box).
- Enter a default organization for this new ADE profile.
- Enter a default location for this new ADE profile.
- Select an APN certificate to be associated with this ADE profile.
- Enter an ADE profile name, NinjaOne recommends using the organization name.
- Enter a Support email address.
- Enter a Support phone number.
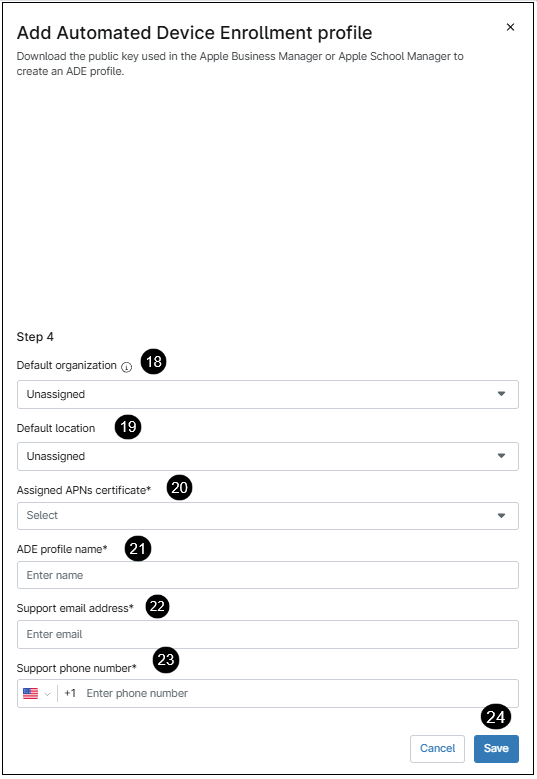
Figure 18. Filling out ADE profile information. - Click Save.
The New ADE profile should now appear listed under Automated Device Enrollment (ADE), along with the health status, expiration date and days remaining until expiration.
Follow the next steps to Edit the Organization’s ADE profile.
This configuration defines the initial setup steps for devices enrolled through this service. When an Apple device is enrolled via ADE, it will eventually be reset to factory defaults and restarted as if it were brand new. The ADE profile specifies the default company, location and APNs certificate assigned to a device. It also defines how the initial setup process will proceed, allowing certain steps and questions to be skipped. Additionally, it determines whether the device will be enrolled in supervised mode.
- Navigate to Administration > Apps > NinjaOne MDM Apple. The NinjaOne MDM Apple configuration screen appears.
- Go to the Automated Device Enrollment tab.
- Click on the desired ADE profile.
- Select it using the check box on the left of the name.
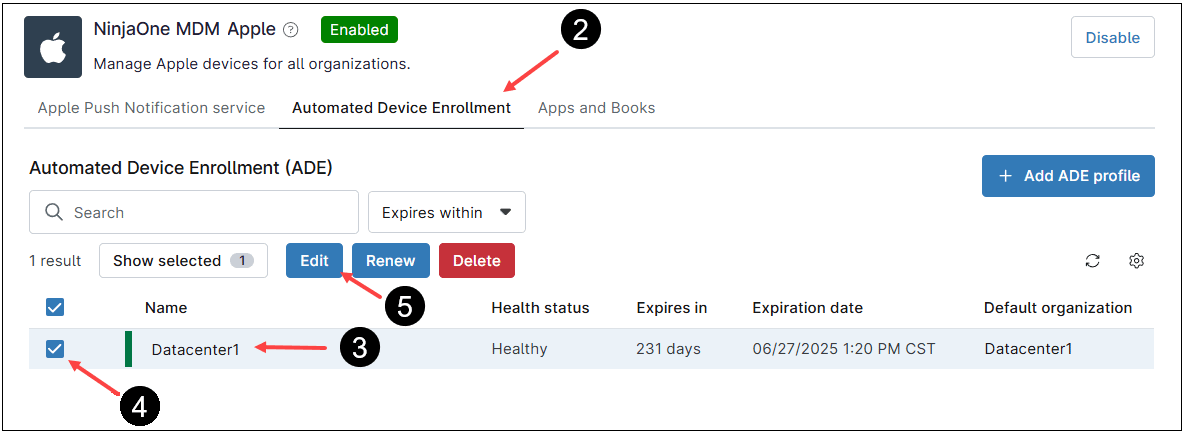
Figure 19. Edit the ADE profile. - Click Edit. The ADE Profile editor appears.
- Edit the settings per your preferences, enter the default organization, location and APNs certificate.
- If you want to enroll devices in supervised mode, turn on this setting.
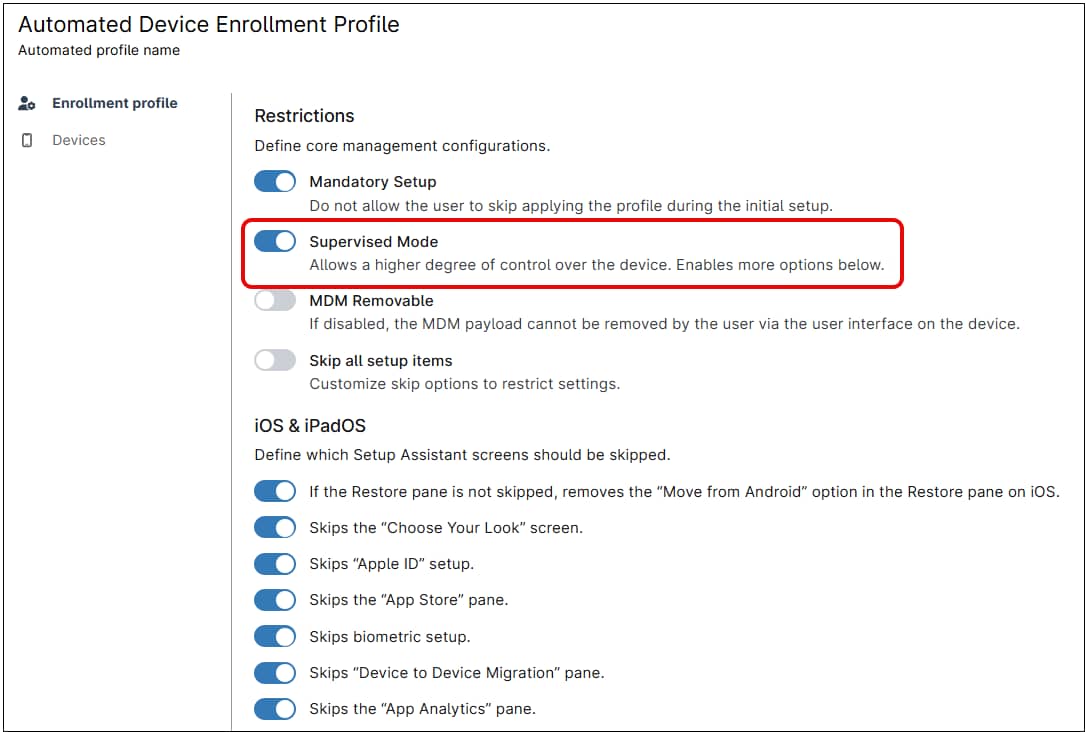
Figure 20. Turn on Supervised mode. - Click Save Profile Configuration.
4.2.3 Apps and Books
To subscribe a company to use the Apps and Books feature, a content token must be added.
Follow the steps below to add a content token.
- Navigate to Administration > Apps > NinjaOne MDM Apple. The NinjaOne MDM Apple configuration screen appears.
- Go to the Automated Apps and Books tab.
- Click + Add content token. The “Add Apps and Books content token” dialog box appears.
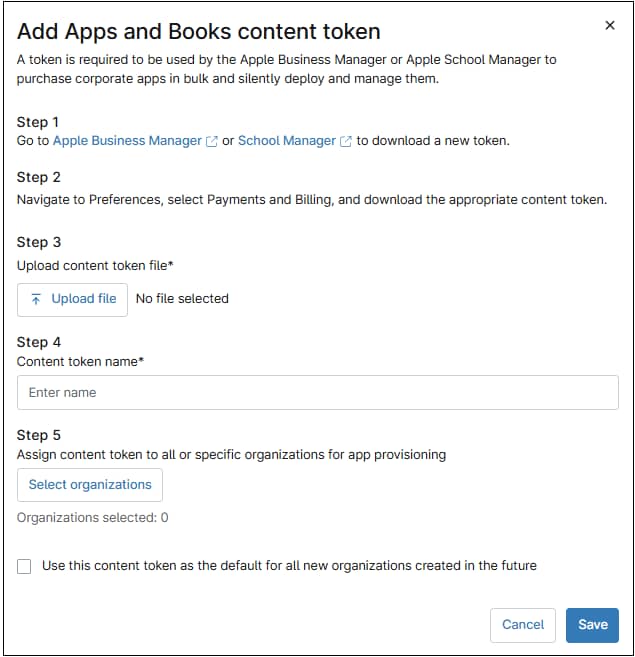
Figure 21. Add Apps and Books content token dialog box. - Execute step 1 in the dialog box, go to the ABM or ASM portal and login to the company´s account.
- Once in the ABM or ASM site, navigate to Preferences > Payments and Billing. (step 2 in the dialog box).
- Under Content Tokens, click Download. A file with the .vptoken extension will be downloaded to your computer.

Figure 22. Download Apps and Books content token. - Execute step 3 in the dialog box, upload the downloaded .vptoken file to NinjaOne by clicking Upload file.
- Execute step 4 in the dialog box, give the token a name, this is typically the company name.
- Execute step 5 in the dialog box, assign the content token to a specific organization (more than one organization can be selected.)
- Optionally, select if this content token will be the default for all new organizations created in the future.
- Click Save.