Topic
This article describes how to create and edit conditions in your NinjaOne policies.
Environment
NinjaOne Endpoint Management
Description
You can create conditions that trigger when the device's integrity or performance meets the specified criteria. When triggered, conditions can automatically alert technicians, display on NinjaOne dashboards, create support tickets, and run automations.
Get Started: Conditions (NinjaOne Inc. 01:24)
Index
Select a category to learn more:
Create New Conditions
To create your conditions, either from scratch or with a template, perform the following steps.
- In NinjaOne, navigate to Administration → Policies and select a policy to update.
- On the policy's configuration page, select the Conditions tab, then click Add a condition. Optionally, you can click Use template to add one of our preconfigured condition templates. If you select Use template, the condition will appear on the Conditions page, where you can edit or delete it. Most condition templates do not contain additional settings, such as notifications, automations, or ticketing rules, so we recommend that you proceed through all steps in this article to learn how to add them to a template.

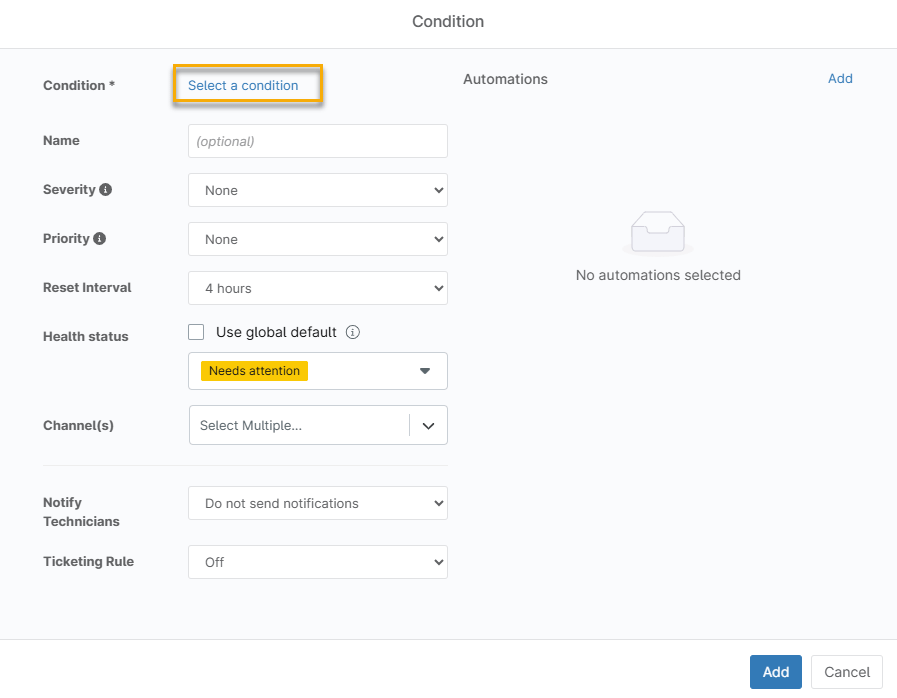
- The Condition configuration dialog will open. Click Select a condition and specify the condition to monitor. For a complete list of all available conditions, refer to
Figure 2: Configuring a condition (click to enlarge) - Use the configuration options in the Condition dialog to finish setting up the condition. Refer to the table below for an explanation of each option.
Option Description Name Give the condition an optional descriptive name. Automation Click Add to add an automation that will run when the condition is triggered. For more information, refer to the Add an Automation (Optional) section within this article. Severity Determine severity to describe the extent to which a defect can affect the system. Priority Determine priority to define the order in which to resolve defects, whether something should be fixed immediately or at a later time. Auto-reset Specify the amount of time to elapse before the condition automatically resets. Refer to the Configure the Reset Interval section of this article for more information. Health Status Assign a custom health status to the condition. You can choose from Healthy, Needs attention, Unhealthy, or Unknown. If the condition triggers, you can view and sort your devices according to this custom health status, making it easier to gain visibility into the extent of the issue. Refer to Per Condition Health Status to learn more. Channel(s) If you selected Send notifications from the Notify Technicians drop-down menu, you can select through which channels the technicians receive the notification. Refer to the Notification Channels article for more information. Notify Technicians Select this option to notify all technicians in your organization when the condition occurs. NinjaOne sends condition alerts in UTC +0 format by default. You cannot change this setting. The local device timestamp will still appear in the Activities feed. Ticketing Rule Create a ticket from the triggered condition. Ticketing options may vary or may not be available if PSA or NinjaOne Ticketing is not activated with your system configuration. Configure the Reset Interval
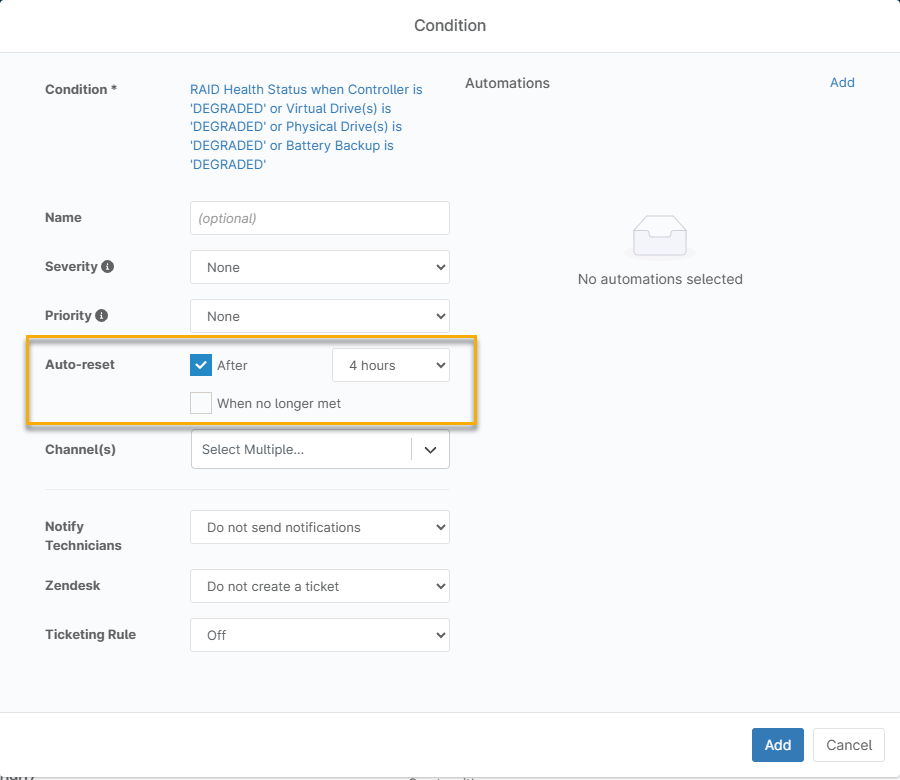
Configure the reset interval in the Auto Reset section of the Conditions card. Select the After checkbox to specify how long the system should wait before resetting the condition and clearing the alert from the device.
Some conditions allow you to instruct NinjaOne to reset the alert when the condition is no longer met. Select the When no longer met checkbox to activate this option. This checkbox will not appear if the condition does not allow the option.
Figure 3: Defining a reset interval (click to enlarge) The Notify on Reset Option
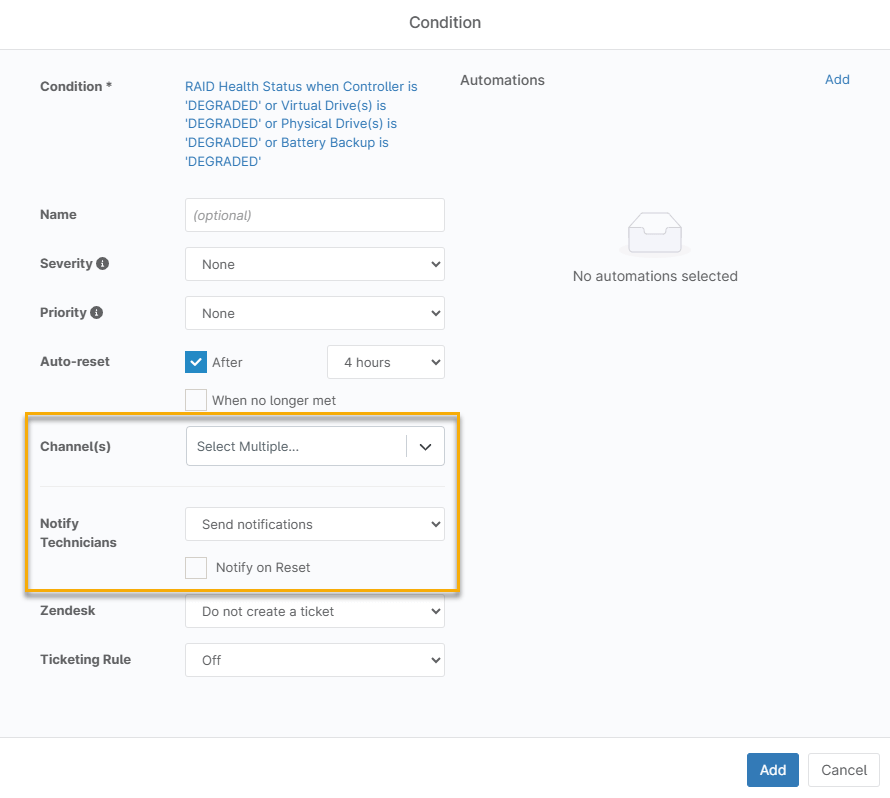
Some conditions, such as Device Down, can notify technicians when they reset. Select the Notify on Reset checkbox to enable this option.
Notify on Reset only notifies technicians. We will always send reset notifications to your notification channels.Figure 4: Notifying technicians and channels (click to enlarge) Condition Health Status
The colored bars represent the condition's assigned custom or default health status. You can use these statuses to indicate which conditions need work.
- Green: Healthy
- Yellow: Needs attention
- Red: Unhealthy
- Grey: Unknown
Create a Ticket (Optional)
If you configured a PSA integration or NinjaOne Ticketing, you can choose to create a ticket when the specified condition is triggered. The ticketing rule relies on the forms you added in Administration → Apps → Ticketing → Forms.
Once you have 10 open tickets for the same condition and device, NinjaOne prevents the creation of additional tickets and updates the most recent ticket with a private message detailing the issue. To resume ticket creation, users must delete at least one existing ticket.Figure 5: Ticketing rules (click to enlarge) Add an Automation (Optional)
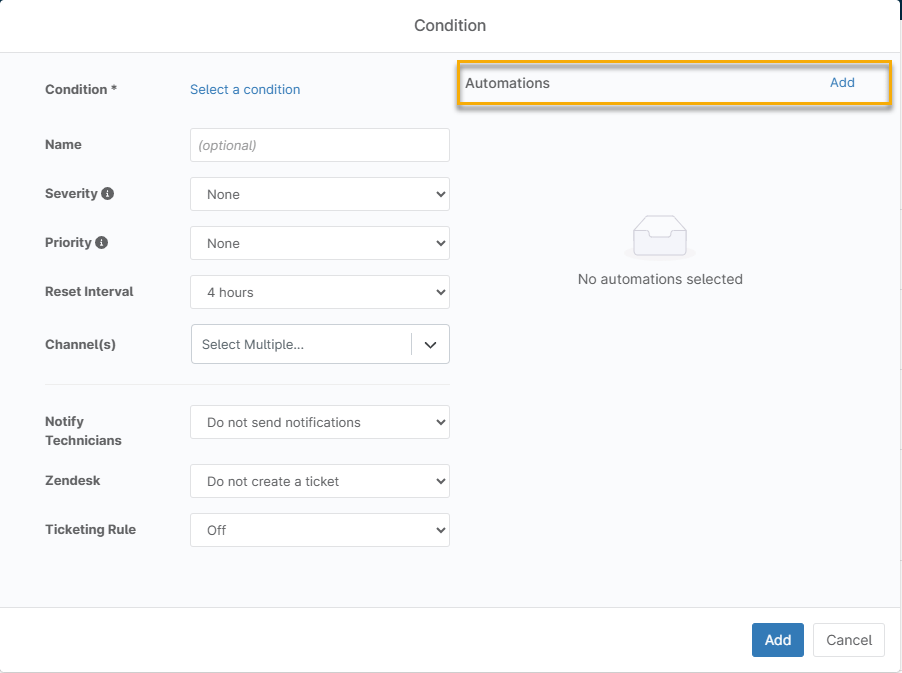
If the condition triggers, you can add a script to install or run an application to remediate it. Click Add in the Automation section of the Condition editor window. This action displays a list of all native scripts and scripts added through the NinjaOne Automation Library.
When you save a condition, NinjaOne displays it on the policy's Conditions tab, with visible ticketing and notification details.
Figure 7: Adding automations (click to enlarge) Manage Your Conditions
When you create a condition, it appears in the Conditions list on the policy's configuration page.
Editing a Condition
Click a condition to open its configuration dialog. After making your changes, click Apply to save them.
Deleting a Condition
Move your mouse cursor over the condition and click Delete when the option appears.

Figure 8: Delete a condition Additional Resources
To learn more about working with policies and conditions, refer to the following articles: