
The Port Scan monitor tests an IP address for Transmission Control Protocol (TCP) port state, which determines the reliability of data transmission. It is also an important resource for identifying network and connectivity problems. Users utilize port scanners to uncover potential entry points for intrusion and determine the types of devices operating on the network, such as firewalls, proxy servers, or VPN servers.
How to Implement Port Scan Monitoring with NinjaOne?
Port scan monitoring involves detecting and analyzing attempts to probe your network for open ports and vulnerabilities. Below is a step-by-step guide on how to implement the port scan monitor.
How to setup a port scan monitor.
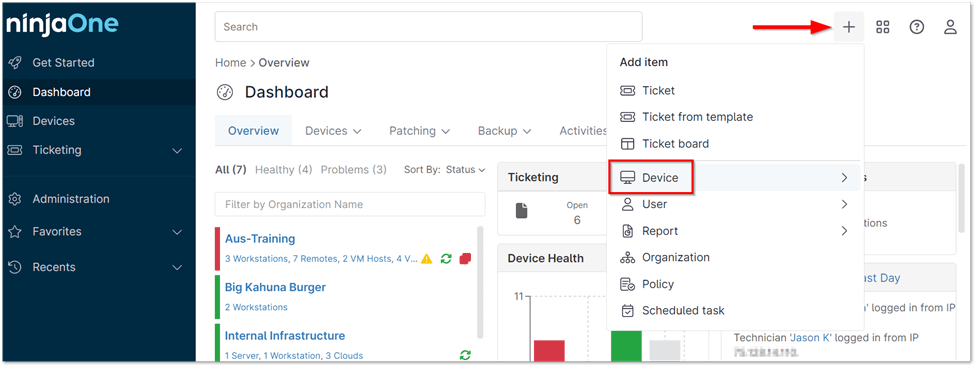
1. To add a new device, click the plus sign (+) in the top right corner of the console, then select ‘Device’ from the dropdown menu. (See below screenshot for reference.)
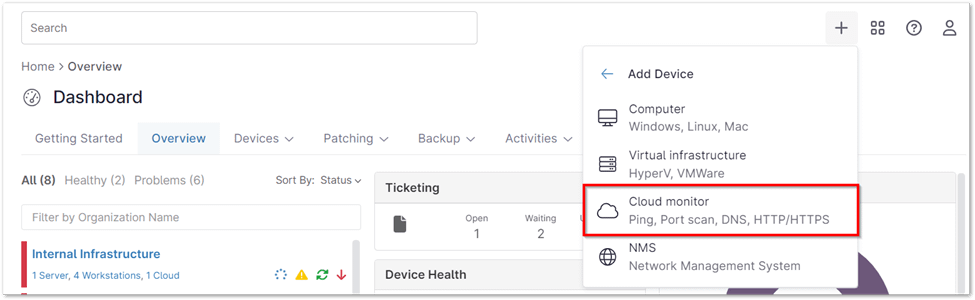
2. Select the Cloud Monitor. (See below screenshot for reference.)
3. Select the desired organization and location for your new cloud monitor. Choose ‘Port scan’ as the monitor type, then provide a descriptive display name and fill in any additional required information, such as frequency, timeout, and server settings.
4. Click ‘Next’ to proceed with the setup.
5. Customize your port scan monitor by specifying any conditions you wish to monitor.
Now with this setup, you will select the frequency, timeout and the IP address/Fully Qualified Domain Name (FQDN) of the device you want to monitor, and then add the ports you want to monitor.
Important Note: The maximum number of ports that can be scanned when using a hostname is 16. There is no limitation when using an IP address.
There are two different types of conditions available for Port Scan monitors:
- State allows you to monitor for whether the port can accept incoming connections.
Important Note: NInjaOne uses a 5-second timeout per port that is set up to be scanned. So, if NinjaOne is able to connect to the port but does not get a basic network response within 5 seconds per port, then the monitor will end up with the “Not Responding” status overall.
- Response Time allows you to monitor the time it takes (in milliseconds) for the port-status query to return a response a specified number of times.
After setting up a Port Scan cloud monitor, viewing it will show you a table of the data points that have been recorded — the table includes the Time, Result, DNS Resolution, and Port Status. (See the screenshot below for reference)

The Benefits of using NinjaOne for Port Scan Monitoring
The Port Scan Monitor of NinjaOne evaluates the TCP port status of an IP address to assess data transmission efficiency. It is an essential resource for network administrators and security experts. It identifies new service inquiries and sends them to the correct destination. Although port scanning has many advantages, port scan monitors are essential for network security as they can help identify potential threats and protect against unauthorized access.