Importance of a Ticketing System
A ticketing system is essential for any IT department or Managed Service Provider (MSP) because it serves as the backbone for managing and resolving issues efficiently. It organizes incoming requests, ensuring that nothing gets overlooked or lost in the shuffle. With a ticketing system, every task or issue is documented, tracked, and assigned to the appropriate technician, which improves accountability and ensures timely resolutions.
It also provides visibility into the workload, helping managers allocate resources effectively and prioritize critical tasks. Historical data from tickets can be analyzed to identify recurring problems, leading to proactive solutions that enhance overall system reliability. Additionally, it streamlines communication between the IT team and users, offering a transparent and centralized platform for updates and feedback.
For MSPs, a ticketing system is crucial for meeting service level agreements (SLAs) and demonstrating value to clients. It helps maintain a professional image by ensuring that client issues are handled systematically and promptly, leading to higher client satisfaction and retention.
Does NinjaOne Provide a Ticketing System?
Yes, NinjaOne Ticketing is a comprehensive solution that streamlines the entire ticketing process, helping IT professionals deliver exceptional support service. Two key features of NinjaOne ticketing are:
- Flexible ticket format.
You can create unique Ticket template forms to facilitate efficiently submitting tickets. Users can select appropriate templates to submit different request types: assistance, software/hardware, configuration changes, etc.
- Direct Management.
A technician processing a ticket can perform important management tasks directly from the ticket:
- Execute automations: From Script or automation library, like reboot, initiate a remote session, run custom tasks, open the file browser, perform Wake-on-LAN, etc.
- Single click to transfer to device dashboard for complete remote management.
How Can I Enable NinjaOne Ticketing?
Initially, the NinjaOne web app main menu does not include access to Ticketing:
To enable NinjaOne Ticketing, a NinjaOne Administrator can perform the following steps:
- Navigate to Administration, then Apps, then Installed.
- Locate Ticketing and click the Disabled label to change the status to Enabled. The Ticketing administration page appears showing 9 tabs to configure your ticketing preferences. Let´s go over each of these tabs and briefly explain what they allow to configure.
a) General
Here you can configure the e-mail domain of the ticketing instance and set up SMTP e-mail sending. Additional settings can be configured like ticket timer settings, business hours, whether customers can attach files, ticket numbering, and more.
b) Email
Here you can view or create email aliases within your custom ticketing domain as well as automate settings for email-delivered tickets sent to those email addresses.
c) Email Lists
Here you have the option to allow or block entire email domains. With this ability, you can allow or block all email from a specific domain, regardless of account.
The e-mail lists facilitate the ability to allow incoming ticket requesters to either be added automatically as contacts, or to ignore the request entirely. Entries can be added to the allow list or block list by e-mail address or e-mail domain.
d) Boards
The boards are used to organize the tickets, in this tab you can edit existing boards as well as adding new ones. Default boards include Unassigned tickets, All tickets, My tickets, Deleted tickets and Pending emails.
e) Fields
Here you can create custom fields specific to ticketing. For more information on custom fields, see the corresponding link at the end of this document.
f) Forms
Using forms facilitates the ability to create templates for information that should be populated for different types of tickets.
g) Tags
The tags tab allows you to manage existing tags or create new tags for use with NinjaOne ticketing. Use tags to categorize, filter, and automate Ticket handling
h) Automation
The Automation tab allows a technician to create automation with event and time-based triggers, response templates, conditions, and script rules.
i) Custom Status
Here you can rename NinjaOne’s default statuses for tickets as well as create custom child statuses. These statuses could also be used in various automations for NinjaOne ticketing
How Can I assign Technician Permissions in NinjaOne Ticketing?
Before technicians and end-users can access NinjaOne Ticketing features, an Administrator must grant the appropriate permissions to designated Technician/End User roles or individual Technician/End User accounts. By granting Ticketing permissions, administrators can allow technicians and end-users access to just the functionality they need.
To grant technicians permission to Ticketing features, perform the following steps:
1. Navigate to Administration, then Accounts, then Technicians or Technician Roles.
2. Click the entry for the respective technician/role or create a new technician/role.
3. Expand the entry Permissions.
4. Click Ticketing.
5. Click the Ticketing switch.
6. For each Ticketing permission category, select the access type you want to grant.
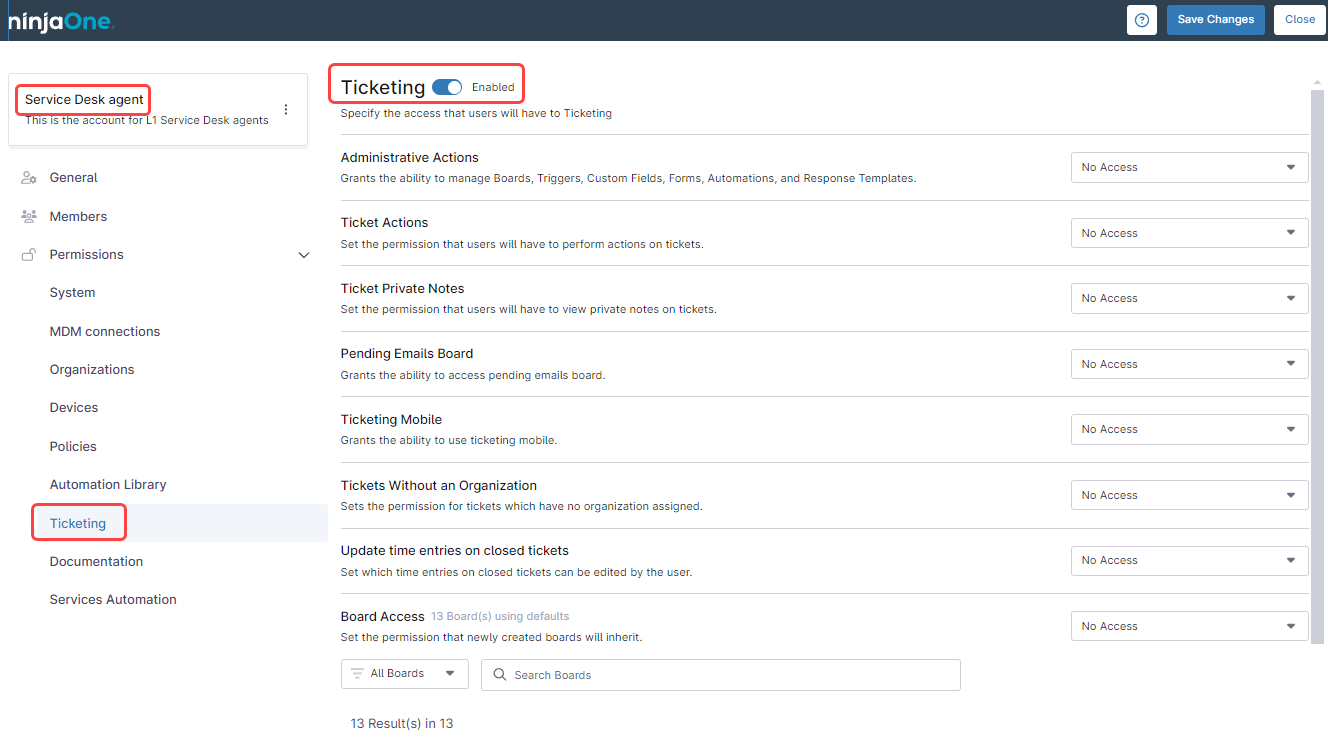
You can also set permissions to access the different boards.
7. Click Save Changes.
How Can I assign End User Permissions in NinjaOne Ticketing?
You can grant End Users access to Ticketing. After you enable Ticketing access, a new section appears within their end user portal, allowing them to view and submit tickets.
To enable End User Ticketing permissions, perform the following steps:
1. Navigate to Administration, then Accounts, then End Users.
2. Click the entry for the respective End User, or End User Role.
3. Expand the entry Permissions.
4. Click Ticketing.
5. Click the Ticketing switch.
6. For each Ticketing permission category, select the access type you want to grant the End User.
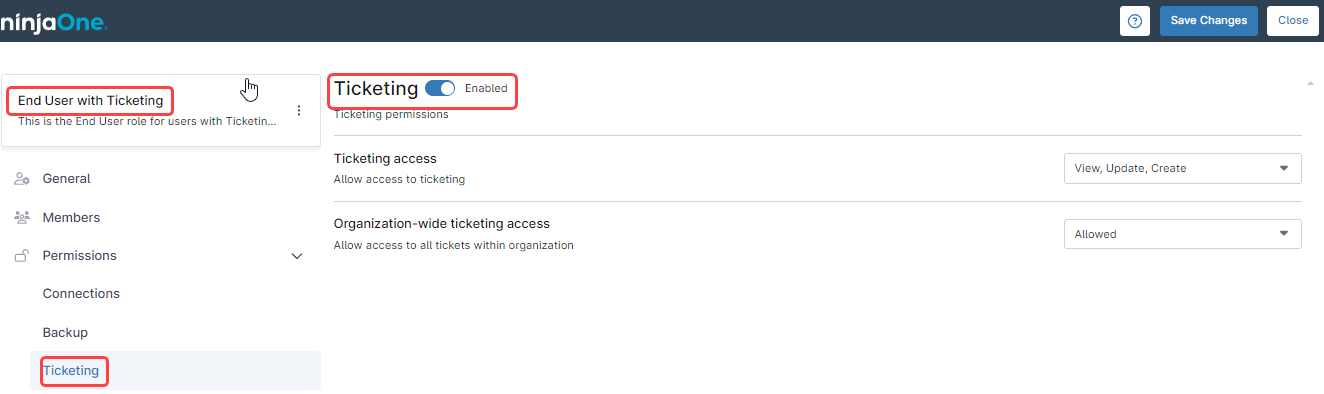
7. Click Save Changes.
Can Other People Submit Tickets in NinjaOne?
Yes, NinjaOne has “Contacts,” who are known users who can submit tickets via email. When a contact sends an email, the system automatically opens a ticket instead of sending this message to the Pending Email board.
To Create a new contact,
- Navigate to Administration, then Accounts, then Contacts.
- Click Create Contact. A Dialog box appears.
- Fill out the contact´s email add address, name, and other fields.
- Click Save.
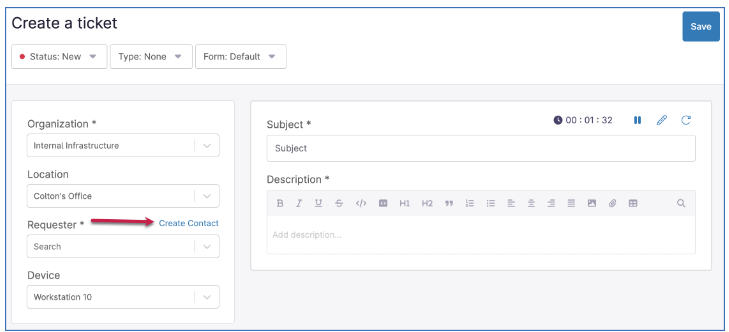
You can also create a contact from within a ticket, to do this, when creating a ticket, locate the Requester field and click Create Contact.
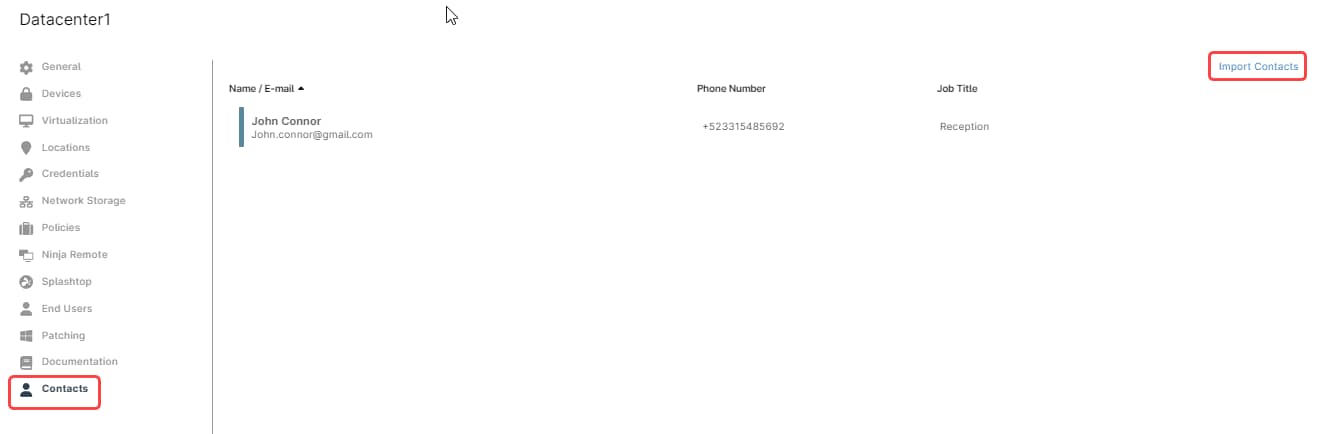
Contacts can also be imported, for that, go to the Organization editor, select Contacts on the left side panel and then click Import Contacts. Then select the file with the contacts. This should be a CSV file with three columns: first name, last name, and email.