
Managing ticket statuses is a crucial aspect of any ticketing system, helping IT teams track and resolve issues effectively. The ability to categorize, update, and manage ticket statuses allows organizations to streamline workflows, prioritize tasks, and reduce backlogs.
In a fast-paced IT environment, having clear visibility into ticket statuses not only optimizes response times but also boosts productivity. NinjaOne’s ticketing system offers robust status management capabilities, allowing teams to automate and simplify the process from start to resolution.
NinjaOne Ticket Statuses
Understand the different ticket statuses within NinjaOne and when to use them effectively to streamline your issue tracking and resolution process.
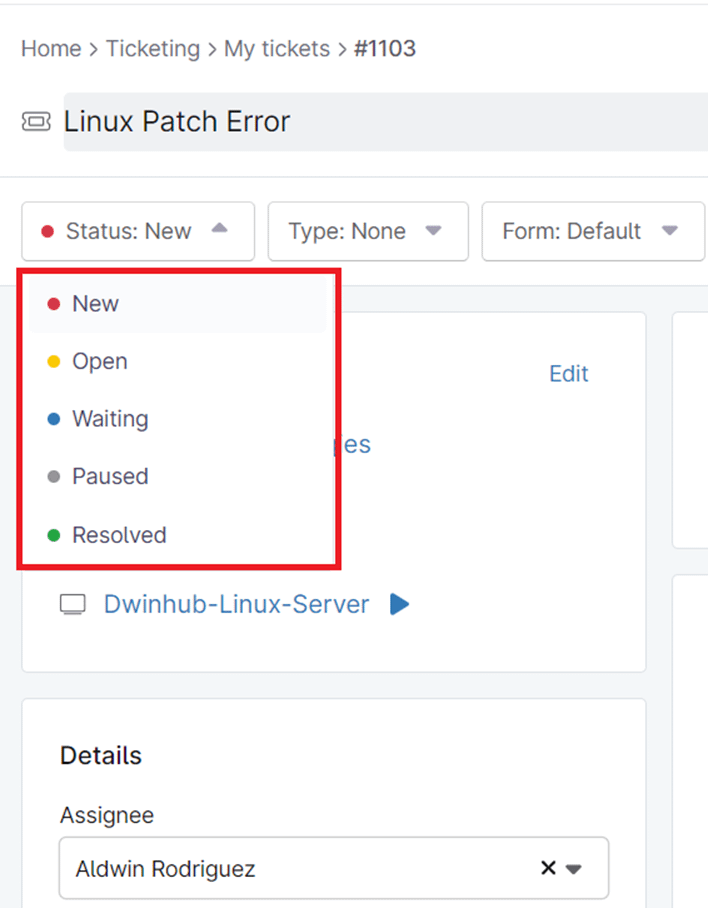
New
- Description: The ticket has just been created and has not yet been assigned to anyone or reviewed.
- When to use: Use for brand-new issues or requests that have not yet been addressed.
Open
- Description: The ticket has been assigned and is actively being worked on.
- When to use: Use when someone is actively troubleshooting or fulfilling the request in the ticket.
Waiting
- Description: The ticket is on hold because it requires action or information from someone else, such as the end-user or a third-party vendor.
- When to use: Use when progress on the ticket is blocked, and you’re waiting for external input to proceed.
Paused
- Description: The ticket has been temporarily put on hold for a specific reason, such as a planned maintenance window or a lack of available resources.
- When to use: Use when work on the ticket is intentionally stopped for a known period and will resume later.
Resolved
- Description: The issue or request in the ticket has been successfully addressed and closed
- When to use: Use when the work is complete, and no further action is required on the ticket.
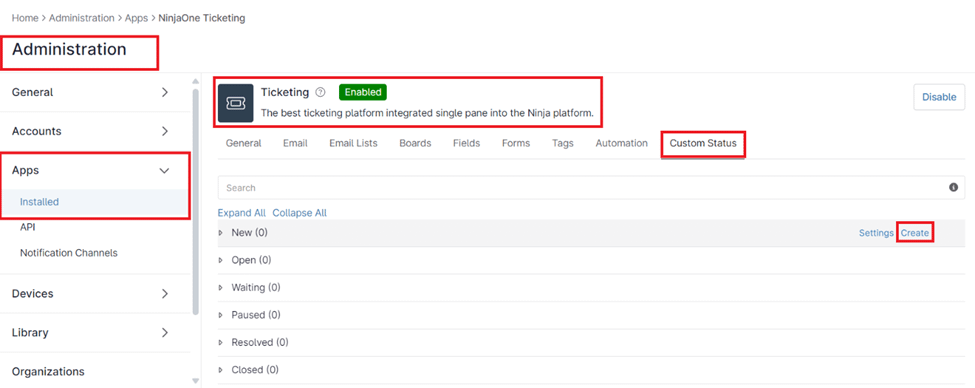
Creating custom statuses
You can also create custom statuses to better reflect your unique support workflow in NinjaOne Ticketing.
1. Navigate to Administration > Apps > Installed and select NinjaOne Ticketing.
2. Open the Custom Status tab.
3. Hover over an existing status and click on Create.
4. In the Custom Status Settings pop-up window, enter the following details:
- Display Name: Provide a name for the custom status.
- Do not send Requester / CC Notifications: Enable this option if you do not want notifications sent to the requester or those CC’d.
- Do not send Assignee Notifications: Enable this option if notifications should not be sent to the assigned team members.
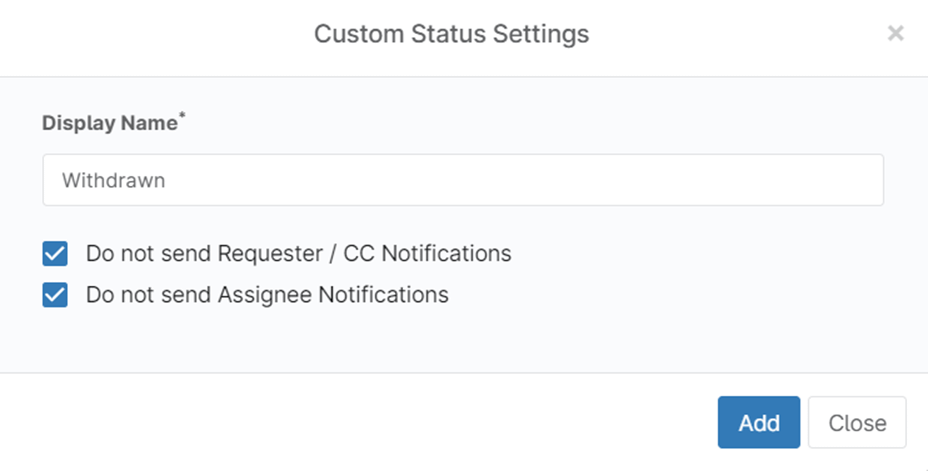
5. Click Add to save the custom status.