
Enhancing NinjaOne Ticketing with Microsoft 365 SMTP Integration.
This document provides a detailed, step-by-step guide on how to set up Simple Mail Transfer Protocol (SMTP) within NinjaOne’s Ticketing system to enable the sending of emails via a Microsoft 365 account. By doing this, NinjaOne will be able to send alerts, notifications, and other email correspondence about tickets straight through the Microsoft 365 email system of your organization. NinjaOne setup and configuration are easy to use with Microsoft 365. Configuring SMTP in NinjaOne with Microsoft 365 integration streamlines your ticketing process, improves communication, and enhances overall IT operations.
How to configure SMTP email sending through Microsoft 365 for NinjaOne Ticketing.
When configuring NinjaOne Ticketing, check the items below to prevent common configuration errors:
- The account from which you send emails must be licensed with at least an Exchange Online Plan 1 License.
- The mailbox must have “Authenticated SMTP” as an allowed email application.
- You must have an administrator account with permission to give consent to the NinjaOne–SMTP Microsoft 365 Application.
- You must ensure you do not have any conditional access policies which would block NinjaOne from logging into the account.
Configuration
If you have not yet enabled NinjaOne Ticketing, please see NinjaOne Ticketing: Setup and Configuration.
We recommend using an incognito / private window to perform this configuration.
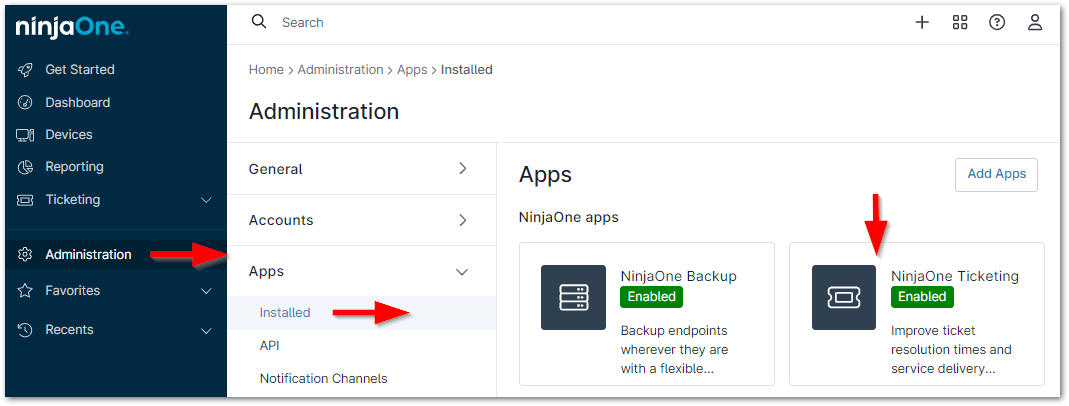
1. In the NinjaOne console, click Administration in the left navigation pane and select Apps>Installed, and then click Ticketing.
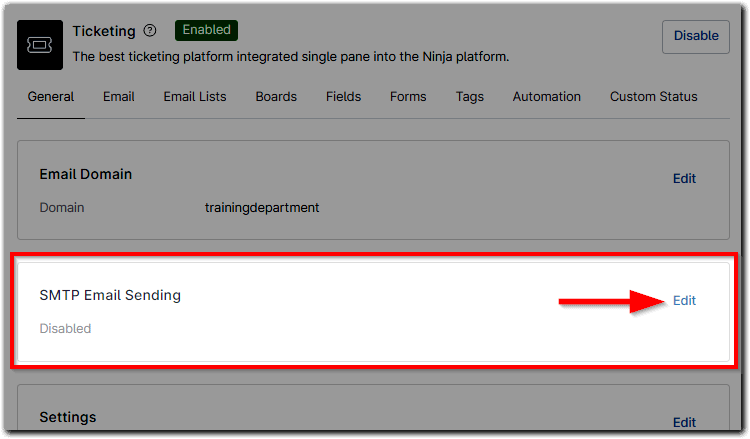
2. Click Edit to the right of “SMTP Email Sending”.
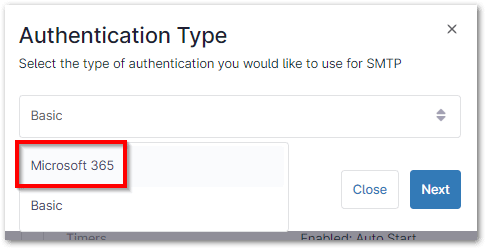
3. Select “Microsoft 365” from the Authentication Type drop-list.
4. Activate the Enabled toggle switch to turn on the outgoing mail server.
5. Use the table below to enter the configuration details:
| Field | Data |
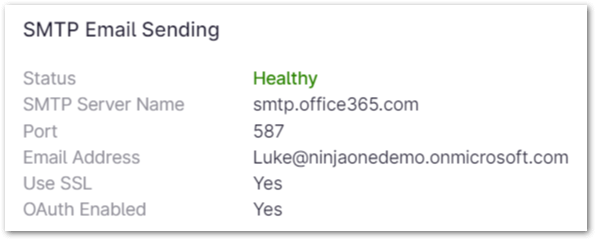
| Server | smtp.office365.com (you must use this for your server address) |
| Port | 587 |
| Email Address | Enter the email address that will be responsible for sending NinjaOne Ticketing messages. This must match the account you use to login to Microsoft when configuring the next steps. |

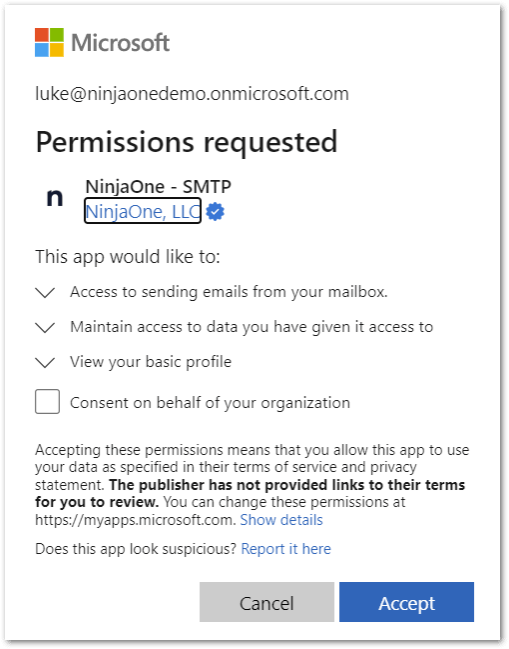
6. Click Go to Microsoft. Microsoftonline.com displays on the same tab.
7. Click the first hyperlink option to sign in with the email you used in Step 5.
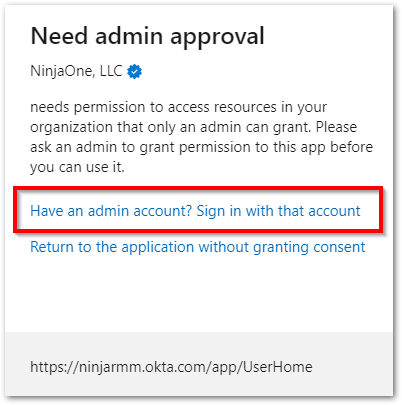
Important Note: If you do not have administrator privileges, you may need to request access and then approve the application with an administrator account. Then, return to the NinjaOne console and repeat the steps above after approval is granted.
8. Click Accept.
You should be redirected back to the NinjaOne console. If the Status does not reflect “Healthy” please refer to our Troubleshooting tips below.
Troubleshooting
Please contact [email protected] for assistance if you have any issues not resolved through our troubleshooting tips.
General Rejection Issues
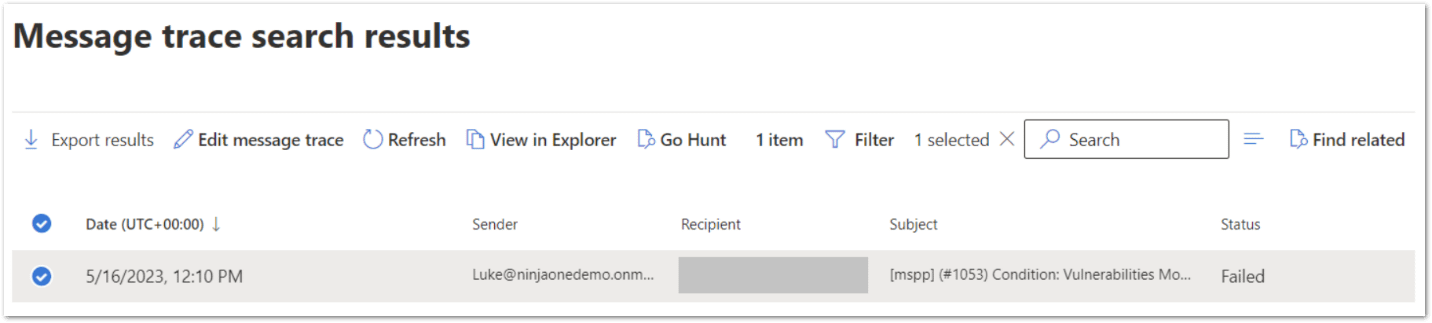
A common reason for rejection is an undelivered email—check the mailbox you configured to ensure this is not the case or perform a mail trace to determine whether the email was received, rejected, deferred, or delivered. Microsoft provides instructions here for both classic and modern Exchange admin center.
You should see the results of any emails which have been attempted to be sent. Click on an email to view more details on why it failed:
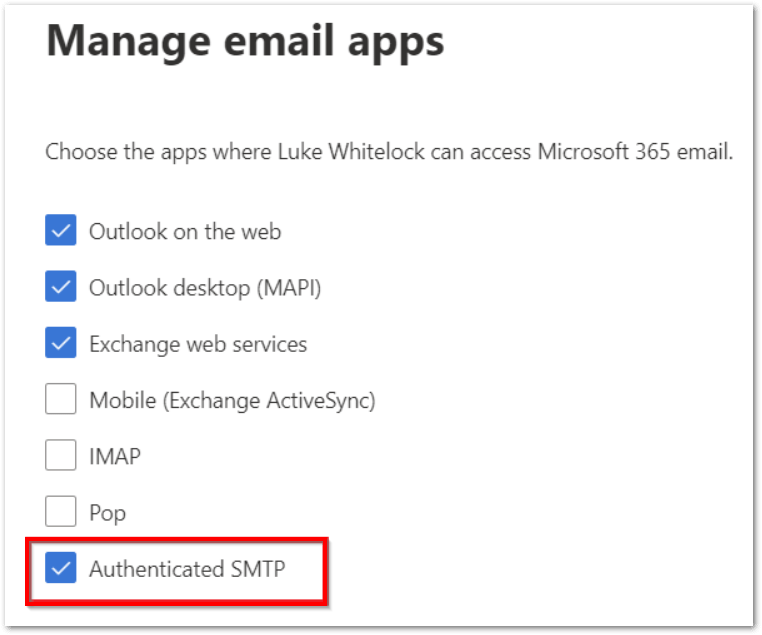
Disabled Authenticated SMTP
If the “Authenticated SMTP” has not been enabled for the account you are using to send emails, you can correct this through the Microsoft 365 admin center.
1. Select the user and open the Mail tab.
2. Under Email apps click Manage email apps.
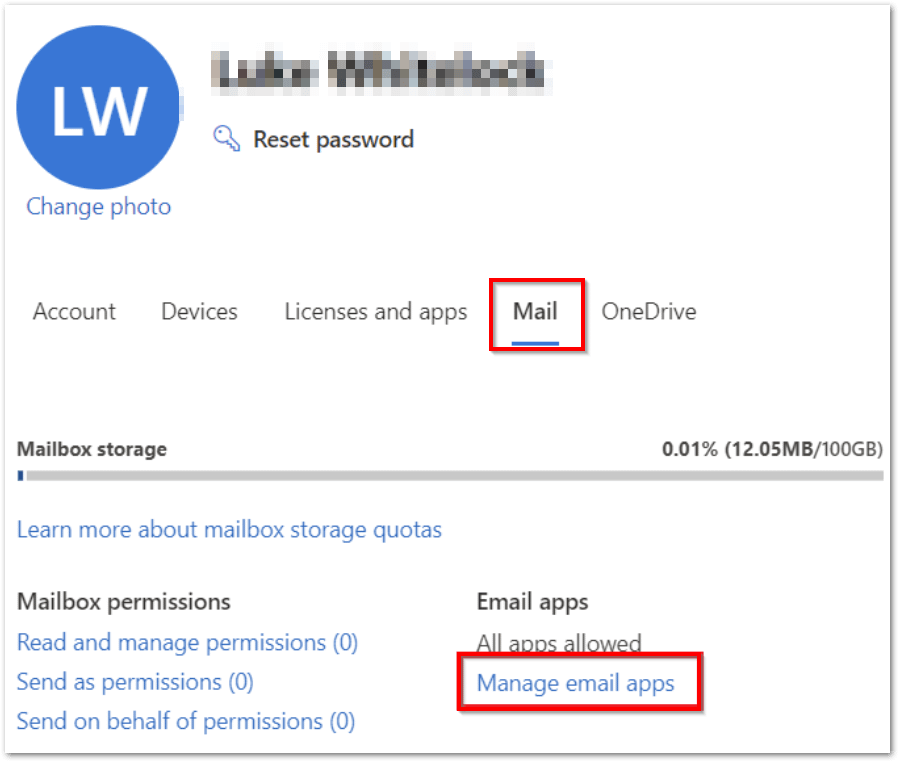
3. Activate the checkbox for “Authenticated SMTP”.
Conditional Access and Security Issues
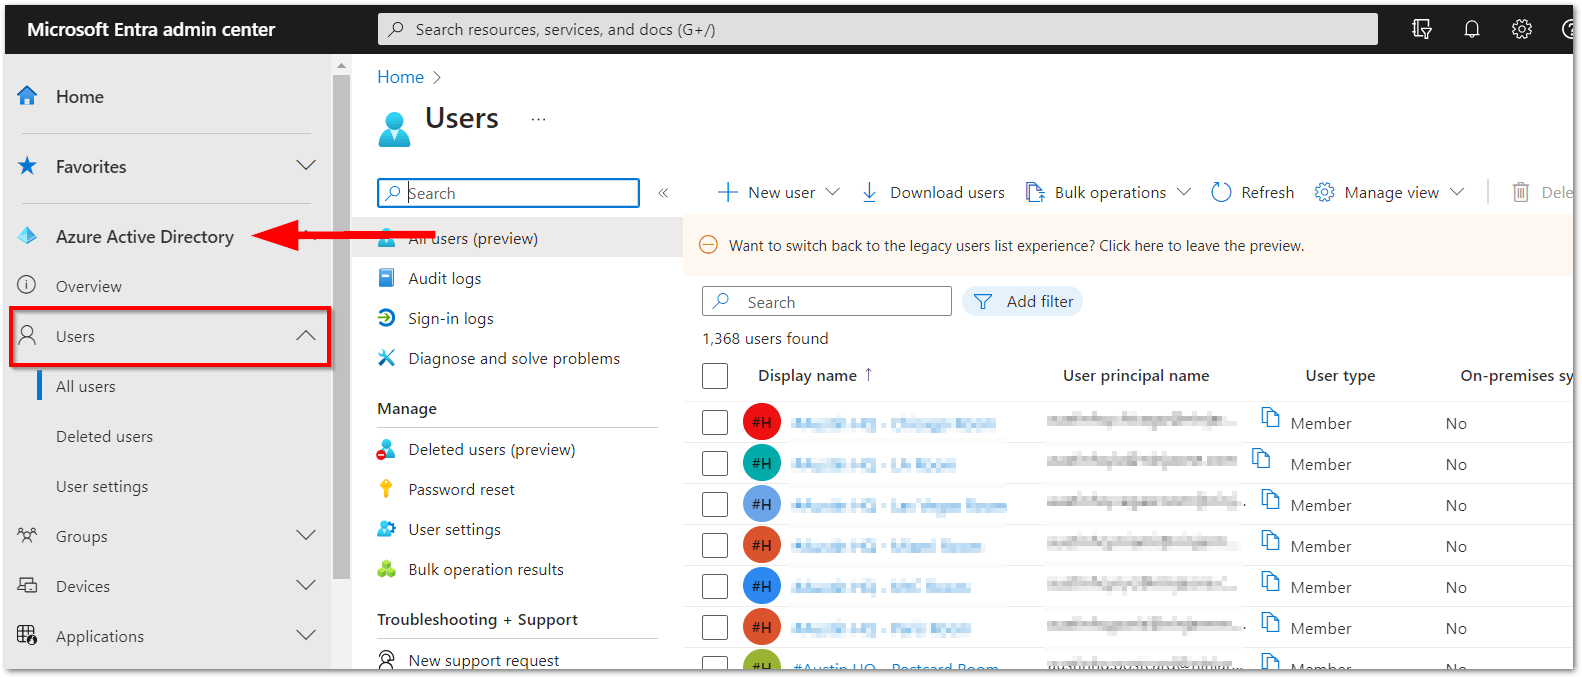
If your access is blocked, this may be caused by Microsoft 365 built-in security features. To correct this issue:
1. Open the Azure Active Directory (from the Microsoft Entra admin center) and click Users in the left navigation pane.
2. Select the user and click Sign-in logs in their profile.
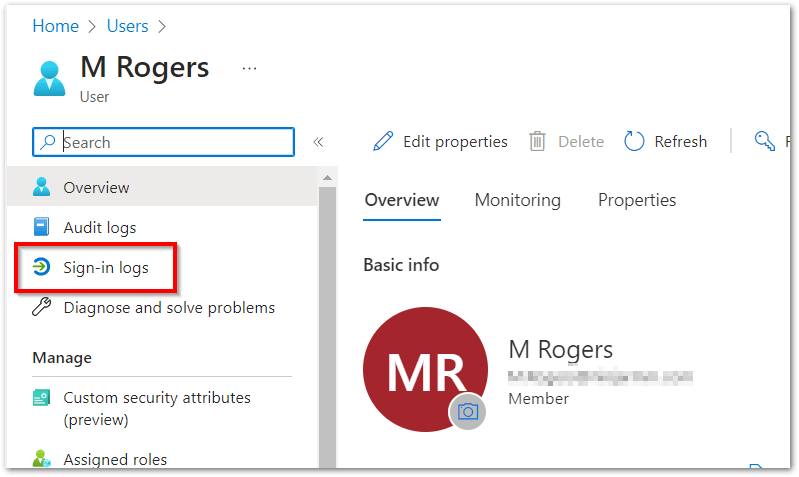
3. Review the data to see if there is anything blocking the connection from NinjaOne. The Status column will display “Success”, “Interrupted” or “Failure”.

- For failures, click the log entry and check all tabs to see if the reason for failure is listed.
- Try creating an exclusion for the user in conditional access policies or adjust other settings to allow the connection.
Strategies, Best Practices and Benefits for Microsoft 365 SMTP Integration with NinjaOne
Efficiency: Create a service account with limited permissions for email sending. Keep an eye on your email open and bounce rates and watch out for spam complaints. If you see any problems with email delivery, investigate and fix them.
Enhanced Security: Add extra security by using multi-factor authentication and strong passwords. Keep your software updated to protect against vulnerabilities.
Establish Configuration: Ensure your Microsoft 365 login details are correct, and your domain settings are set up properly for email. Then, send a test email to confirm everything is working.
Improved Performance and Optimization: Monitor your emails to check if they’re being delivered and opened. If you see problems, investigate and fix them. Also, make sure your emails are well-formatted to improve delivery.
Streamlined Integration: Configure Microsoft 365 in NinjaOne with minimal effort. Manage everything in one place: Control both NinjaOne and Microsoft 365 from the same platform. Automated tasks: Let NinjaOne handle email sending, reducing manual work.