
Ticket Assignment and Management
Efficient ticket management is the backbone of a responsive IT team. With NinjaOne, you can streamline the entire process, from creating detailed tickets to assigning them to the right technicians, ensuring swift issue resolution and improved customer satisfaction.
Whether you’re currently relying on manual methods or seeking to optimize your existing ticket system, NinjaOne offers a centralized, automated solution that enhances productivity and visibility.
Managing Ticket Assignment and Creation Without NinjaOne
Without a dedicated platform, ticket creation and assignment involve manual, inefficient processes. IT issues are documented in spreadsheets or basic ticketing systems, and communication occurs via email threads. Ticket assignment requires manual assessment and workload balancing, often leading to errors.
Tracking progress and generating reports are cumbersome, resulting in delays and miscommunication. This approach hampers the efficiency of IT service management.
How to Create and Assign Tickets in NinjaOne
Using NinjaOne for ticket assignment and creation offers a streamlined and efficient process.
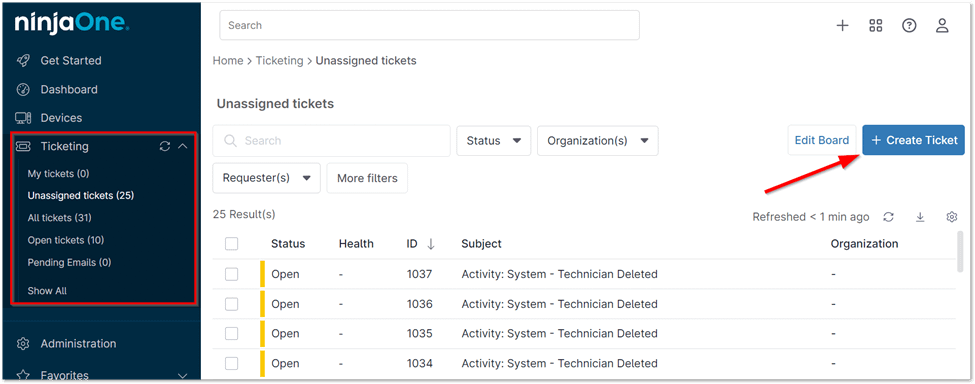
Generating a ticket directly from the ticket board
Technicians can easily create new tickets by going to any ticket board and clicking “Create Ticket“.
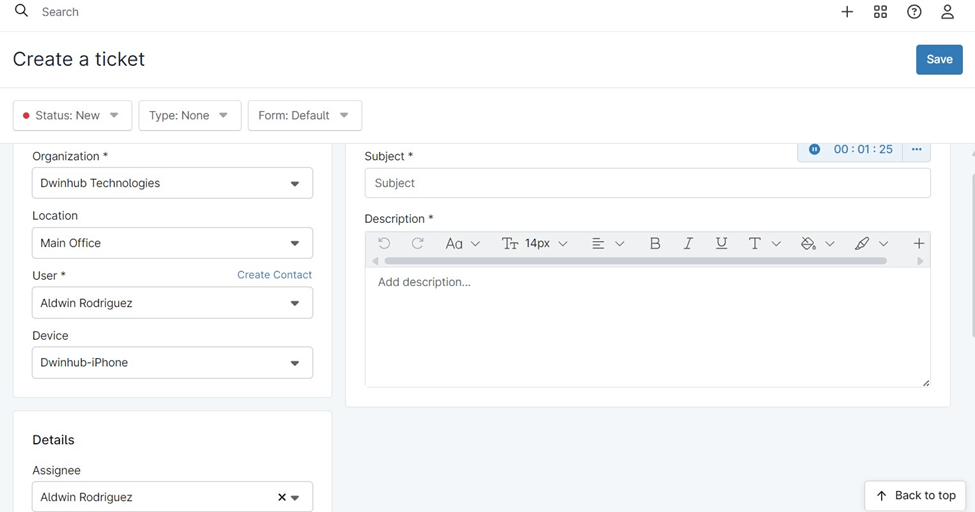
Once the ticket is Initiated, you can fill out the required ticket information:
- Organization: Specify the organization associated with the support request.
- Location: Indicate the physical location where the issue is occurring.
- User: Identify the user who is experiencing the problem or making the request.
- Device: If applicable, mention the device or equipment involved in the issue.
- Assignee: Assign the ticket to a specific technician or team member responsible for addressing it.
- Priority: Set the level of urgency for the ticket (e.g., high, medium, low).
- Severity: Define the impact of the issue on operations or user experience.
- Tags: Add relevant tags or keywords to categorize and filter the ticket.
- CC: Include other individuals who should be kept informed about the ticket’s progress.
- Agreement: Specify any relevant service agreements associated with the request.
- Region: Indicate the geographical region associated with the organization or issue.
- Subject: Provide a clear and concise summary of the issue or request.
- Description: Elaborate on the problem, providing specific details, steps to reproduce, and any relevant context.
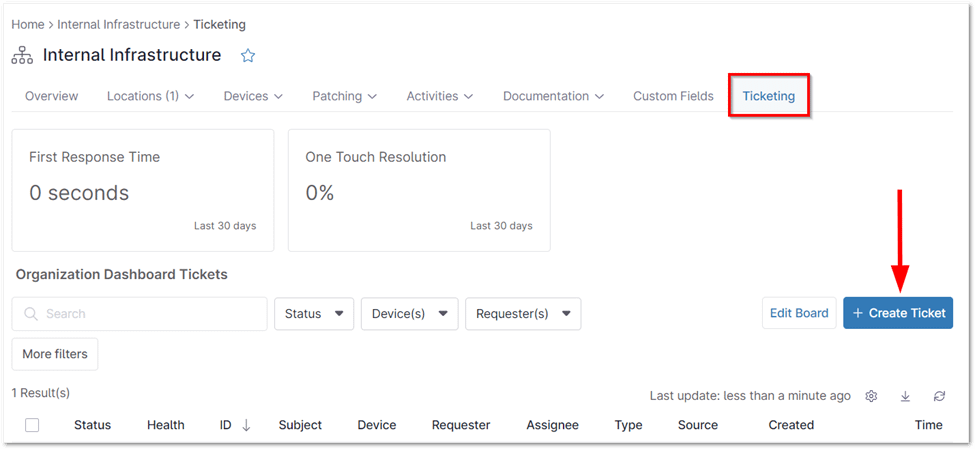
Creating a Ticket from the Organization Dashboard
Technicians can create tickets directly from the organization level dashboard. To do this:
- Navigate to the desired organization and access the Ticketing section.
- Select the “Create Ticket” button to the right of the ticket filters.
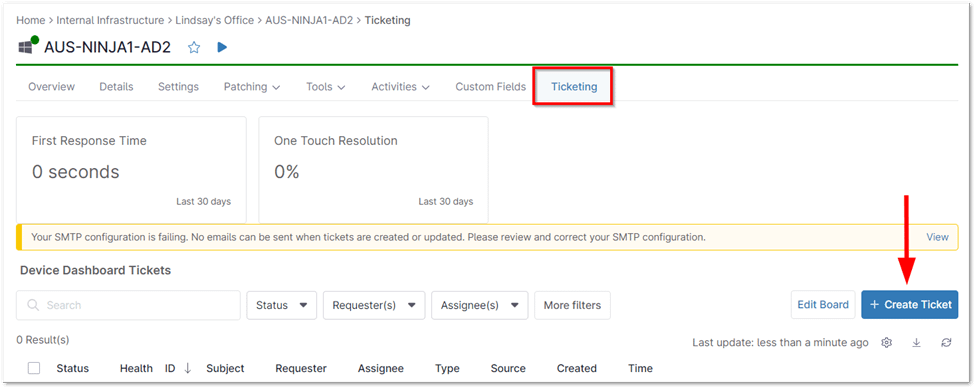
Creating a Ticket from the Device Dashboard
Tickets can also be created from the device level dashboard. If the device has an assigned asset owner, they will automatically be set as the ticket requestor.
- Access the device and open the Ticketing tab.
- Click “Create Ticket” located to the right of the ticket filters.
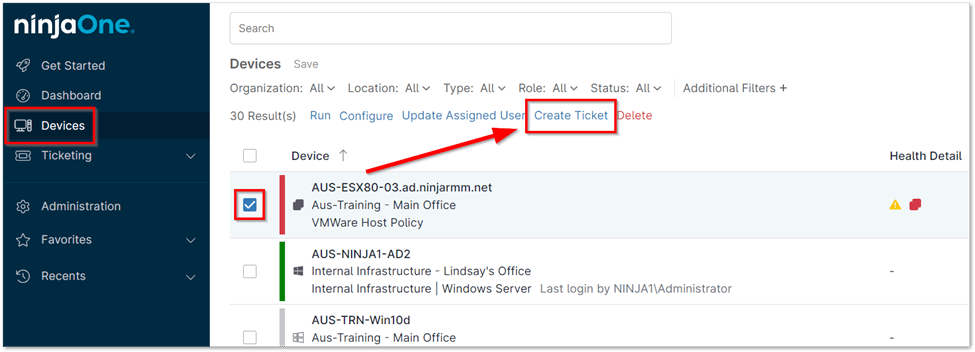
Creating a Ticket from the Search Dashboard
Tickets can also be created from the device list under the Devices tab in the left navigation pane. The organization, location, and device data are auto populated in the new ticket, and if the device has an assigned asset owner, they are automatically set as the requestor.
- Select “Devices” in the left navigation pane.
- Check the box next to a device and click “Create Ticket.”
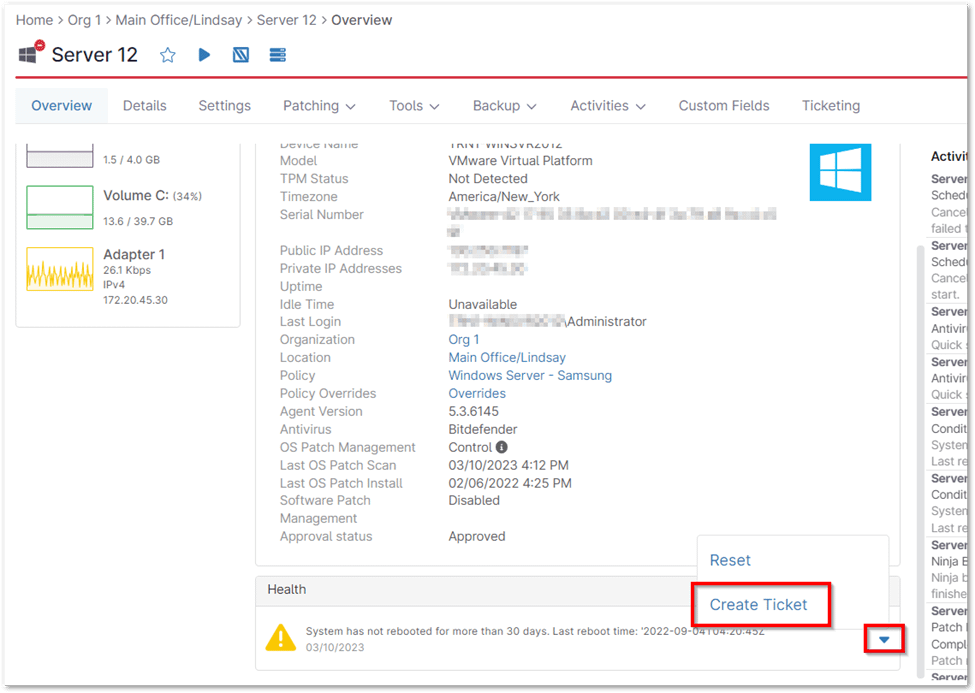
Creating a Ticket from a Health Alert
When a specific condition is triggered on a device, a ticket can be created directly from the associated health alert.
- At the bottom of the device dashboard, click the down arrow and select “Create Ticket.”
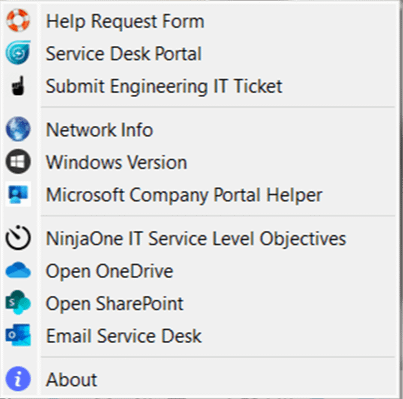
Creating a Ticket from the systray icon
Ticket creation can also be initiated directly from the systray icon, providing a convenient access point for end-users.
The Benefits of Using NinjaOne for Ticket Management
- Increased Efficiency: Automation reduces manual effort and minimizes errors.
- Improved Visibility: A centralized dashboard provides a clear overview of all ongoing issues.
- Enhanced Collaboration: Streamlined communication keeps everyone on the same page.
- Scalability: NinjaOne grows with your organization, handling increasing ticket volumes with ease.
Strategies for Ticket Management with NinjaOne
- Prioritization: Define clear service level agreements (SLAs) and prioritize tickets based on impact and urgency.
- Templates: Create ticket templates for common issues to speed up creation and ensure consistency.
- Feedback Loop: Encourage users to provide feedback on their ticket experience to identify areas for improvement.
Examples of Ticket Management with NinjaOne
- Self-Service Help Desk: An employee submits a help desk request through a self-service portal, generating a ticket that’s automatically assigned for resolution.
- Proactive Issue Detection: A technician creates a ticket after identifying a system issue, routing it to the appropriate team for investigation.
- Scheduled Maintenance: A ticket is automatically created and assigned to track the progress and document any issues during a scheduled server maintenance.