
Enable SSO in NinjaOne
Single Sign-On (SSO) is a centralized authentication method that allows users to access multiple applications with a single set of credentials. This streamlines the login process, enhances security, and reduces the burden on IT teams. With NinjaOne, SSO enabled means simplifying access management across your entire IT environment.
Configuring Single Sign-On (SSO) in NinjaOne
The following steps outline the process for enabling SSO within the NinjaOne platform:
1. Navigate to Administration > Accounts > Identity Provider. In the top-right corner, click Configure.
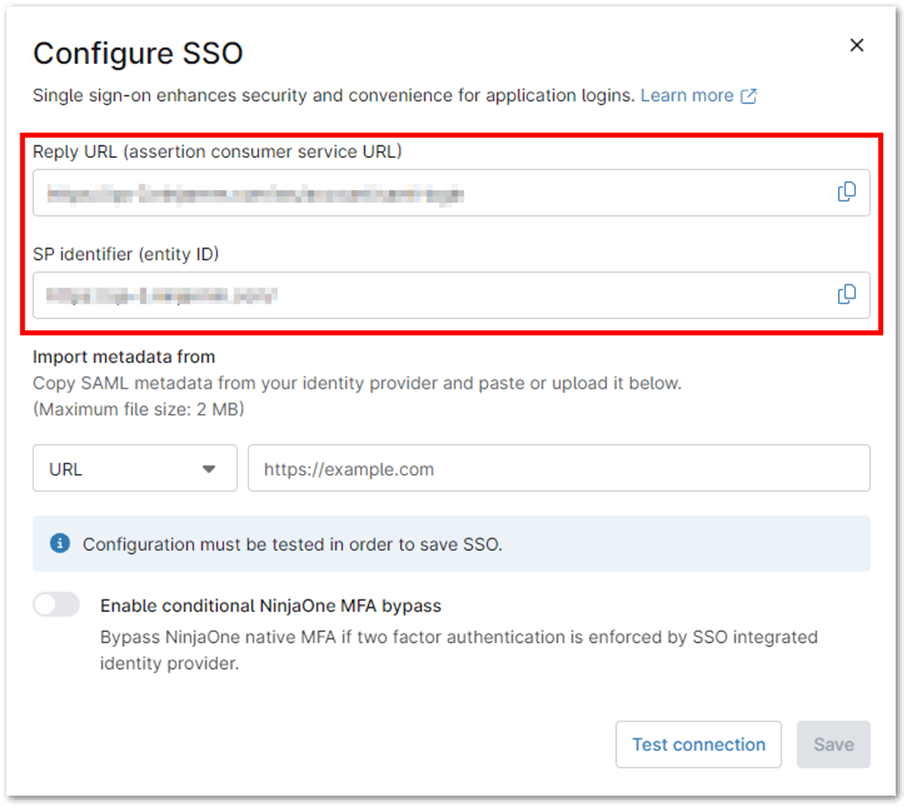
2. In the dialog box that appears, copy the Entity ID provided by NinjaOne and paste it into the corresponding field within your SSO provider’s settings. Repeat this process for the Reply URL.
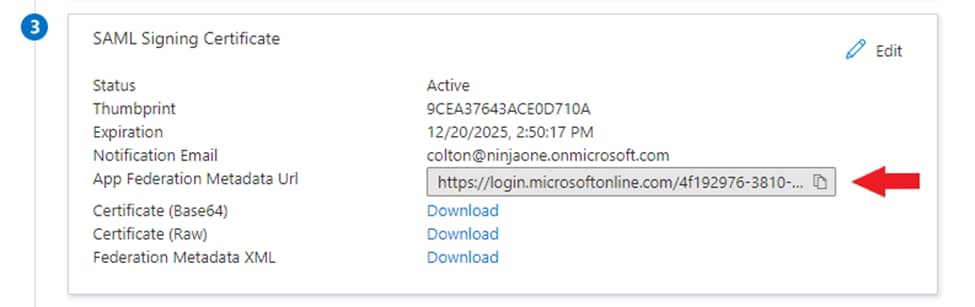
3. From your SSO provider, copy or download the SAML Signing Certificate.
4. Under Import Metadata from, select URL. Paste the appropriate URL (or select File or XML and upload the relevant content), and then click Test. If an error message appears, verify that the correct user has been assigned. If no user has been assigned, do so before retesting the connection. 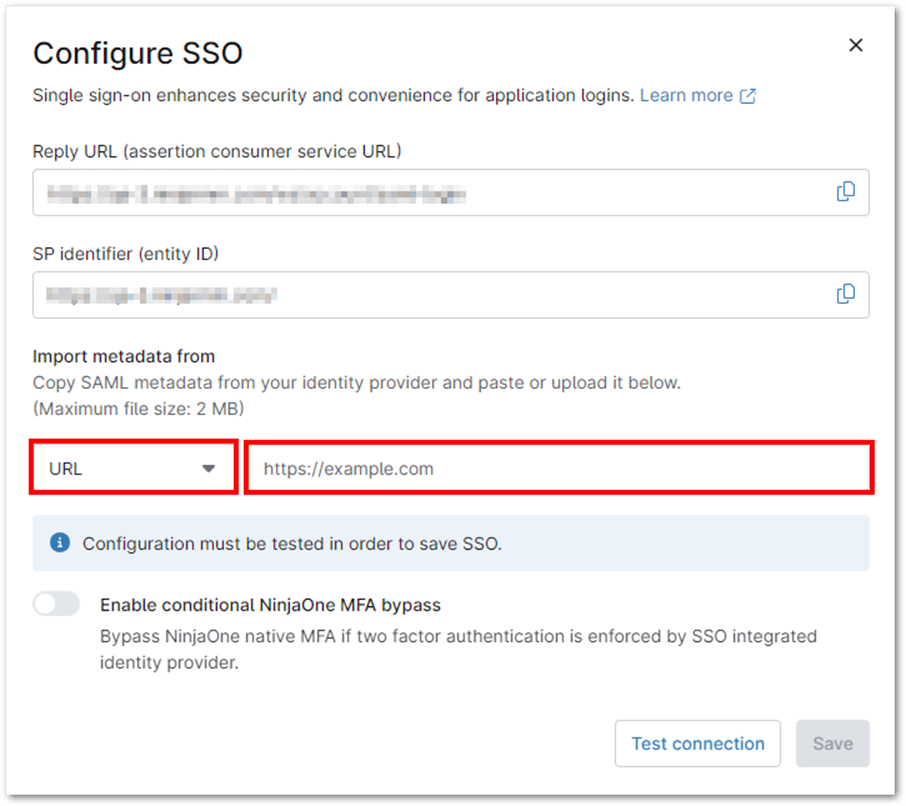
5. Upon successfully testing the connection, you may be prompted to log in. If the test is successful, click Save, and then click Enable on the resulting page. Single sign-on will now be active.
Enabling SSO for NinjaOne Technicians and End Users
To enable Single Sign-On (SSO) for specific technicians or end users in NinjaOne:
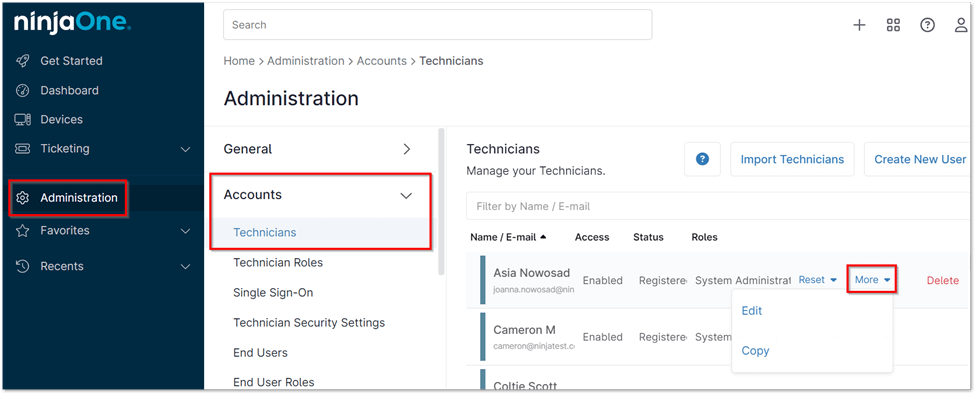
1. Navigate to Administration > Accounts > Technicians or End Users. Locate the technician or end user for whom you want to enable SSO, then click More and select Edit from the drop-down list.
2. In the Technician Editor under the General section, select the Security tab. From the Authentication Type drop-down list, choose Single Sign-On.
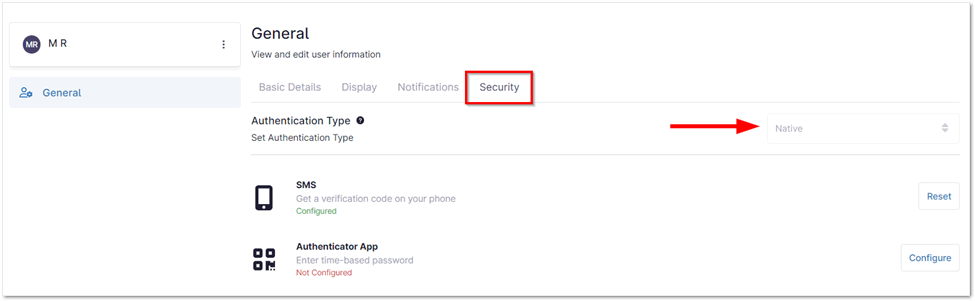
3. To apply the changes, click Save. Repeat this process for each technician or end user you wish to enable SSO for.
NinjaOne SSO: Benefits and Implementation Strategies
- Streamlined Access and Improved Security: NinjaOne SSO simplifies logins with single credentials, enhances security by minimizing password risks, and centralizes access management for IT.
- Boosted Productivity and Integration: SSO with NinjaOne boosts productivity by streamlining logins, saving time for both users and IT. It also seamlessly integrates with various SSO providers for easy setup.
- Strategic Implementation and Provider Selection: Plan your SSO implementation by determining user and application access. Choose an SSO provider that meets your organization’s needs and security standards.
- User Communication and Ongoing Monitoring: Keep users informed about SSO changes and provide clear login instructions. Regularly monitor SSO logs and user activity for any issues or improvement areas.
Examples of SSO Use Cases with NinjaOne
- IT Teams: IT professionals can use SSO to access NinjaOne and other critical tools seamlessly, improving efficiency and productivity.
- Managed Service Providers (MSPs): MSPs can leverage SSO to manage access for multiple clients, simplifying administration and enhancing security.
- Remote Workforces: SSO provides a secure and convenient way for remote employees to access the tools they need.